The art of transforming a humble cut of beef into a culinary masterpiece is a journey of patience and precision. This pastrami tri-tip recipe, a testament to this transformation, employs a meticulous weeklong brine followed by a high-heat grilling process. The result is an exceptionally tender, smoky, and flavorful beef, equally suited for elegant slicing or hearty sandwiches, offering a depth of flavor that belies its relatively quick cooking time. This method elevates the tri-tip, a lean yet robust cut from the bottom of the sirloin, into a pastrami-inspired delicacy.
The genesis of pastrami, while often associated with New York delis and its iconic cured beef, has roots that stretch back to Eastern European traditions. The term itself is believed to derive from the Romanian word "pastramă," a dry-cured meat. The process involves curing meat, typically beef brisket, in a salt and spice mixture, followed by smoking and steaming. This traditional method, honed over generations, imbues the meat with a distinctive texture and taste. However, this particular recipe adapts the spirit of pastrami to a different cut, the tri-tip, leveraging its unique characteristics for a more accessible, yet equally rewarding, outcome.
Understanding the Pastrami Process: Curing and Flavor Infusion
At its core, making pastrami is a two-step process: curing and then seasoning and smoking. Virtually any type of meat can be transformed into homemade pastrami through this fundamental approach. The initial stage involves a wet cure, akin to a corned beef brine, which is crucial for both preserving the meat and beginning the flavor infusion. This curing period typically spans several days, allowing the salts and spices to penetrate the meat, tenderize it, and develop that characteristic savory profile.
Following the brine, the meat is seasoned generously with a specific pastrami rub. This rub often features a blend of spices like black peppercorns, coriander, mustard seeds, and sometimes paprika and garlic powder, adding layers of aromatic complexity. The final step in the traditional pastrami-making process is smoking. This imparts a smoky essence and further tenderizes the meat.
However, the beauty of adapting this process to a tri-tip lies in the cut’s inherent qualities. Tri-tip, known for its relatively lean composition and favorable grain structure, does not require the extended, low-and-slow cooking that cuts like brisket demand. This distinction is key to achieving the desired texture and flavor profile without overcooking. The goal for pastrami tri-tip is to reach a medium or medium-rare internal temperature, typically around 135°F (57°C). This target temperature, achievable within a much shorter cooking window—approximately 35-40 minutes on the grill—ensures that the meat remains moist and tender, avoiding the dryness that can sometimes plague leaner cuts.
The Timeline of Transformation: A Week of Brining and Preparation

The journey to this delectable pastrami tri-tip begins a full week before it hits the grill. This extended brining period is non-negotiable for achieving the authentic pastrami flavor and texture.
Day 1-6: The Brine
The process commences with the preparation of the brine. This involves combining a specialized pastrami brine mix with a specific quantity of warm water. The exact composition of the brine mix is critical, often containing a balance of curing salts (like kosher salt and pink curing salt), sugars (such as brown sugar or honey), and aromatic spices that form the foundation of the pastrami flavor. Once the sugar and salts are fully dissolved, the brine is allowed to cool completely. This cooling step is essential to prevent the brine from "cooking" the meat prematurely.
The tri-tip, typically a 2-3 pound cut, is then placed in a food-grade meat prep bag. The cooled brine is poured over the meat, ensuring it is fully submerged. The bag is then sealed, and the tri-tip is refrigerated for a minimum of six days. During this week-long immersion, the curing agents work their magic, drawing out moisture from the meat and then reabsorbing the flavorful brine. This process tenderizes the meat, introduces saltiness, and lays the groundwork for the complex flavors that will develop. The extended duration allows for deep penetration of the brine, ensuring that every part of the tri-tip is infused with the characteristic pastrami essence.

Day 7: The Rinse and Dry
After six days in the brine, the tri-tip is removed. A crucial step follows: rinsing the meat thoroughly under cold running water. This removes any excess salt and brine clinging to the surface, preventing the final product from being overly salty. Following the rinse, the tri-tip is patted completely dry with paper towels. This step is vital for achieving a good crust during the grilling process. Any residual moisture on the surface would steam the meat rather than sear it.
Day 7 (Continued): The Seasoning and Air Dry
Once thoroughly dried, the tri-tip is generously seasoned on all sides with a prepared pastrami rub. This rub is the second layer of flavor, providing the characteristic peppery, aromatic notes of pastrami. The spices in the rub adhere to the slightly moist surface of the meat after patting dry. Following the seasoning, the tri-tip is placed back in the refrigerator, this time uncovered, for an additional day. This uncovered period, often referred to as an "air dry," helps to further dry out the surface of the meat, creating an ideal environment for the pastrami rub to form a flavorful crust during grilling. This meticulous preparation ensures that the tri-tip is primed for its final transformation.

The Fiery Finale: Grilling for Perfection
With the week of brining and preparation complete, the tri-tip is ready for the grill. This stage, while relatively short, demands attention to temperature and timing to achieve the perfect balance of smoky flavor and tender texture.
Step 3: Grilling the Tri-Tip
The grill is preheated to a medium-high heat, aiming for a temperature range of 350-375°F (175-190°C). It’s important to establish a direct heat zone on the grill, where the meat will be placed for searing. The seasoned tri-tip is placed directly over this heat. The cooking process involves grilling to an internal temperature of 135°F (57°C) for medium-rare. To ensure even cooking and to develop a beautiful crust on all sides, the tri-tip is flipped every 5-7 minutes. This frequent flipping also allows for basting.

Step 4: Basting for Moisture and Flavor
During the grilling process, a basting liquid is prepared and applied. In a small pot, a combination of oil, red wine vinegar, minced garlic, and salt is brought together. This mixture is often warmed slightly on the grill itself, ensuring it’s ready for application. The basting liquid is applied to the tri-tip every time it is flipped. This not only adds another layer of flavor with the tang of vinegar and the aromatics of garlic but also helps to keep the lean tri-tip moist during the high-heat cooking. The oil in the basting liquid also aids in developing a richer, more appealing crust.
The combined effect of the direct heat and the frequent basting creates a beautifully caramelized exterior while ensuring the interior remains succulent and perfectly cooked to the desired medium-rare doneness. The relatively short grilling time, approximately 35-40 minutes, is a significant advantage of using tri-tip for this pastrami-style preparation, making it a more manageable project than traditional pastrami made from brisket.
Serving and Storage: Savoring the Smoky Delight

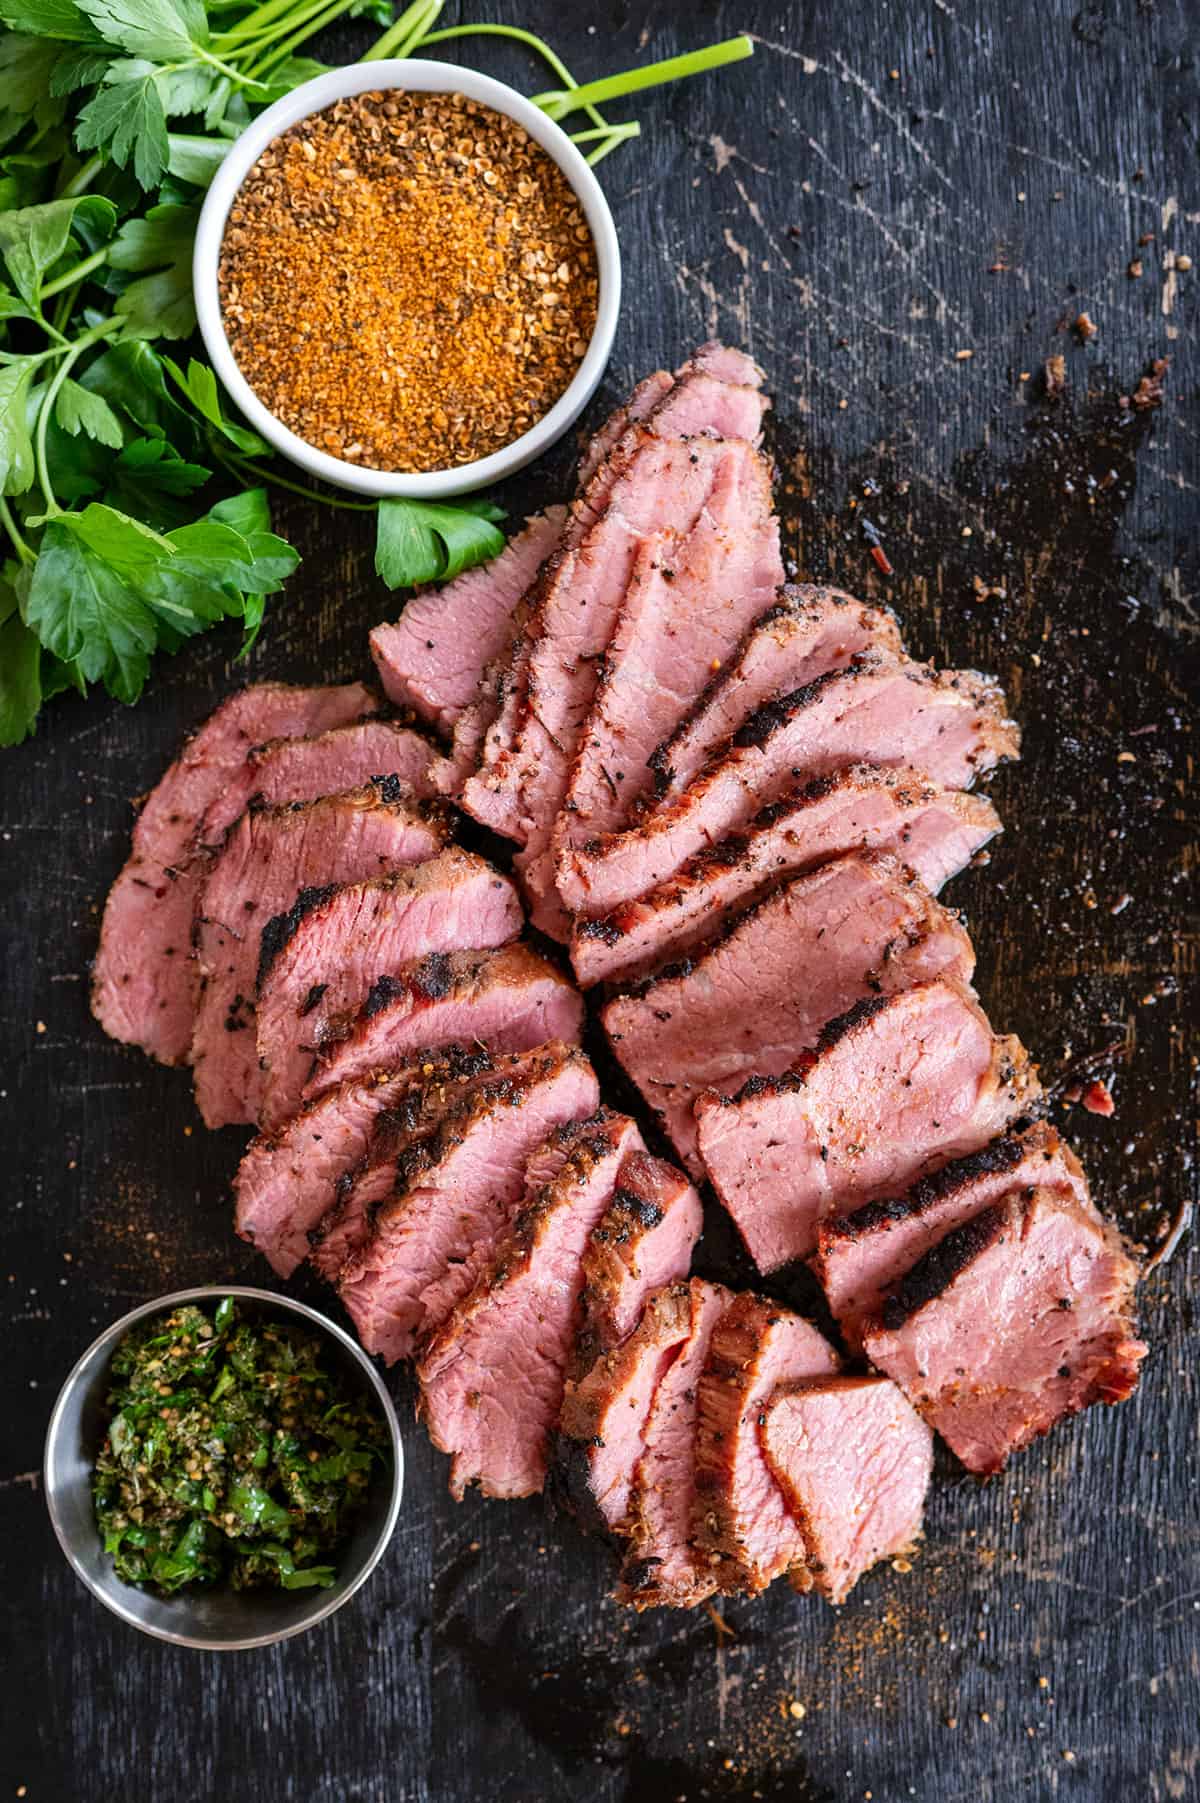
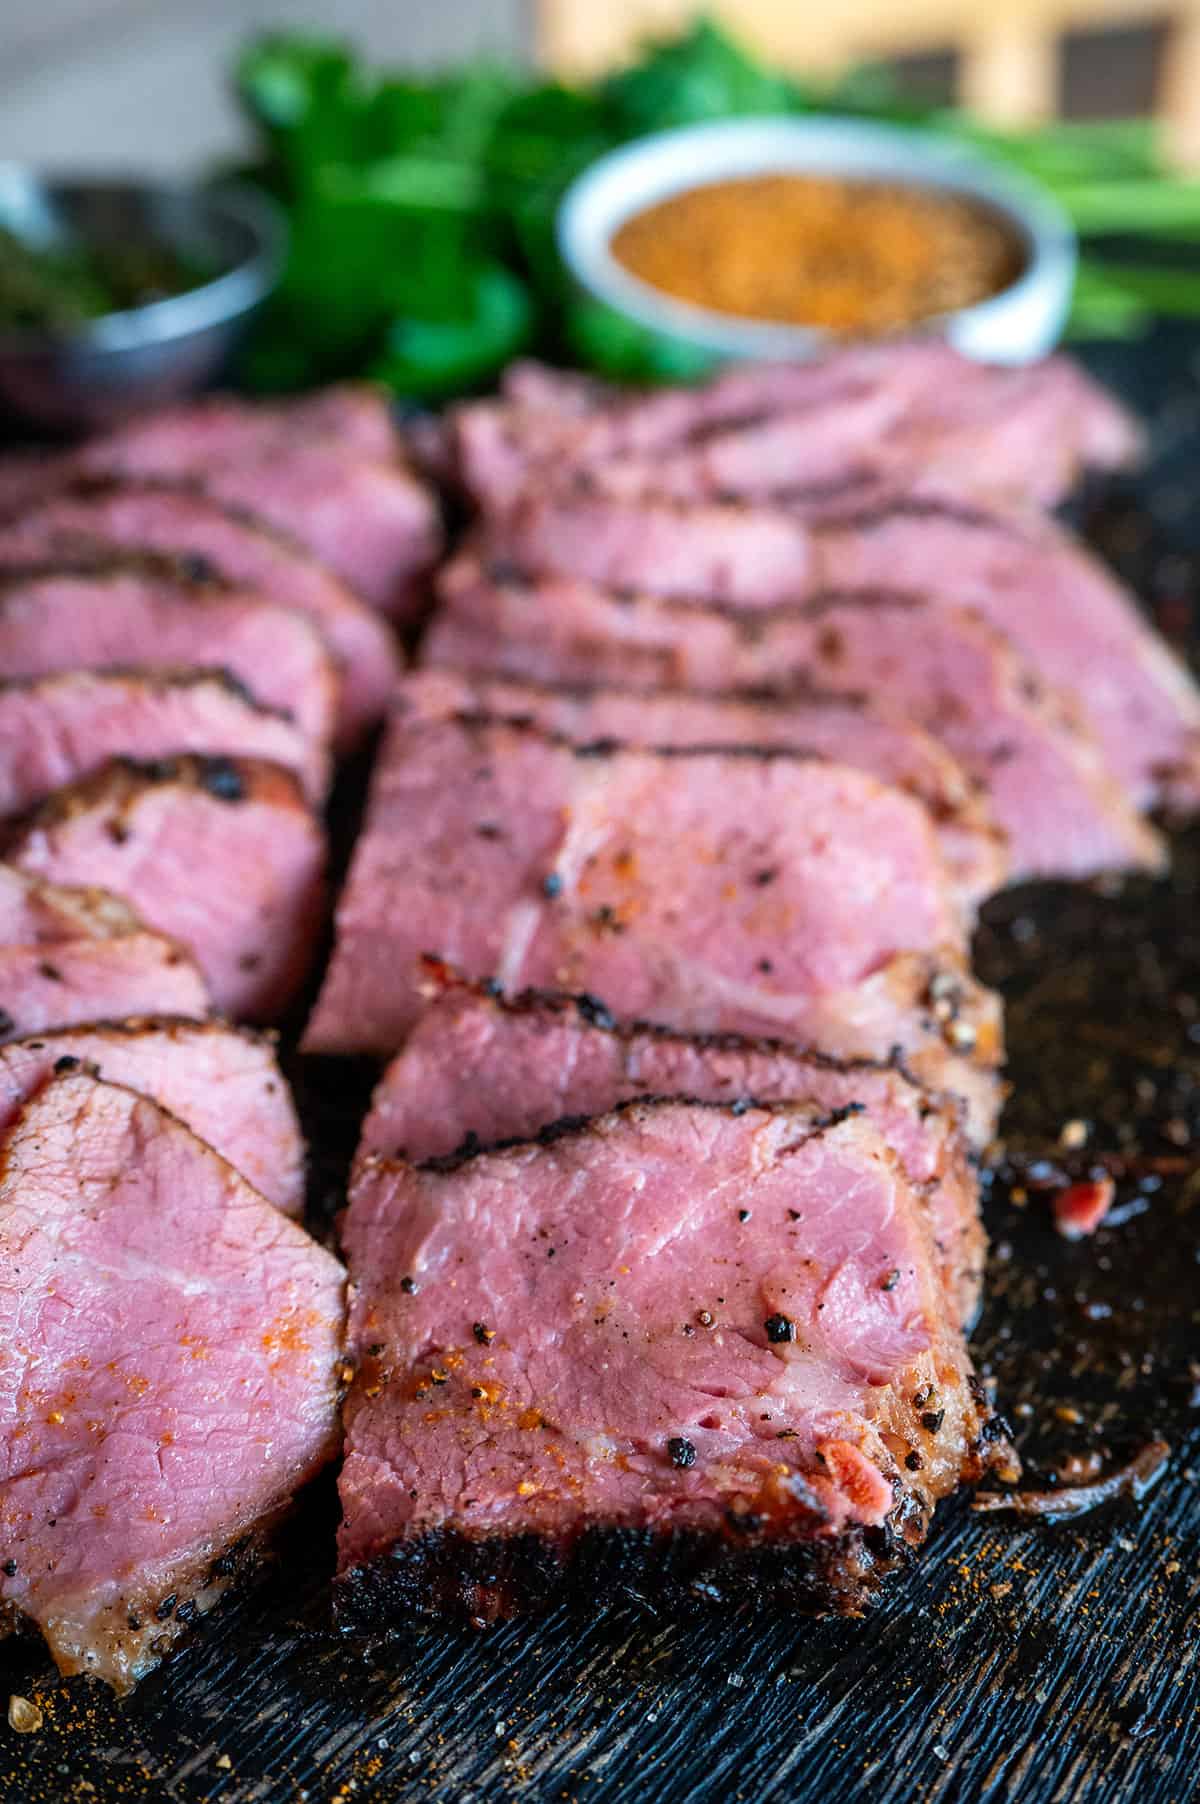
Once the pastrami tri-tip reaches its target internal temperature of 135°F (57°C), it is removed from the grill. A crucial resting period of 10-15 minutes follows. This allows the juices within the meat to redistribute, ensuring maximum moisture and tenderness when sliced. After resting, the tri-tip is sliced against the grain. This technique breaks down the muscle fibers, making the meat exceptionally tender and easy to chew.
The versatility of this pastrami tri-tip is one of its greatest assets. It can be enjoyed as a standalone protein, served alongside classic barbecue accompaniments such as potato salad, coleslaw, or baked beans. Alternatively, it shines as the star of a sandwich. Piled high on crusty bread or soft buns, perhaps with a smear of mustard or a dollop of sauerkraut, it transforms into a deli-style sandwich that rivals any found in a traditional smokehouse.
For storage, any leftover pastrami tri-tip can be kept in an airtight container in the refrigerator for up to a week. It also freezes exceptionally well for several months, making it an excellent candidate for batch preparation. When ready to enjoy leftovers, the meat can be gently reheated in a microwave or a skillet to preserve its texture and flavor.
Nutritional Considerations
The nutritional profile of this pastrami tri-tip, while primarily focused on flavor and texture, offers some insights. A typical serving provides approximately 322 calories, 1 gram of carbohydrates, 31 grams of protein, and 21 grams of fat. The fat content includes about 6 grams of saturated fat, 6 grams of polyunsaturated fat, and 8 grams of monounsaturated fat. It also contains a modest amount of cholesterol (98mg) and sodium (97mg), largely influenced by the brining process. While not a low-fat or low-sodium food, its protein content makes it a satisfying and flavorful meal option. It is important to note that these values are automatically calculated and should be considered approximations.
Frequently Asked Questions
-
What cut of meat is best for pastrami?
Traditionally, pastrami is made from beef brisket or beef navel due to their rich marbling and ability to withstand long curing and smoking processes. However, the fundamental principles of curing, seasoning, and smoking can be applied to various proteins. This recipe demonstrates the successful adaptation of the pastrami process to a tri-tip, a leaner cut that requires a modified cooking approach. Other cuts like picanha, while from the same primal as tri-tip, are distinct and offer different textural and flavor profiles. -
How long do you brine a tri-tip for pastrami?
For larger cuts like tri-tip, a brining period of 5 to 7 days is recommended. This duration ensures that the curing agents and flavorings penetrate the meat effectively, leading to a tender and well-seasoned final product. Shorter brining times may not allow for sufficient flavor infusion or tenderization.
-
Is picanha the same as tri-tip?
No, picanha and tri-tip are distinct cuts of beef, although they both originate from the sirloin primal, located near the rear of the cow. Picanha, also known as the sirloin cap, is prized for its thick cap of fat, which imparts exceptional flavor and moisture. Tri-tip, a triangular muscle, is leaner but offers a robust beefy flavor and a desirable grain for slicing.
Conclusion: A Culinary Achievement
This pastrami tri-tip recipe offers a compelling gateway into the world of cured and smoked meats, accessible even for home cooks. By meticulously following the week-long brining process and employing a high-heat grilling technique, one can achieve a deeply flavorful, incredibly tender, and satisfyingly smoky cut of beef. Whether enjoyed as a centerpiece for a meal or incorporated into a classic sandwich, this pastrami tri-tip stands as a testament to the transformative power of patient preparation and skillful cooking. The success of this recipe lies in its ability to deliver the essence of pastrami with the unique advantages of the tri-tip cut, making it a standout addition to any grilling repertoire.