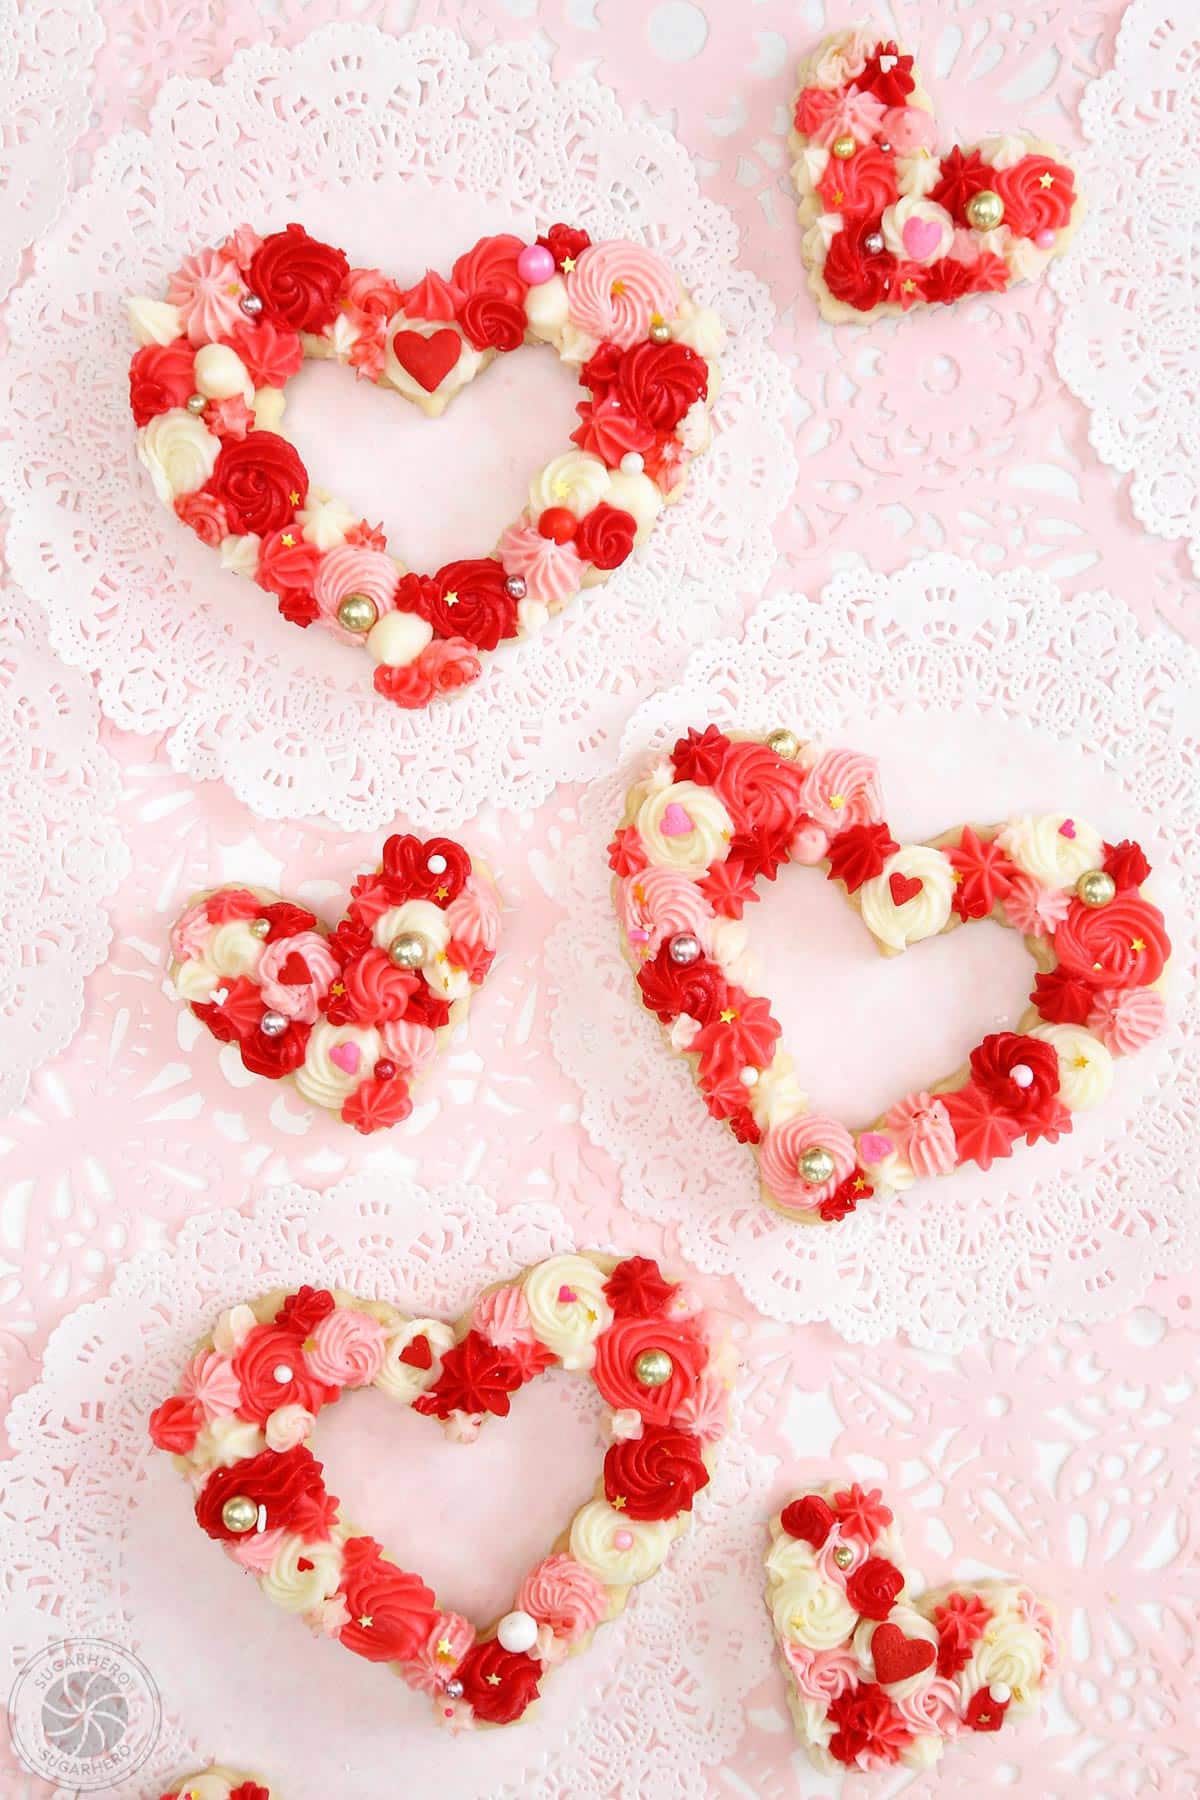
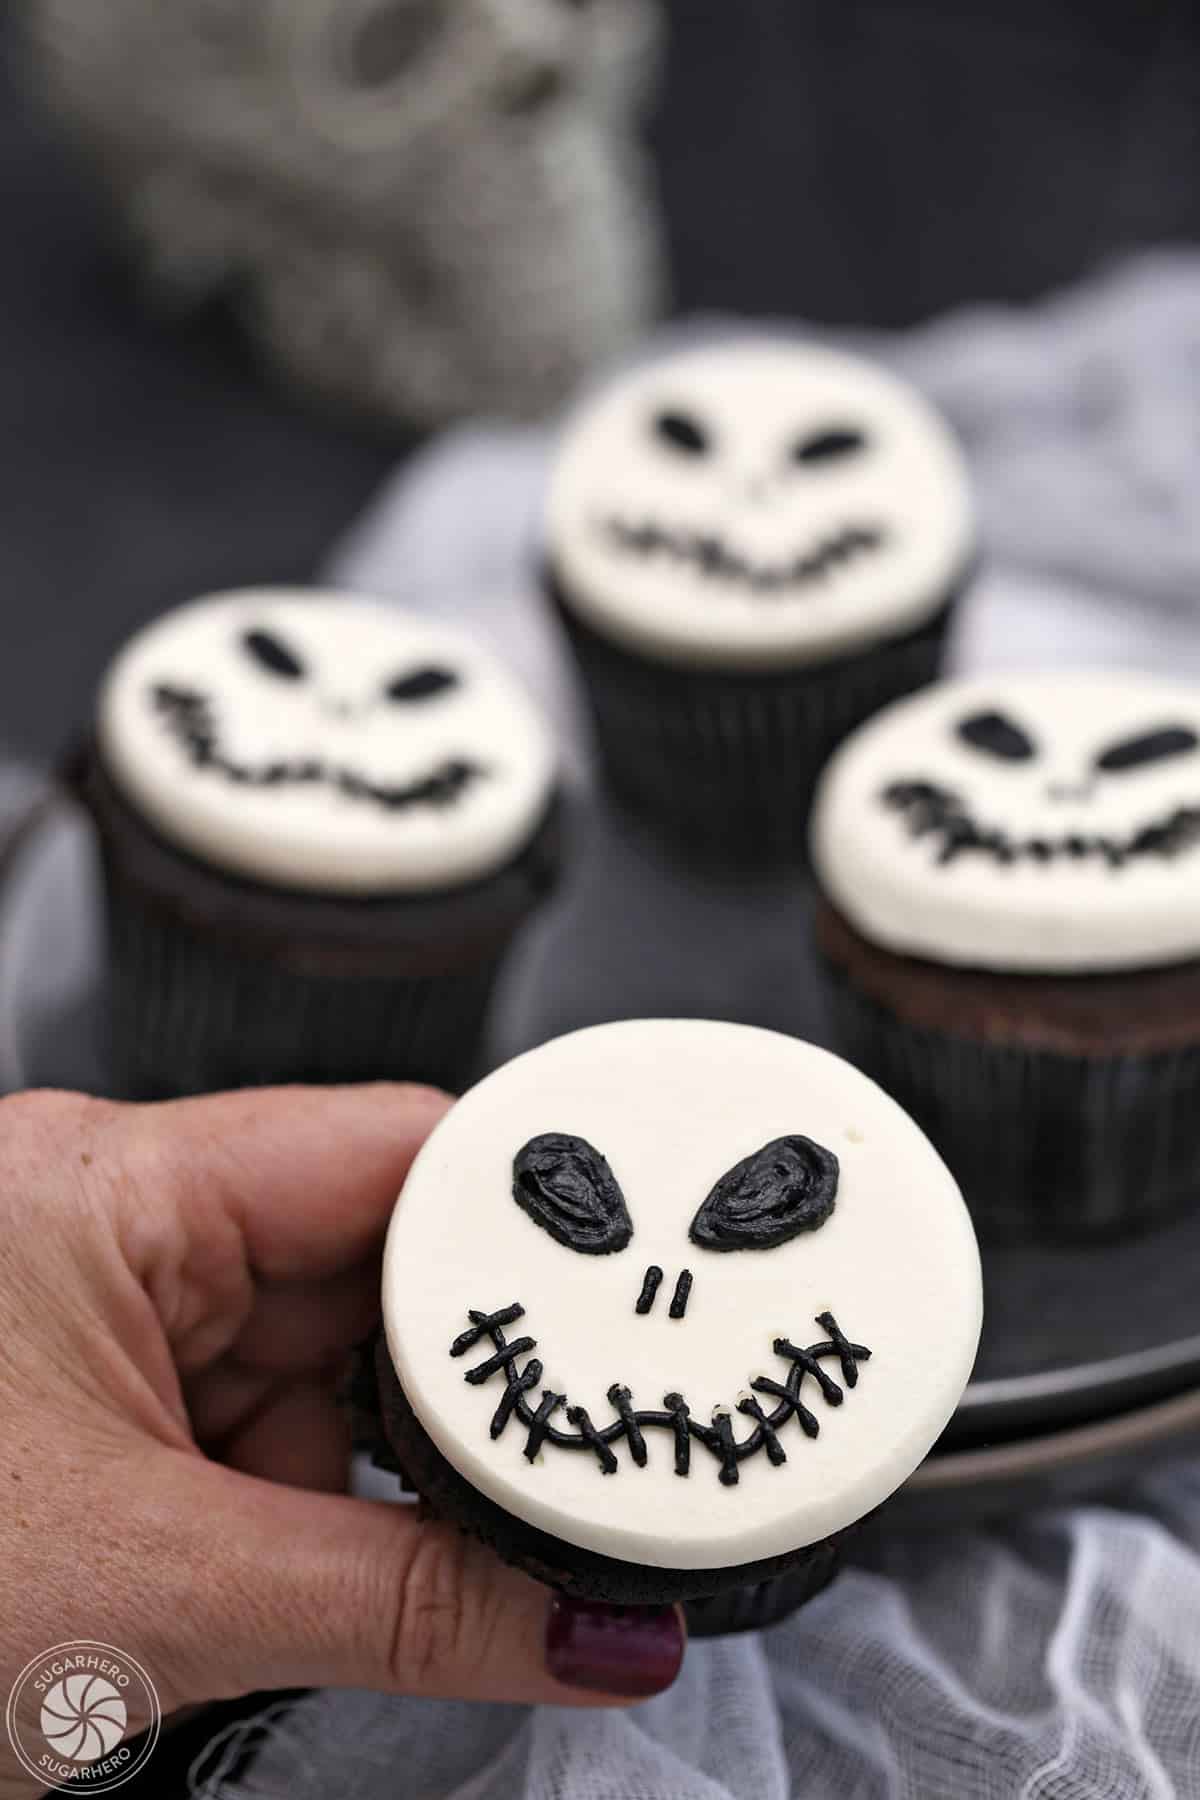
The arrival of autumn heralds the season of spooky celebrations, and for many, this means preparing festive treats that capture the spirit of Halloween. Among the most anticipated are cupcakes, small, individual cakes that offer a perfect canvas for creative decoration. This year, a simple yet striking design is gaining traction: the Skull Cupcake. These cupcakes, adorned with an easily achievable buttercream skull motif, offer a blend of "creepy-cute" aesthetics, making them an ideal addition to any Halloween party or a fun activity for families.
The appeal of these Skull Cupcakes lies in their accessibility. The decorating technique requires minimal specialized skills, relying primarily on two colors of buttercream and basic piping tools. This approach democratizes elaborate-looking Halloween desserts, making them achievable for bakers of all skill levels. The core of the design involves transforming a standard cupcake into a charming, albeit macabre, representation of a human skull. This simplicity allows for a focus on the overall festive atmosphere rather than complex culinary challenges.
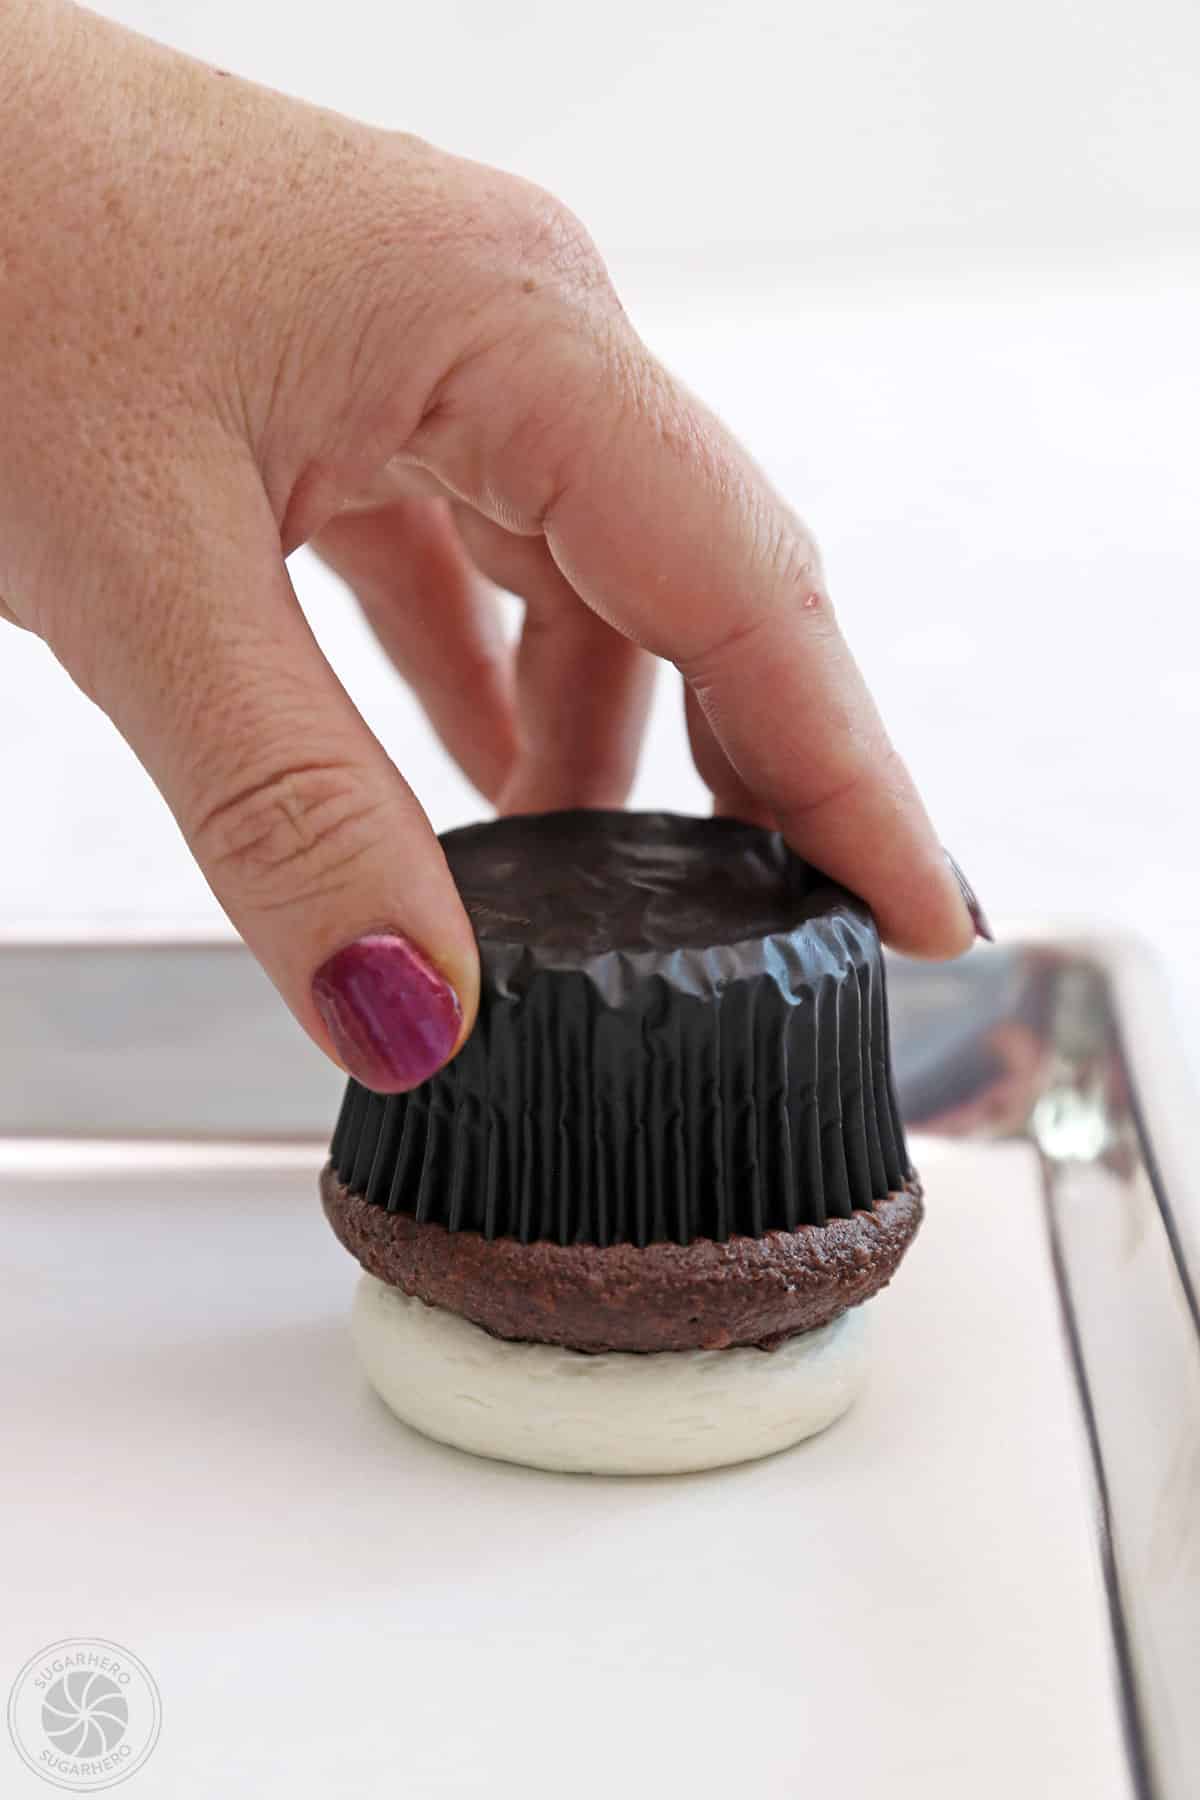
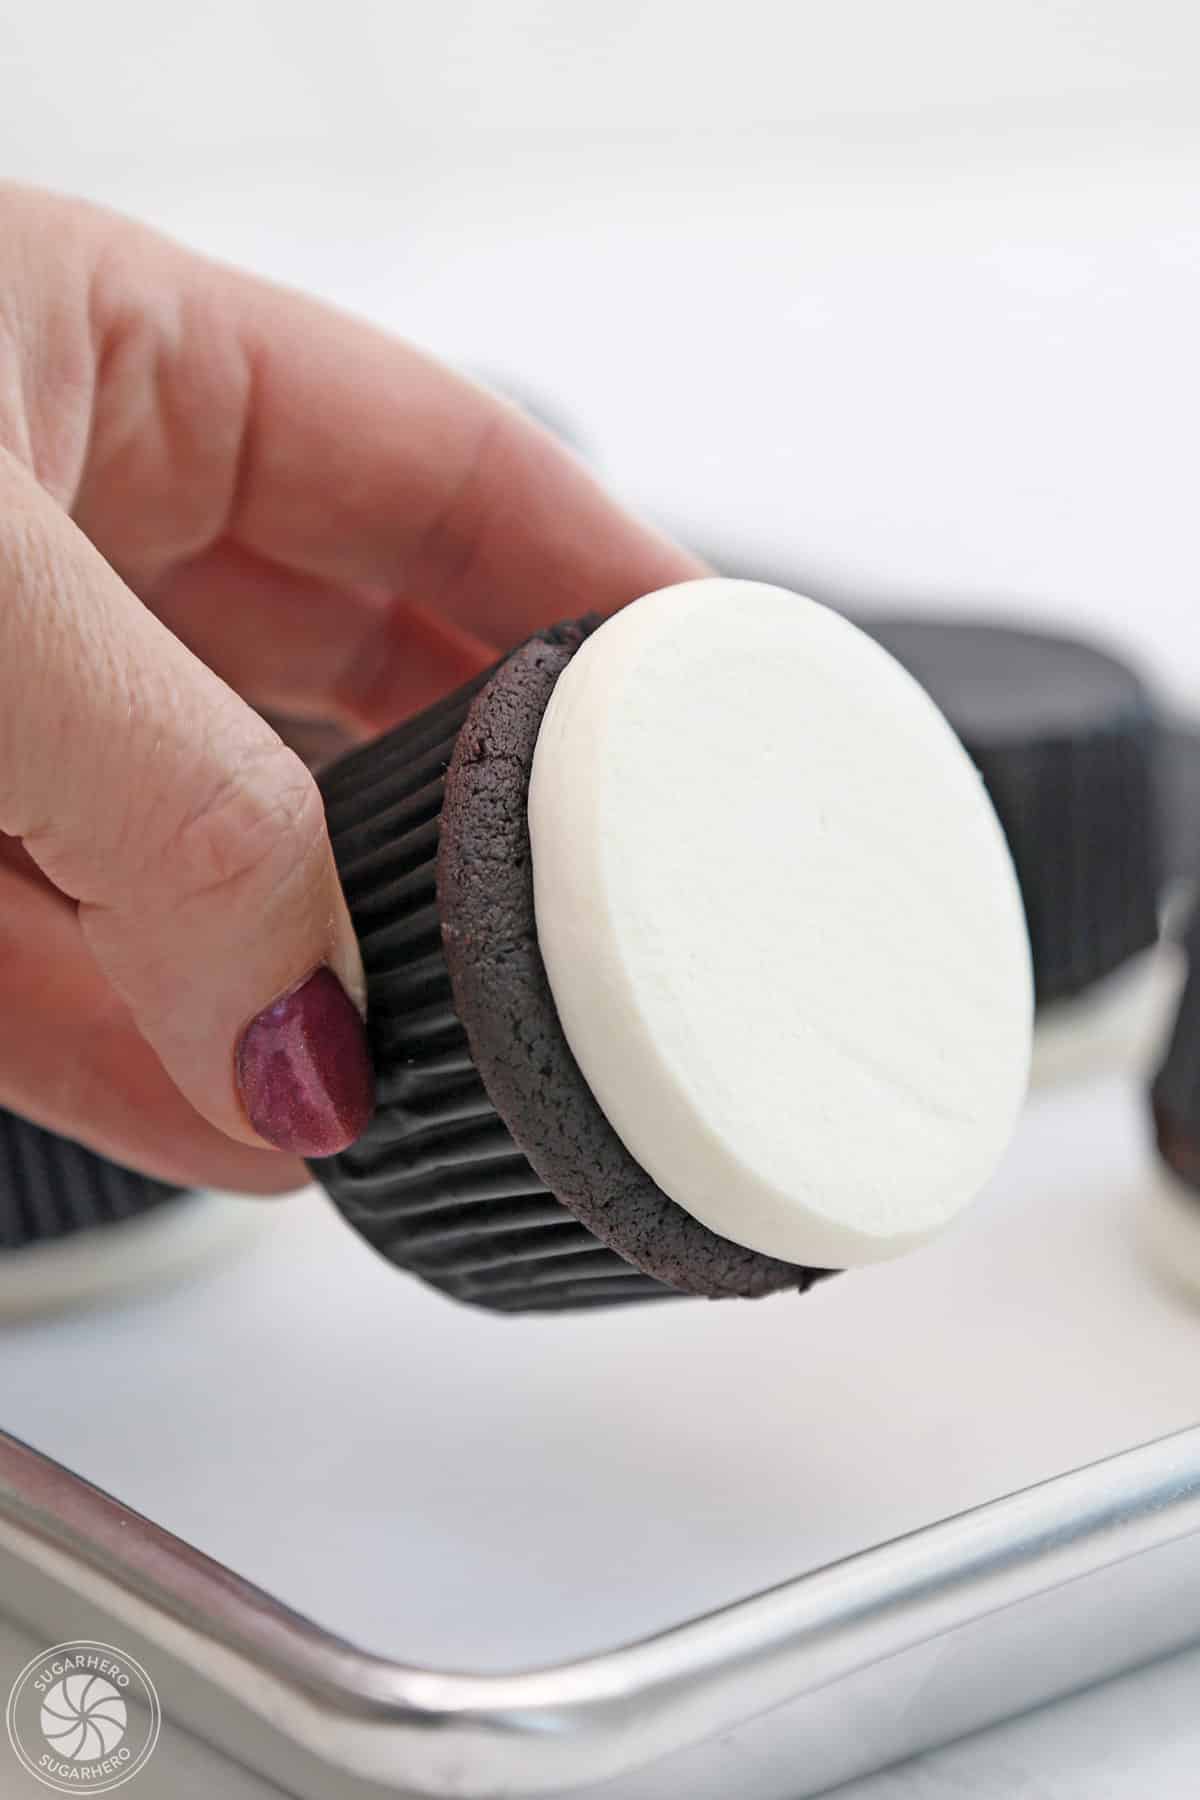
For those looking to embark on this sweet endeavor, the process begins with the cupcakes themselves. While homemade recipes offer a personalized touch, the article acknowledges the practicality of using a favorite cake mix as a shortcut. This inclusivity ensures that the focus remains on the decoration, a crucial element for holiday-themed baking. For bakers seeking inspiration for their base cupcakes, a curated list of recipes is readily available, providing a foundation for these skull-adorned creations.
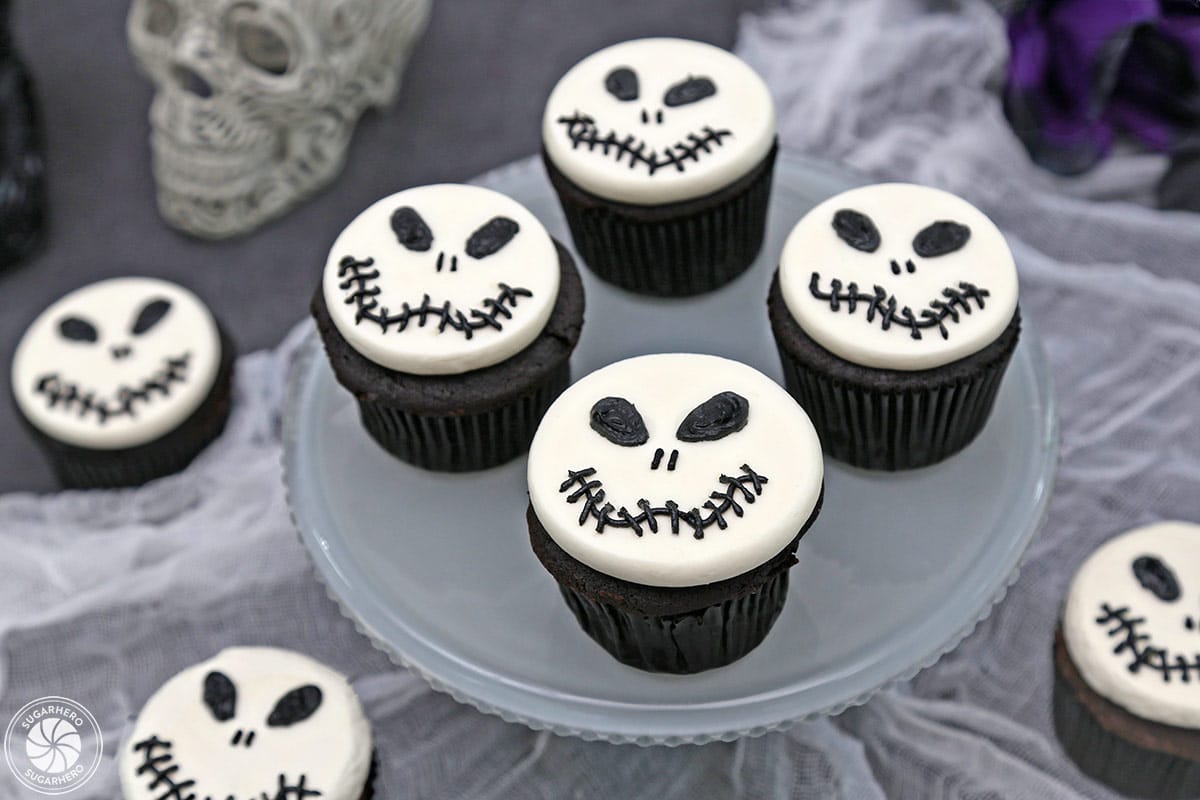
The charm of these Skull Cupcakes is amplified by their visual impact. The contrast between a dark base frosting (often chocolate) and the stark white of the skull elements, typically accented with black for eyes and nose, creates a classic Halloween palette. The design draws inspiration from iconic imagery associated with the holiday, including the widely recognized Jack Skellington character from "The Nightmare Before Christmas," known for his distinctive skull-like face. This visual familiarity contributes to the immediate appeal and festive recognition of the treat.
What You’ll Need
Creating these distinctive Skull Cupcakes requires a focused list of ingredients and equipment, emphasizing simplicity and readily available baking staples. The core components are designed to be straightforward, allowing for easy procurement and preparation.
Ingredients:
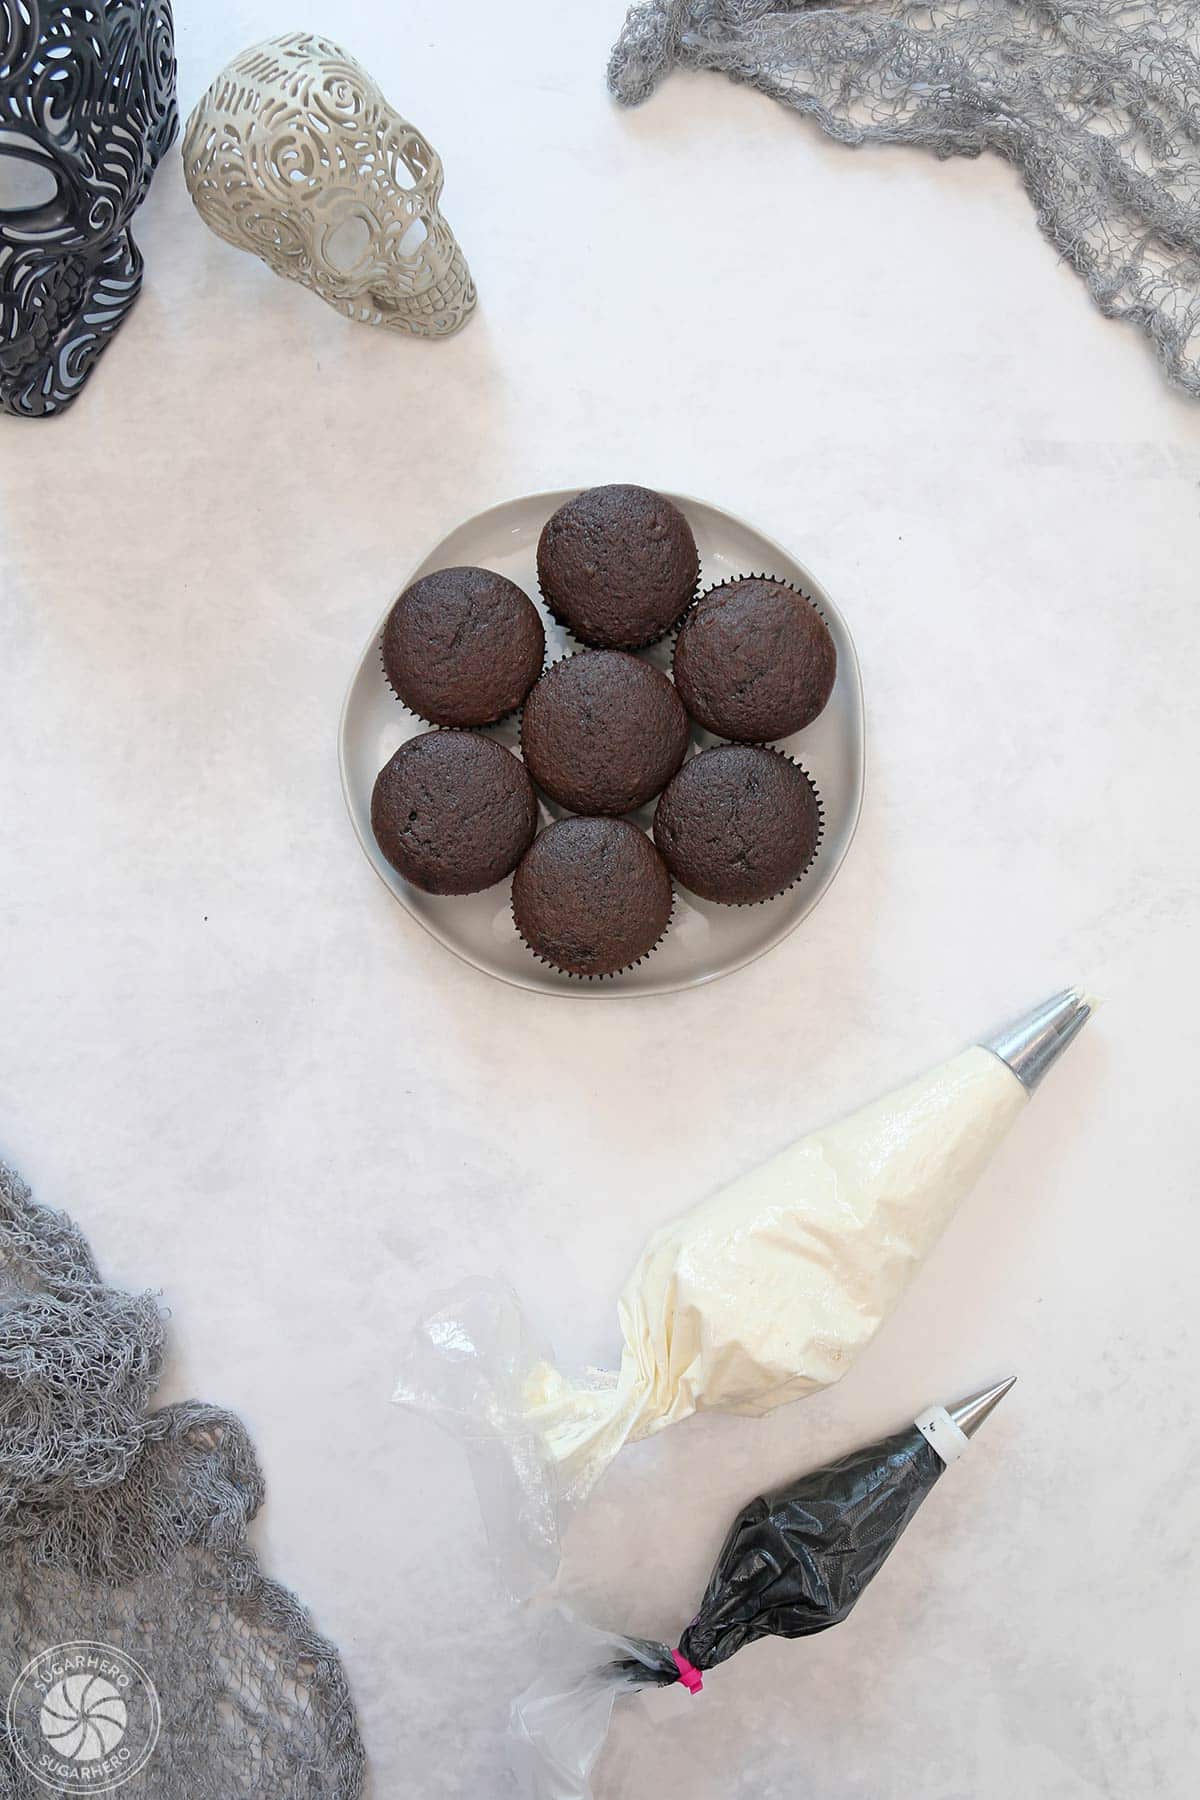
- Baked Cupcakes: The foundation of the treat. The article suggests that any preferred cupcake recipe or a high-quality cake mix can be used, offering flexibility for the baker’s convenience and taste preferences. Chocolate or dark-colored cupcakes often provide a striking contrast for the white and black frosting elements.
- Buttercream Frosting: Two distinct colors are essential for the skull design.
- White or Off-White Buttercream: This will form the main part of the skull’s face. A classic vanilla or cream cheese frosting serves well.
- Black Buttercream: This is crucial for creating the eye sockets, nose cavity, and potentially other facial details. Achieving a true, vibrant black can be a nuanced process, often requiring specific food colorings or techniques.
- Food Coloring (Optional but Recommended for Black Frosting): High-quality gel or powdered black food coloring is recommended to achieve an intense black hue without diluting the frosting’s consistency. Liquid food coloring is generally less effective for deep colors. Black cocoa powder can also be incorporated into white frosting to achieve a dark color with a chocolate flavor.
Equipment:

The tools required are primarily for frosting application and shaping, making the decorating process manageable for home bakers.
- Piping Bags: These are essential for controlling the application of frosting for both the base layer and the detailed skull features.
- Piping Tips: A few basic tips are helpful. A round tip, such as a Wilton #12, is often used for creating the main facial shapes, while a smaller round tip might be useful for finer details. Alternatively, a simple Ziploc bag with a corner snipped off can serve as a makeshift piping bag.
- Offset Spatula: Useful for smoothing the initial layer of white frosting onto the cupcake, creating a clean canvas for the skull details.
- Baking Sheets and Parchment Paper: For managing the cupcakes during the frosting and decorating stages.
Crafting the Frosting: The Key to the Skull
The success of the Skull Cupcake design hinges significantly on the buttercream. The article highlights a critical tip for achieving a truly impactful black frosting: time.
Making True Black Frosting:
The process of creating a deep, rich black frosting is often a challenge for bakers. Unlike other colors, black can appear muted or grayish if not prepared correctly. The article emphasizes a key technique: allowing the colored frosting to rest. When black food coloring is mixed into buttercream, the color needs time to "bloom" or fully develop. This process is best achieved by preparing the black frosting at least 24 hours in advance of decorating. Storing the frosting in an airtight container, with a layer of plastic wrap pressed directly onto its surface to prevent a crust from forming, ensures its quality.
When ready to use, the frosting should be brought back to room temperature. A thorough beating on medium speed will restore its light, creamy texture, making it ready for piping. This advance preparation is crucial for achieving a visually striking black that defines the skull’s features effectively. For those who prefer a chocolate flavor profile, incorporating black cocoa powder into the frosting base can reduce the reliance on food coloring while adding depth to the color and taste.
Adjusting Frosting Consistency:
The article also provides practical advice on adjusting frosting consistency. Factors such as the brand of butter used, its temperature, and the ambient temperature of the kitchen can all influence the final texture of the buttercream. Bakers are encouraged to be flexible and make minor adjustments, such as adding a touch more powdered sugar for a firmer consistency or a small amount of milk or cream for a softer one, to achieve the desired texture for piping.
The Decorating Process: A Step-by-Step Guide
The transformation of a simple cupcake into a Halloween-themed skull is a methodical process, broken down into manageable steps for clarity and success. The accompanying photo tutorial visually guides bakers through each stage, from the initial frosting application to the final details.
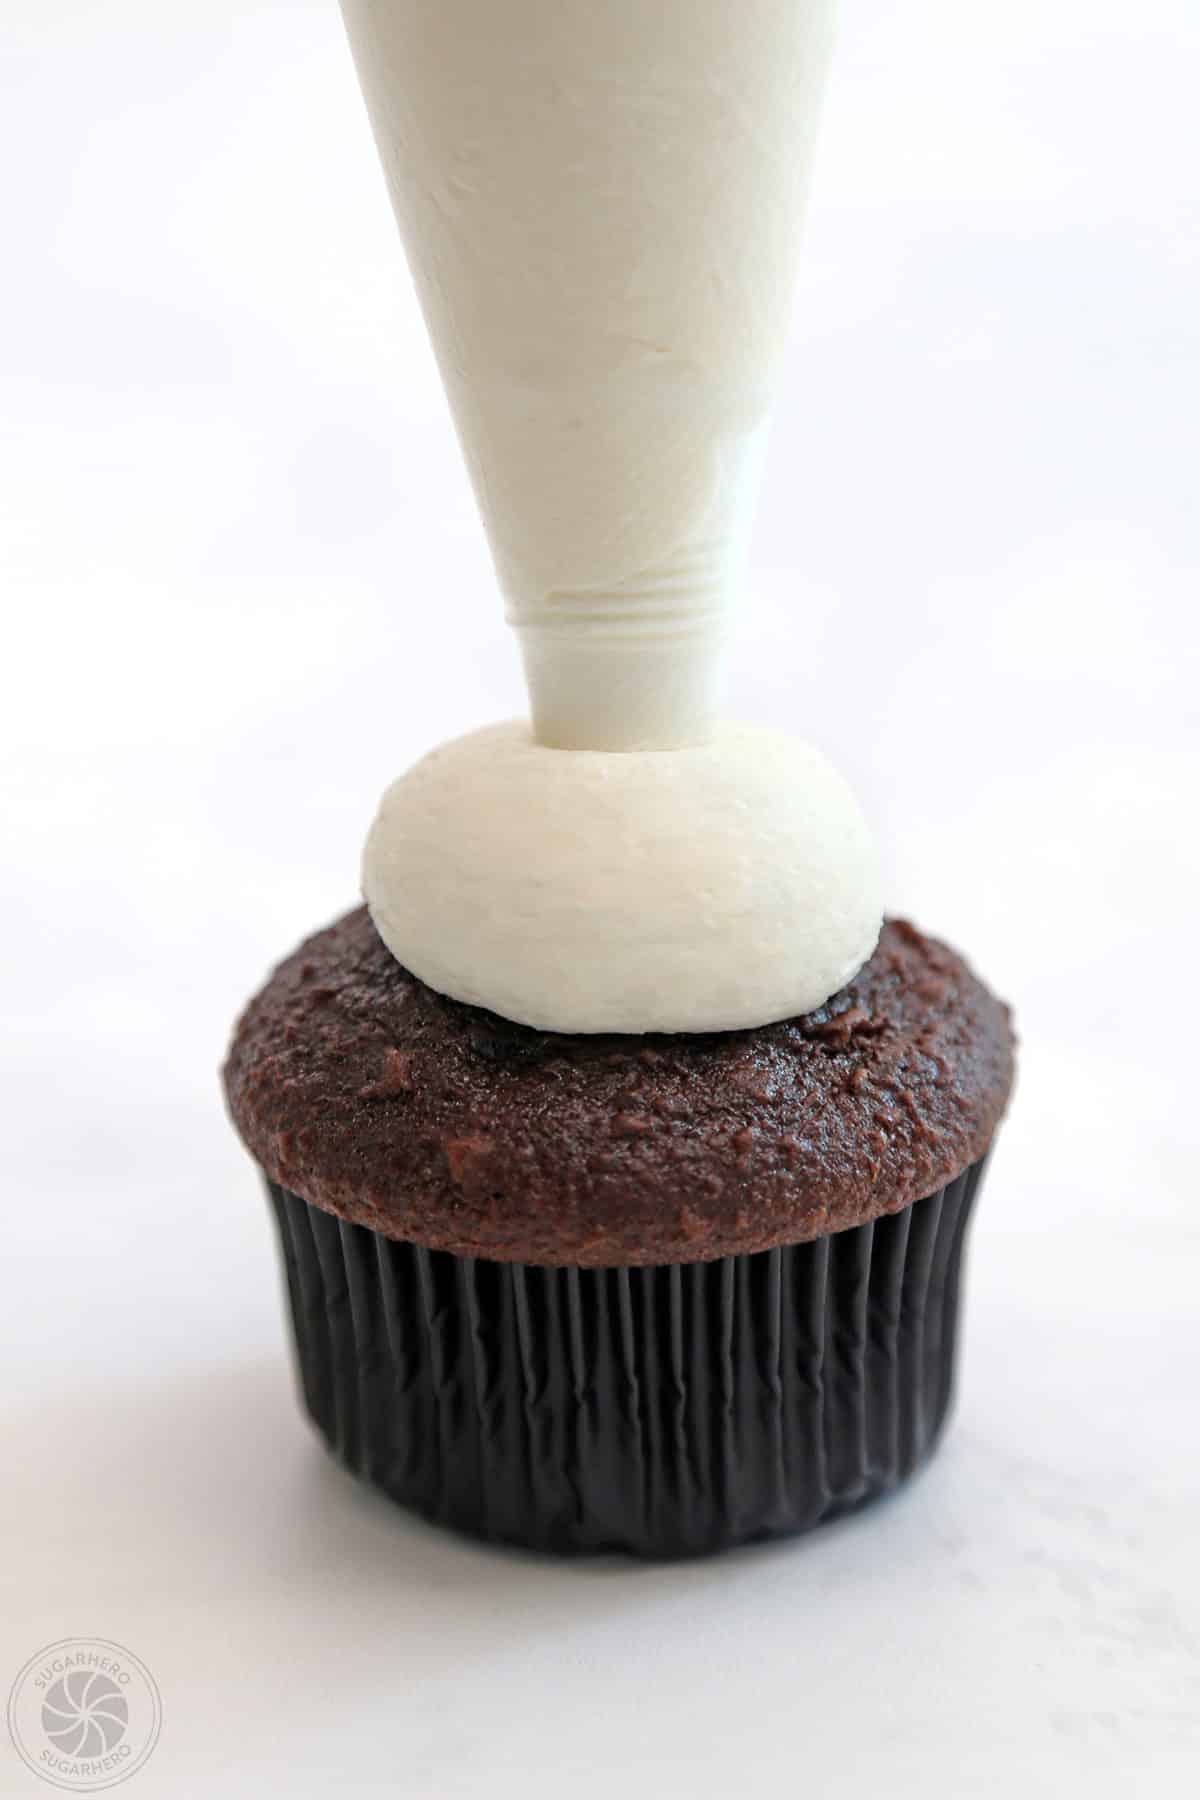
Step 1: Frosting the Cupcakes
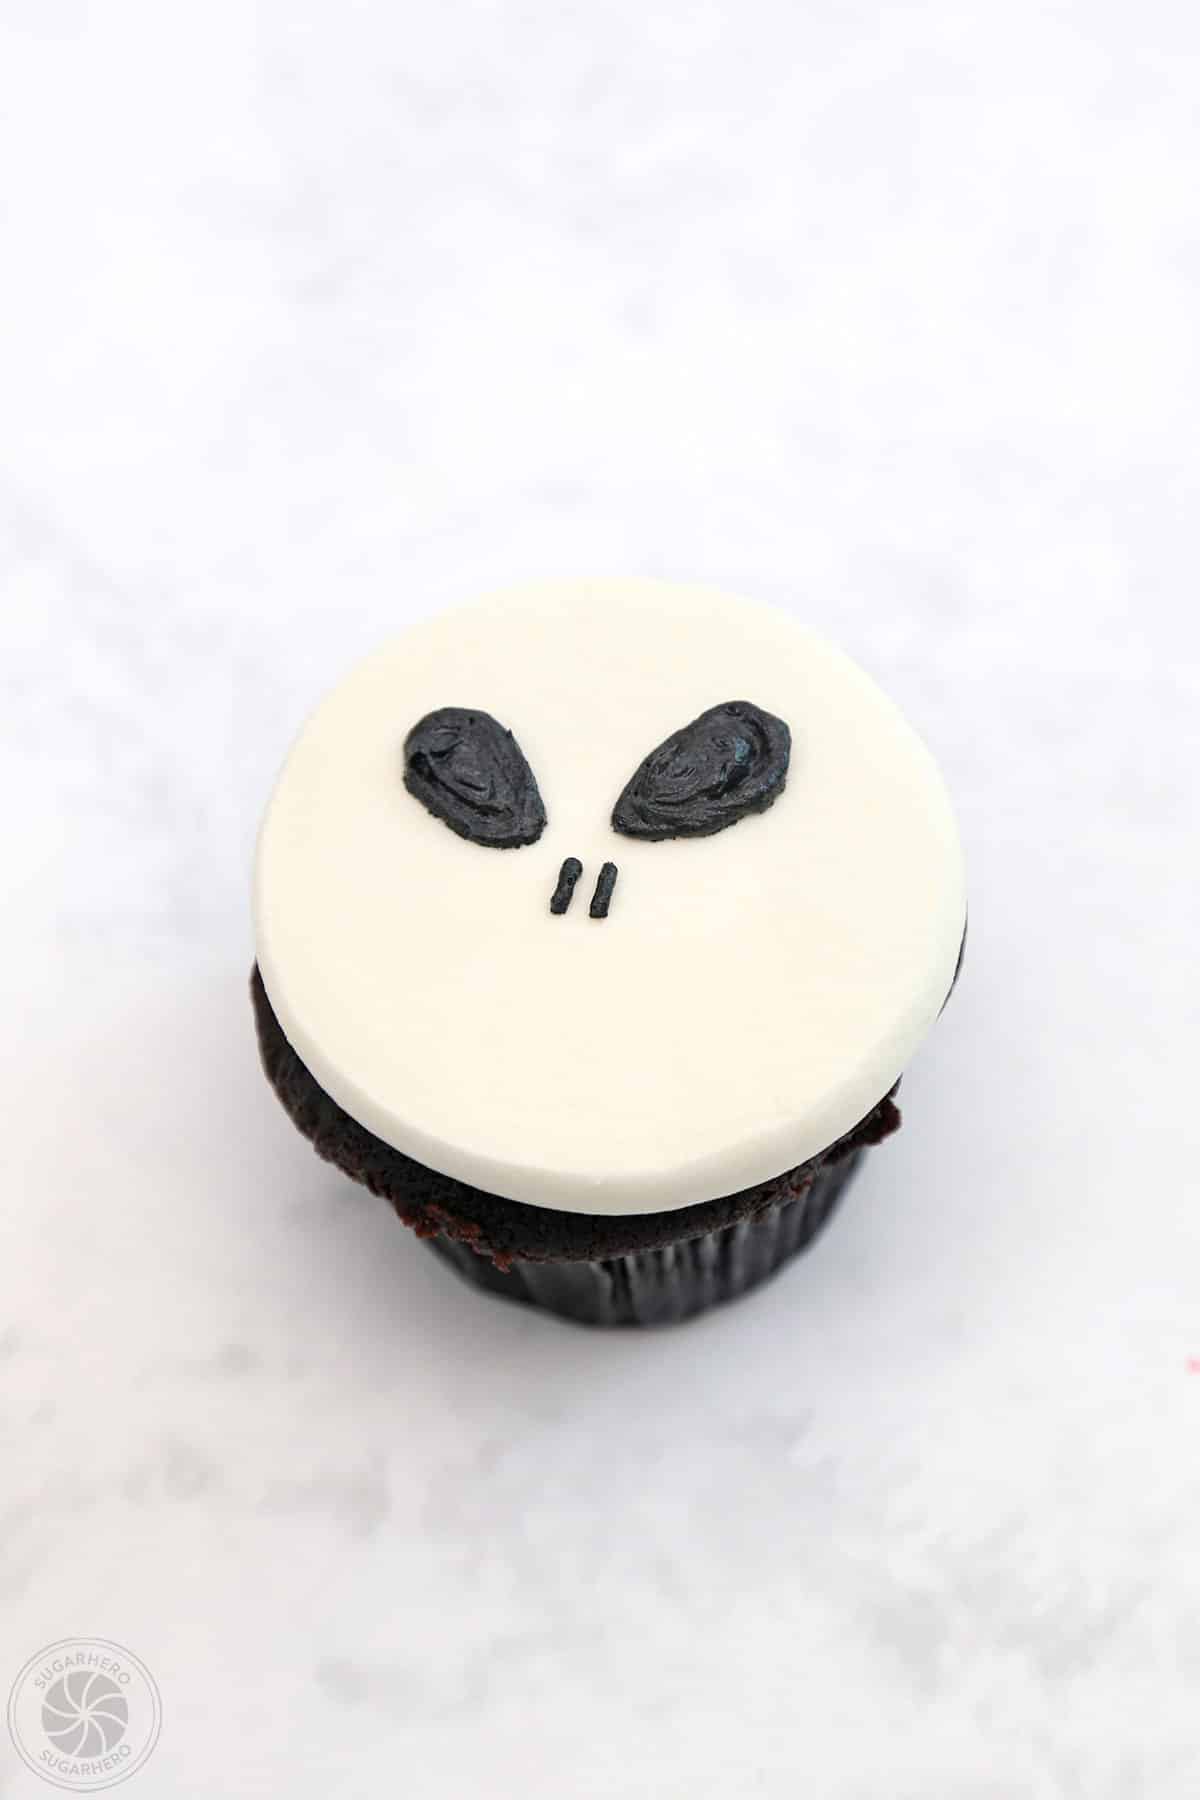
The first step involves preparing the base for the skull design. A generous amount of white or off-white buttercream is applied to the top of each baked and cooled cupcake. This can be done using an offset spatula to create a smooth, even surface, or by piping a rounded mound of frosting. The goal is to create a relatively flat, uniform base that will serve as the "face" of the skull. If using a piping bag, a large round tip or even a Ziploc bag with a corner cut off can be used to deposit a sufficient amount of frosting. The spatula is then used to gently smooth this frosting into a dome shape, mimicking the rounded form of a skull.
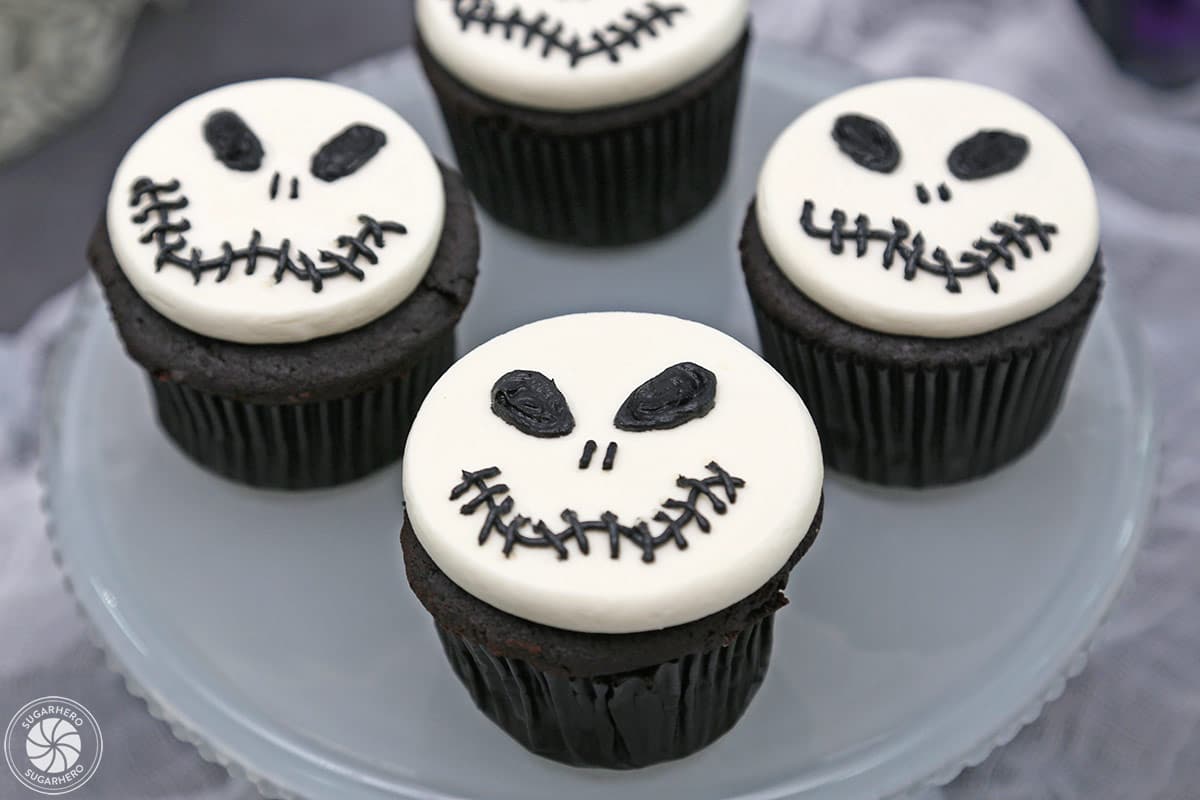
Step 2: Creating the Skull Features
With the white base established, the black frosting is brought into play to define the skull’s distinctive features.
- Eye Sockets: Using a piping bag fitted with a medium-sized round tip (or a Ziploc bag with a small corner snipped), two circular or slightly oval shapes are piped onto the white frosting to represent the eye sockets. These are typically positioned symmetrically on the upper half of the cupcake’s surface. The size and placement can be adjusted to give the skull different expressions, from vacant to slightly menacing.
- Nose Cavity: Below the eye sockets, a small, inverted triangle or a heart shape is piped in black to represent the nasal opening. This detail is critical for completing the iconic skull silhouette.
- Mouth and Teeth (Optional): For a more detailed skull, a curved line can be piped below the nose to suggest the mouth. This can be further embellished with small vertical lines to represent teeth. However, for a simpler design, just the eyes and nose are often sufficient.
The precision of piping is key here. Steady hands and consistent pressure will result in cleaner lines and more defined features. The contrast between the dark black and the bright white creates a bold, graphic effect that is instantly recognizable as a skull.
Step 3: Refining the Design
Once the primary black features are in place, a final review can be done. Small adjustments can be made to the shapes or placement if needed. For instance, if the eye sockets appear too far apart, a touch more white frosting can be added around them to subtly shift their position. The overall aim is to achieve a balanced and visually appealing representation of a skull.
The article also offers a photo tutorial, detailing each step with visual aids. This includes images of piping the initial frosting, flattening it for a smooth surface, and then carefully adding the black elements for the eyes, nose, and mouth. These visual cues are invaluable for bakers who are new to cake decorating or who prefer a visual guide to complement written instructions.
Tips and Frequently Asked Questions
To further enhance the baking experience and ensure the best results, the article addresses common questions and provides helpful tips for making Skull Cupcakes.
Alternative Piping Methods:
For bakers who may not have dedicated piping bags and tips, a practical alternative is suggested: Ziploc bags. By filling a sturdy resealable plastic bag with frosting and snipping a small corner off, a makeshift piping tool can be created. This method is effective for applying both the base frosting and the detailed skull features, making the decorating process accessible even without specialized equipment.
Achieving Ultra Black Frosting:
The challenge of achieving a deep black hue in frosting is a recurring theme. The article reiterates the importance of using high-quality gel or powdered food coloring, specifically recommending brands like Americolor Ultra Black. Liquid food colorings are discouraged due to their lower pigment concentration, which can lead to an undesirable pastel or gray result even when a large quantity is used. The crucial advice of allowing the colored frosting to rest for at least 24 hours is emphasized again, as this resting period is vital for the color to fully develop its intensity. The suggestion of incorporating black cocoa powder is also presented as an alternative or supplementary method for achieving a richer black color while adding a chocolatey flavor.
Make-Ahead Strategies:
For busy bakers, the ability to prepare components in advance is a significant advantage. The article provides guidance on making both the cupcakes and the frosting ahead of time.
- Frosting: The buttercream can be prepared up to a week in advance. It should be stored in an airtight container with plastic wrap pressed directly onto its surface to prevent a crust. Refrigeration is recommended. Before use, the frosting needs to come to room temperature and then be whipped to restore its light, creamy consistency.
- Cupcakes: Baked and cooled cupcakes can be frozen for longer storage. They should be placed in airtight containers to prevent freezer burn. Before decorating, they should be thawed at room temperature while still in their container.
Storage Information:
Proper storage ensures that the Skull Cupcakes remain fresh and appealing. Extra cupcakes can be stored in an airtight container at room temperature for 2 to 3 days. For longer storage, refrigeration for up to a week is recommended. It is advised to allow chilled cupcakes to return to room temperature before serving to ensure the best taste and texture.
The Broader Appeal of Halloween Baking
The creation of themed treats like Skull Cupcakes is more than just a culinary activity; it’s a cultural practice that deepens the engagement with seasonal celebrations. Halloween, in particular, lends itself to imaginative and often whimsical food creations. The skull motif, while traditionally associated with danger or mortality, has been widely adopted in popular culture as a symbol of the macabre and the fun aspects of the holiday. Its application to a sweet treat like a cupcake softens its edge, transforming it into something "creepy-cute."
This trend reflects a broader interest in DIY and home baking, particularly for holidays. Social media platforms have played a significant role in popularizing such visually appealing and shareable food items. Recipes and tutorials that offer step-by-step guidance, like the one provided here, empower individuals to recreate these festive treats, fostering a sense of accomplishment and shared experience. The hashtag #SugarHero, encouraged for sharing creations on Instagram, highlights the community aspect of online baking and recipe sharing.
The accessibility of the Skull Cupcake design is a key factor in its popularity. It allows for creative expression without requiring advanced pastry skills. This democratizes the ability to produce visually impressive holiday treats, making them attainable for a wider audience. The joy derived from creating and sharing these themed cupcakes contributes to the overall festive atmosphere of Halloween, turning a simple baked good into a memorable part of the celebration. The phrase "Bone-appetit!" serves as a playful sign-off, encapsulating the lighthearted spirit of the recipe.