What is the first quality that captivates a baker or connoisseur when presented with a loaf of sourdough bread? For some, it might be the delightful inclusion of toasted walnuts or the subtle crunch of sesame seeds perfectly suspended within the matrix of the loaf. Others prioritize a more fundamental appeal: the profound, nuanced flavor born from meticulously selected grains, or the alchemical transformation wrought by fermentation, elevating simple ingredients into a culinary marvel capable of silencing a conversation. Indeed, as many seasoned bakers affirm, flavor comes first—always.
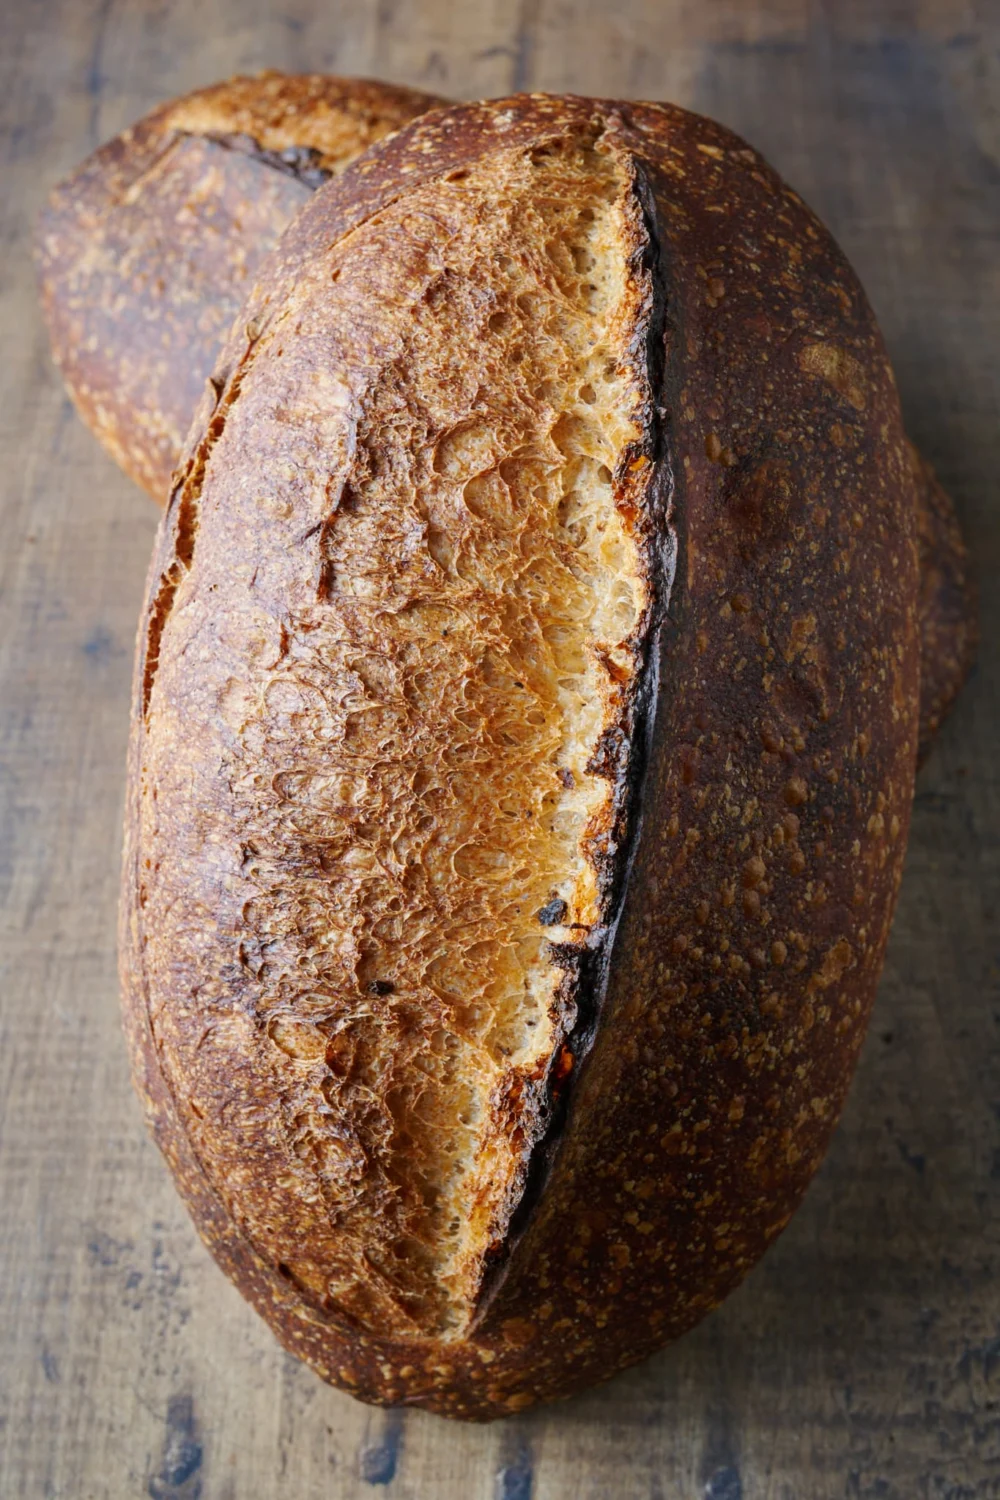
Yet, the visual allure is undeniable. The dark, burnished crust that yields with a satisfying crackle, a razor-sharp score that blossoms impeccably in the oven’s heat, or the gently rounded edges hinting at the masterful touch of hands that instinctively understood the dough’s needs and timing. For a significant segment of the baking community, the ultimate visual prize is the open crumb – a loaf interior that seduces with its intricate, airy web. While this highly sought-after characteristic might appear to be the pinnacle of sourdough achievement, it is crucial to establish a foundational truth: of all the qualities that render sourdough memorable, a dramatically open crumb is often the least important from a purely gastronomic perspective. However, its presence frequently signals a mastery of fundamental baking principles.
The pursuit of an open crumb is not merely an aesthetic endeavor; it is a tangible manifestation of robust fermentation, optimal dough development, and meticulous handling throughout the baking process. A truly exemplary open crumb is characterized by a light, even texture with well-distributed air pockets, devoid of massive, irregular caverns surrounded by dense, gummy regions. When harmonized with exceptional flavor, this kind of texture elevates the eating experience, transforming each slice into a genuinely pleasurable indulgence. This comprehensive guide will navigate the critical decisions and techniques that contribute to achieving a desirable open crumb, emphasizing understanding and control over the dough rather than simply chasing a visual ideal.
Deconstructing the Open Crumb: A Scientific Perspective
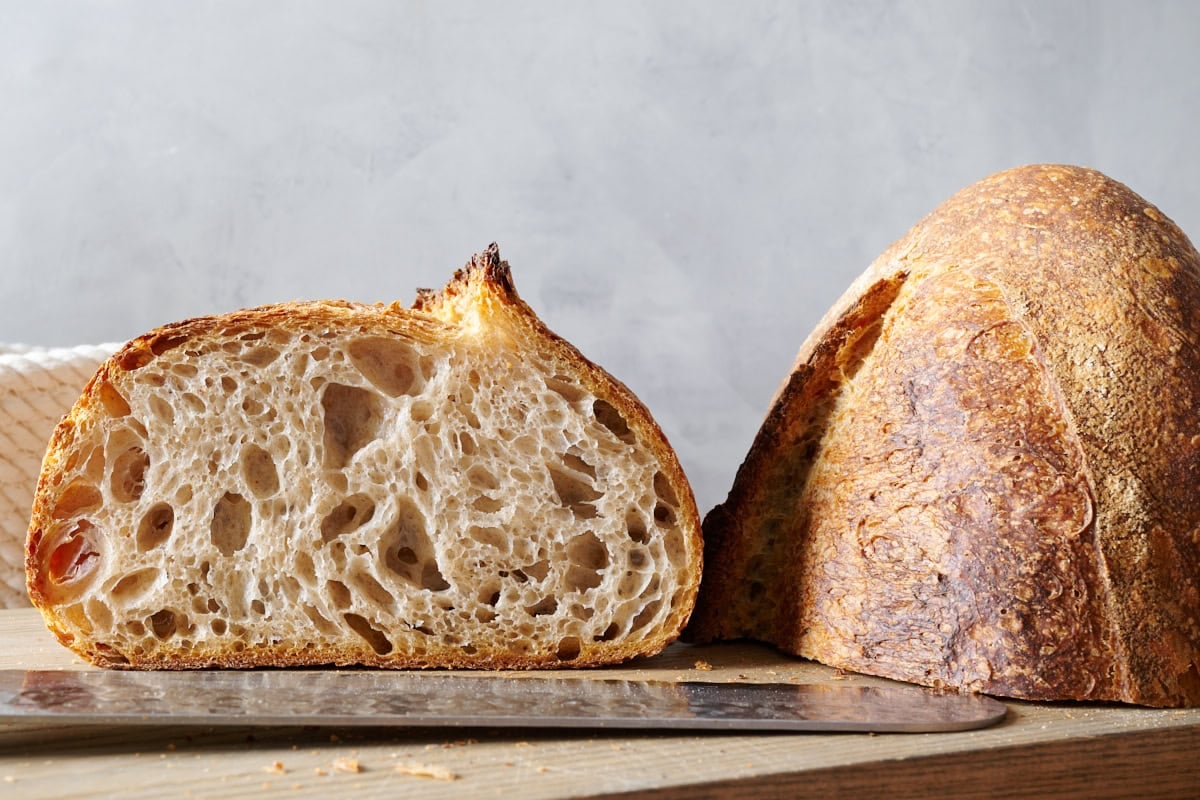
An open-crumb loaf, when sliced, reveals an intricate internal structure composed of numerous, evenly distributed holes. These air pockets are primarily formed during fermentation, as yeast (primarily Saccharomyces cerevisiae) and various bacteria within the sourdough starter produce carbon dioxide. The gluten in wheat flour, when properly hydrated and developed, forms an elastic, extensible network. This network acts like a balloon, trapping the carbon dioxide gas. During the initial stages of baking, known as oven spring, the trapped gas rapidly expands due to the intense heat, further inflating these pockets and setting the bread’s characteristic airy texture.
It is imperative to clarify the objective: the aim is not bread riddled with gaping holes so vast that sandwich fillings plunge through, but rather a consistently light and airy texture throughout the loaf. An appropriately open crumb signifies a tender, airy mouthfeel, reflecting a delicate balance of internal strength and extensibility.
Distinguishing True Open Crumb from Underproofing
A common misconception, particularly among novice bakers, is mistaking an underproofed loaf for one with a desirable open crumb. At first glance, an underproofed loaf might exhibit large holes, creating the illusion of success. However, closer inspection often reveals inconsistencies: oversized, erratic holes frequently coexist with denser, tighter areas. This typically indicates insufficient fermentation, where the gluten structure has not fully relaxed and expanded to evenly distribute gas throughout the dough. The loaf often displays an excessive upward rise and an uncontrolled oven spring, with the scored surface breaking open erratically, rather than blooming gracefully.
Underproofing (and overproofing) is an inherent challenge in sourdough baking, demanding the development of "baker’s intuition" – an intuitive understanding of the dough’s readiness through repeated observation and practice. Key indicators of an underproofed loaf masquerading as open crumb include:

- An unusually tall loaf with excessive oven spring.
- A dense, tight crumb at the bottom of the loaf or around the edges.
- Large, isolated, irregular holes surrounded by denser, often gummy areas, sometimes described as "lava flow" patterns.
- A crust that appears excessively thick or develops blisters unevenly.
The remedy for underproofing is straightforward: extend the fermentation time, either during bulk fermentation or the final proof. This additional time allows the yeast and bacteria to produce more gas and for the gluten network to relax and expand more evenly, resulting in a more uniform crumb, eliminating dense spots, and facilitating a controlled, graceful oven spring.
The Pillars of Open Crumb Sourdough: A Methodical Approach
Achieving an open crumb is a multifaceted endeavor, dependent on a synergy of careful decisions at each stage of the baking process.
1. Strategic Flour Selection: The Blueprint of Structure
Flour stands as arguably the most critical determinant for an open crumb. Even with perfect technique, suboptimal flour will limit the dough’s capacity to form and retain large air pockets. The general consensus among expert bakers is to opt for white flour over whole wheat, specifically choosing one with a higher protein content.

Strong white flour, often referred to as high-protein white flour (typically 11-13% protein), offers greater gluten-forming potential. This increased protein, when properly hydrated and developed, creates a more robust and elastic gluten network. This strong network can stretch and expand significantly with the gases produced during fermentation without tearing, akin to a high-quality balloon inflating to a large size without bursting. Such flour provides a wider margin for error and an enhanced capacity for developing expansive air pockets.
However, there is a limit. Flour with an excessively high protein content (above 13%) can result in an open crumb but often leads to a bread with a chewy, almost gummy texture. The ideal range for white flour typically falls between 11% and 13% protein. Additionally, high-extraction flours, such as Type 85, can yield excellent results, providing both an open crumb and superior flavor, provided they are adequately hydrated.
The inclusion of whole wheat flour introduces complexities. While high in protein, the presence of bran particles acts as microscopic razor blades, severing gluten strands and inhibiting the formation of a strong, continuous network. Consequently, increasing the proportion of whole wheat flour invariably makes achieving a significantly open crumb more challenging. This, however, is often a worthwhile trade-off, as whole wheat contributes immensely to flavor and nutritional value. Bakers must adjust their expectations: a loaf with 50% whole wheat flour will naturally be denser and less airy than an all-white flour counterpart, a perfectly acceptable outcome that reflects the unique characteristics of the grain.
2. Cultivating a Potent Sourdough Starter: The Engine of Aeration
Vigorous fermentation, the cornerstone of an open crumb, begins with a healthy, active sourdough starter. Regular, consistent feeding (e.g., twice daily, maintained between 74°F and 78°F / 23-25°C) ensures a robust microbial population capable of ample leavening.

Crucially, the starter must be utilized at its peak ripeness. For a liquid starter, this means observing specific indicators: it should have noticeably risen (at least doubled in volume), exhibit a domed surface with small bubbles, and smell pleasantly yeasty and subtly acidic. Catching the starter at this precise moment, just as it begins to turn, is vital. Allowing it to over-ferment leads to an accumulation of active protease enzymes. These enzymes, while beneficial in moderation for gluten extensibility, will, if excessive, continue to break down the gluten structure throughout bulk fermentation, ultimately weakening the dough and resulting in a tighter crumb. Therefore, for an open crumb, using sourdough starter when it just turns ripe, before it becomes overly acidic, is paramount.
3. Strategic Hydration: The Catalyst for Extensibility
Higher dough hydration generally correlates with an increased likelihood of achieving an open crumb. More water creates a more extensible dough, allowing it to stretch and expand without tearing, and it generates steam during baking, which actively contributes to opening the crumb structure.
However, high hydration is not a universal mandate and comes with inherent challenges. Wetter doughs are notoriously difficult to handle and require greater skill to develop adequate structural strength. Pushing hydration beyond a flour’s capacity will result in a soupy, structurally weak dough that resists proper development. For many white flour doughs, a hydration range of 70% to 80% is common, though this figure is highly relative to the specific flour and environmental conditions (e.g., arid climates like New Mexico often necessitate slightly higher hydration). The objective is to find the "sweet spot" – sufficient water for a soft, extensible dough that expands freely, yet manageable enough to build and maintain structure. A dough that feels "alive," silky, supple, and responsive, without being excessively slack, indicates optimal hydration. While an open crumb is achievable at 70% hydration, higher hydration (with corresponding skill) often simplifies the process.
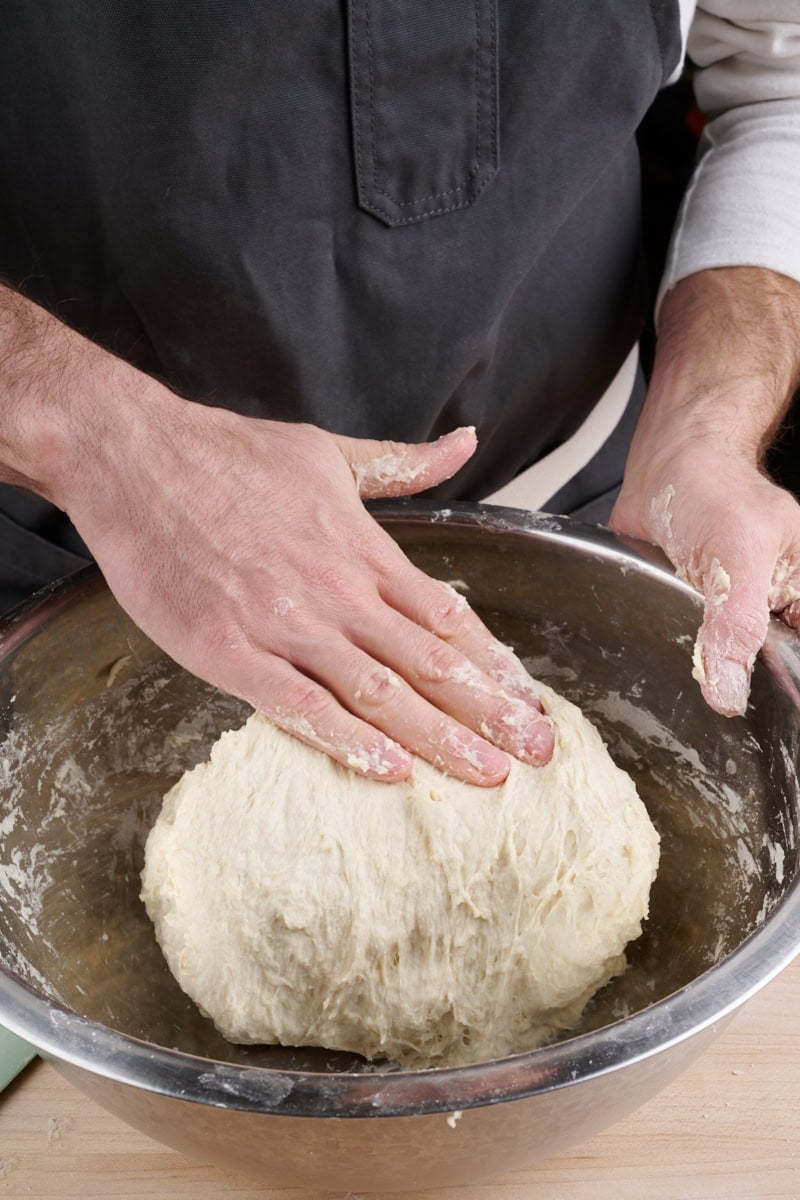
4. Optimized Dough Development: Forging the Gluten Framework

Sufficient gluten development is non-negotiable for an open crumb. The mixing process constructs the gluten network, forming the resilient scaffolding that traps gas and defines the crumb structure. Under-strengthened dough possesses a weak network, prone to collapse, leading to a tight, dense crumb. Conversely, over-mixing can render the dough overly elastic and tight, resisting expansion and resulting in a closed crumb from the opposite extreme.
Many home bakers, especially those relying on hand-mixing, tend to underdevelop their dough. The dough might feel tight but lacks the smooth elasticity and shape-holding capacity of adequately developed gluten. A practical tip is to mix for a few minutes longer than instinctively feels comfortable. Employ repeated stretch and folds, slap and folds, or mechanical mixing at medium speed until the dough transforms into a smooth, elastic mass that holds its shape. At the culmination of mixing, the dough should nearly pass the "windowpane test" – stretching into a thin, translucent membrane without tearing. When in doubt, err on the side of slightly more mixing.
5. Gentle Handling: Preserving the Delicate Gas Network
Throughout the baking process, particularly during preshaping and final shaping, gentle handling is paramount. The dough contains thousands of microscopic gas pockets, each meticulously formed and encapsulated by gluten walls. Aggressive handling – excessive pressing, slapping, or tearing – ruptures these fragile bubbles, causing them to dissipate or fragment into smaller, less uniform pockets. This destructive action directly compromises the potential for an open crumb, leading instead to a tighter, more uniform interior. The delicate structure painstakingly built during bulk fermentation must be preserved, making a light touch during shaping essential.
6. The Batard Advantage: Shape and Crumb Architecture

Experience suggests that an oval-shaped batard frequently yields a more open interior compared to a round boule. This phenomenon can be attributed to two primary factors. Firstly, batard shaping generally requires less compressive force. Shaping a boule often involves significant tucking and tensioning around the entire dough, which can inadvertently compress nascent gas pockets. Batard shaping, involving a more linear rolling motion into a cylinder, is inherently gentler, better preserving the airy structure developed during bulk fermentation.
Secondly, the geometry of the loaf influences heat penetration and oven spring. A batard’s thinner, elongated profile allows oven heat to permeate the dough more rapidly and uniformly. This expedited heat transfer contributes to a more vigorous and even expansion of gas, promoting a more open crumb. This principle is even more pronounced in slender forms like baguettes, which, despite their modest size, often exhibit dramatic, irregular open crumbs due to their high surface area to volume ratio and efficient heat transfer. While an open crumb is certainly achievable with a boule, struggling bakers might find the batard shape a valuable adjustment.
7. Precision Proofing: The Critical Final Stage
The final proof is the culmination of all prior efforts, where fermentation transforms the dough from dense to light, establishing the ultimate crumb structure. This stage demands precision, aiming for a narrow window where the dough has risen approximately 75% to 80% of its potential height. This deliberate under-proofing ensures a reserve of strength, allowing the dough to achieve its final expansion (oven spring) in the intense heat of the oven, which is crucial for opening the crumb.
Over-proofing, conversely, leads to the breakdown of the gluten network as protease enzymes, active throughout fermentation, continue to weaken the dough’s structure. The dough loses its capacity to trap gas, resulting in a sluggish oven spring and a dense, tight interior, despite potentially excellent flavor.
A sufficiently proofed dough should feel "alive" – puffy, light, and yielding without feeling weak. The "poke test" is an invaluable diagnostic tool: a gentle indentation with a floured finger should slowly spring back. If it springs back immediately, the dough is underproofed. If the indentation remains completely, it is overproofed. Observing the dough’s behavior and developing this intuitive feel is key to consistent success.
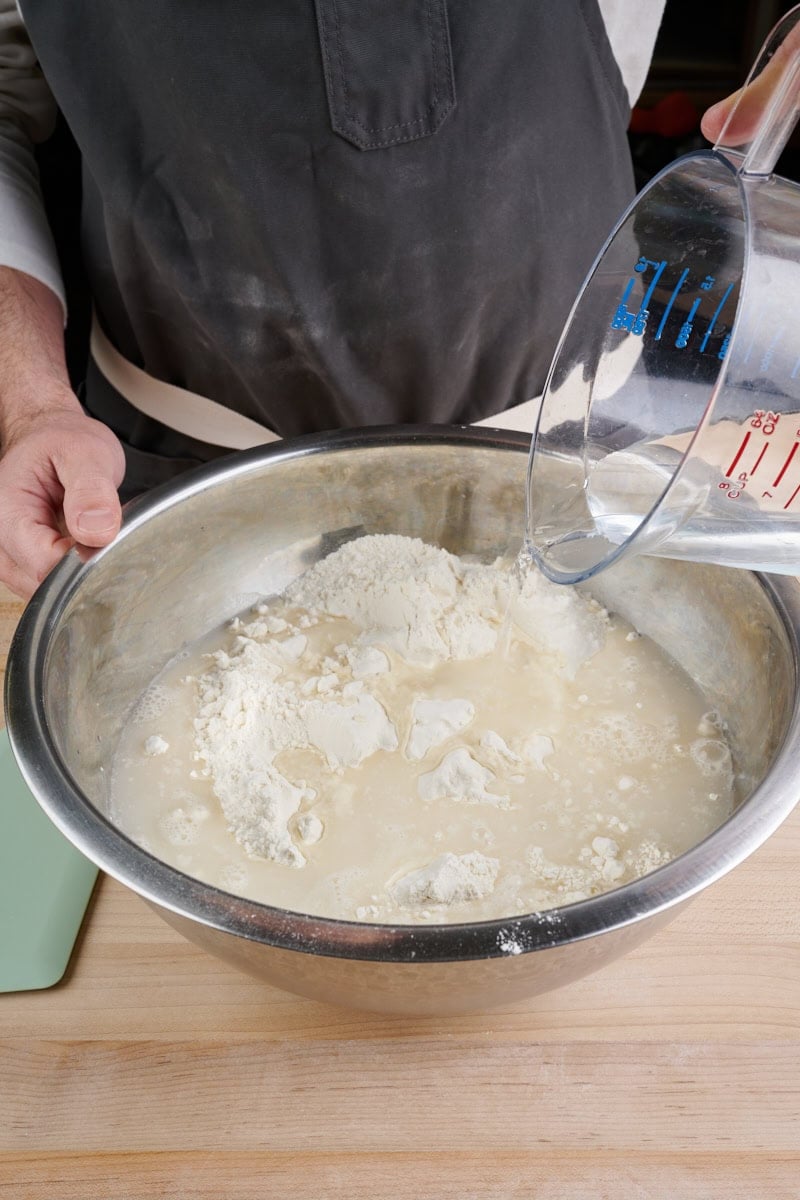
8. The Autolyse Technique: Enhancing Extensibility
The autolyse technique, involving the initial mixing of flour and water followed by a rest period before adding salt and starter/levain, can significantly boost dough extensibility. During this rest, naturally occurring enzymes in the flour (proteases and amylases) begin to gently break down protein and starch bonds. This enzymatic action makes the dough more pliable, less resistant, and more extensible, thereby increasing its capacity to expand freely during fermentation and baking.
Autolyse is particularly beneficial when working with high-protein white flours, which often exhibit considerable elasticity. The rest period "tames" the flour’s natural resistance, allowing the dough to stretch more readily to accommodate gas bubbles without tearing. Even a short autolyse of 30 minutes to an hour can shift the dough’s balance, yielding a dough that is both strong and supple, a desirable characteristic for an open crumb.
Putting It All Together: A Holistic Approach to Baking
After decades of dedicated baking, it becomes clear that achieving an open crumb in sourdough is not the result of a singular "magic trick." Rather, it is the synergistic outcome of numerous deliberate choices and meticulous execution: intelligent flour selection, precise starter timing, optimized hydration, thorough dough development, gentle handling, appropriate shaping, and critical proofing. Each step is interconnected, influencing the next, and a deep understanding of these relationships is fundamental to mastering the craft.
Experimentation is key. Vary hydration levels with the same flour, use the starter at different stages of ripeness, practice gentle versus slightly firmer shaping, and diligently record observations in baking notes. Trusting what the dough communicates through touch, sight, and feel is paramount. While flavor remains the ultimate priority, texture undeniably enhances the overall experience. A well-aerated crumb elevates every bite, whether buttered, sandwich-bound, or savored on its own. However, the ideal level of aeration is subjective, and a tighter crumb is equally valid and appropriate for certain bread styles or personal preferences.
The journey of baking sourdough is one of continuous learning. Delicious bread manifests in myriad forms; a dense, rustic whole-grain loaf can be as profoundly satisfying as an airy, open-crumbed batard, sometimes even more so. The ultimate goal transcends mere aesthetic perfection or social media validation; it is about crafting bread that brings joy in its creation and delight in its consumption. The bread itself is the greatest teacher.
Frequently Asked Questions (FAQs) on Open Crumb Bread
How can I intentionally avoid an open crumb in my bread?
Not every bread style benefits from a very open crumb, and personal preference often dictates a tighter structure. To achieve a less open crumb, a gentle degas of the bread dough during shaping is highly effective. Before the final shaping, use a flat hand to gently pat the dough down from top to bottom, evenly flattening it. This action redistributes the gases throughout the dough, breaking up larger bubbles into smaller, more uniform ones, resulting in a tighter, more consistent crumb with fewer large holes. Additionally, using lower hydration and flours with lower protein content can contribute to a denser interior.

My bread has a nice open crumb, but it’s gummy or tough. Why?
A gummy or tough open crumb can stem from several factors. Primarily, it can be a result of using flour that is excessively strong, meaning it has a protein percentage that is too high. While high protein aids in creating an open structure, flour above 13-14% protein can often lead to a rubbery, overly chewy mouthfeel. Other contributing factors include:
- Underbaking: If the internal temperature of the bread does not reach 200-210°F (93-99°C), residual moisture can create a gummy texture, even with an open crumb.
- Insufficient Hydration for the Flour Type: Paradoxically, if a very strong flour is not hydrated sufficiently, its gluten network can become too tight and resistant, leading to a tough crumb despite appearing open.
- Over-fermentation/Over-proofing: While an open crumb often indicates good fermentation, an over-fermented dough can sometimes result in a crumb that looks open but feels weak and gummy due to excessive enzymatic degradation of gluten.
What’s Next?
For those ready to embark on the journey of achieving an exemplary open crumb, "My Best Sourdough Recipe" offers a transformative experience, guiding bakers towards a loaf with a creamy, evenly open crumb that consistently impresses.