The seemingly straightforward process of creating pastrami—curing, seasoning, smoking, and slicing meat—belies a delicate balance where minor missteps can lead to disappointing results. From an overly saline bite to a dry, unyielding texture, a few common issues can derail even the most well-intentioned cooks. This guide delves into the most frequent challenges encountered in pastrami preparation, offering expert analysis and actionable solutions to elevate your next batch from flawed to fantastic.
The Salty Truth: Addressing Overly Salty Pastrami
One of the most frequently cited reasons individuals express a dislike for pastrami is its potential to be excessively salty. This characteristic, while a hallmark of the curing process, can easily tip from pleasantly briny to unpalatably so if not managed with precision.
Why It Happens: The Nuances of Curing
The primary culprit behind overly salty pastrami lies in the curing process, specifically the brine or rub used. The goal of curing is to draw moisture out of the meat while infusing it with salt, nitrates (for preservation and color), and flavorings.
- Brine Concentration: If the salt concentration in the curing brine is too high, or if the meat is left to cure for an extended period, it will absorb an excessive amount of sodium. This is exacerbated if the brine is not properly formulated to account for the meat’s weight and density.
- Rub Application: For dry-cured pastrami, an uneven or overly generous application of the salt-heavy rub can lead to localized pockets of intense saltiness.
- Inadequate Rinsing/Soaking: After the curing period, it is crucial to rinse the meat thoroughly and, in many cases, soak it in fresh water to draw out excess surface salt. Skipping or inadequately performing this step will lock in the excessive saltiness.
- Curing Time: Deviating from recommended curing times, whether over or under, can impact salt absorption. While under-curing might lead to safety concerns, over-curing directly results in a saltier product.
How to Fix It: Salvaging and Prevention
Addressing overly salty pastrami requires a two-pronged approach: immediate mitigation and preventative measures for future cooks.
- Immediate Mitigation (Post-Cure, Pre-Smoke): If the pastrami is already cured and you detect excessive saltiness before smoking, a period of soaking in fresh, cold water can help. Submerge the meat for several hours, changing the water every hour or two. This will draw out some of the surface salt. However, this is a partial solution and may affect the texture and flavor profile if done too aggressively.
- Serving Adjustments: When serving, consider pairing the pastrami with accompaniments that can balance the saltiness. Creamy coleslaw, mild potato salad, or a simple side of rye bread can provide a neutral counterpoint. Offering dipping sauces with a touch of sweetness or acidity can also help.
- Preventative Measures (Future Cooks):
- Precise Measurement: Always use a reliable scale to measure salt and other curing ingredients. Recipes should be followed meticulously, especially concerning salt percentages.
- Brine Hydrometer: For wet cures, a brine hydrometer can be an invaluable tool to ensure the correct salt concentration.
- Rinse and Soak Protocol: Establish a consistent and thorough rinsing and soaking protocol after the curing period. Taste a small sliver of the meat after soaking to gauge salt levels before proceeding to smoking.
- Curing Time Adherence: Stick to the recommended curing times for the specific cut and thickness of meat you are using.
The Challenge of Dryness and Toughness in Pastrami
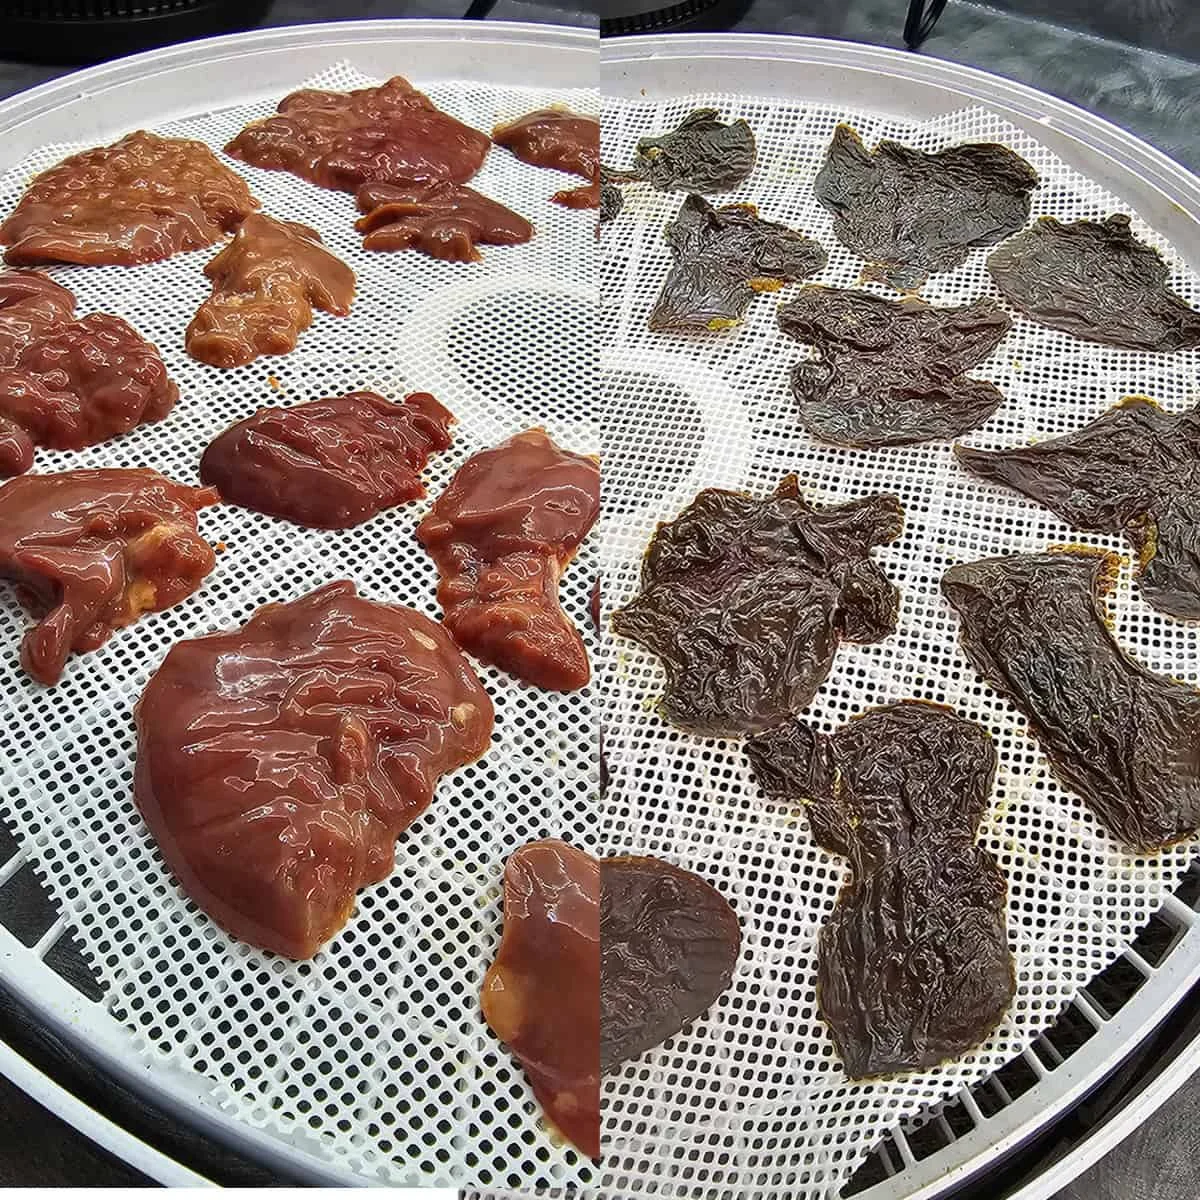
Pastrami, most commonly prepared from beef brisket, is a cut of meat that demands careful handling during the smoking process. Its inherent toughness, if not cooked properly, can lead to a dry and unappealing final product.
Why It Happens: The Science of Toughness
The primary reasons pastrami can end up dry or tough are related to the muscle structure of brisket and the effects of heat and moisture loss during cooking.
- Brisket’s Muscle Composition: Brisket is a well-exercised muscle, rich in connective tissues like collagen. While collagen is desirable as it breaks down into gelatin during slow cooking, providing moisture and tenderness, it requires specific temperatures and time to achieve this transformation.
- Insufficient Cooking Time/Temperature: If the meat is not cooked low and slow for a sufficient duration, the connective tissues will not have enough time to break down. This leaves the muscle fibers tightly bound, resulting in a tough texture.
- Overcooking and Moisture Loss: Conversely, cooking at too high a temperature for too long, or without adequate moisture retention, can cause the muscle fibers to contract excessively and squeeze out their natural juices, leading to dryness.
- Lack of Resting: Failing to allow the pastrami to rest properly after cooking is a critical error. During resting, the muscle fibers relax and reabsorb the juices that were pushed to the center during cooking. Skipping this step means those precious juices escape upon slicing.
- Meat Selection: While less common as a cause of dryness, starting with a very lean cut of brisket (a "lean" or "flat" cut with minimal fat cap) can make it more susceptible to drying out, as the fat renders and bastes the meat during cooking.
How to Fix It: Restoring Moisture and Tenderness
Addressing dry or tough pastrami involves both immediate actions and careful planning for future preparations.
- Salvaging Dry/Tough Pastrami:
- Steaming/Braising: The most effective way to rehydrate and tenderize already cooked dry or tough pastrami is through gentle steaming or braising. Wrap the meat tightly in foil and place it in a steamer or a shallow pan with a small amount of liquid (beef broth, water, or even beer) in a low-temperature oven (around 250-275°F or 120-135°C). This process allows the connective tissues to continue breaking down and reintroduces moisture.
- Thin Slicing: Slicing the meat as thinly as possible, especially against the grain, can help to disguise some of the toughness by shortening the muscle fibers.
- Preventative Measures:
- Choose the Right Cut: Opt for a "packer" brisket, which includes both the "flat" and the "point" muscles. The point is generally fattier and more marbled, contributing to moisture and tenderness. Aim for a brisket with a good fat cap of at least 1/4 inch.
- Low and Slow Cooking: Maintain a consistent low cooking temperature, typically between 225°F and 275°F (107°C to 135°C).
- Internal Temperature Target: Cook the brisket until it reaches an internal temperature of around 195-205°F (90-96°C). However, temperature is just a guide; the meat should feel probe-tender, meaning a thermometer or skewer slides into the meat with very little resistance.
- The Stall: Be prepared for "the stall," a period where the meat’s internal temperature plateaus due to evaporative cooling. This is normal and part of the process.
- Moisture Management: Consider spritzing the meat with liquid (water, apple cider vinegar, beef broth) every 45-60 minutes during the smoking process to keep the surface moist and aid in smoke adhesion.
- The Wrap (Texas Crutch): Once the brisket hits the stall, or when the bark has formed to your liking, wrapping it tightly in butcher paper or foil can help push through the stall and retain moisture.
- Extended Resting Period: This is non-negotiable. After cooking, let the brisket rest, still wrapped, for at least 1-4 hours (or even longer) in a warm place, such as a cooler or a low oven (around 150°F or 65°C). This allows the juices to redistribute.
The Enigmatic Bark: Achieving a Satisfying Crust
The characteristic crust, or "bark," of pastrami is a highly prized element, formed by the blend of spices, smoke, and the Maillard reaction during cooking. A soft or underdeveloped bark can be a significant disappointment.
Why It Happens: Bark’s Building Blocks
The development of a robust pastrami bark relies on several factors, primarily the interaction of seasonings, smoke, and surface moisture during the cooking process.
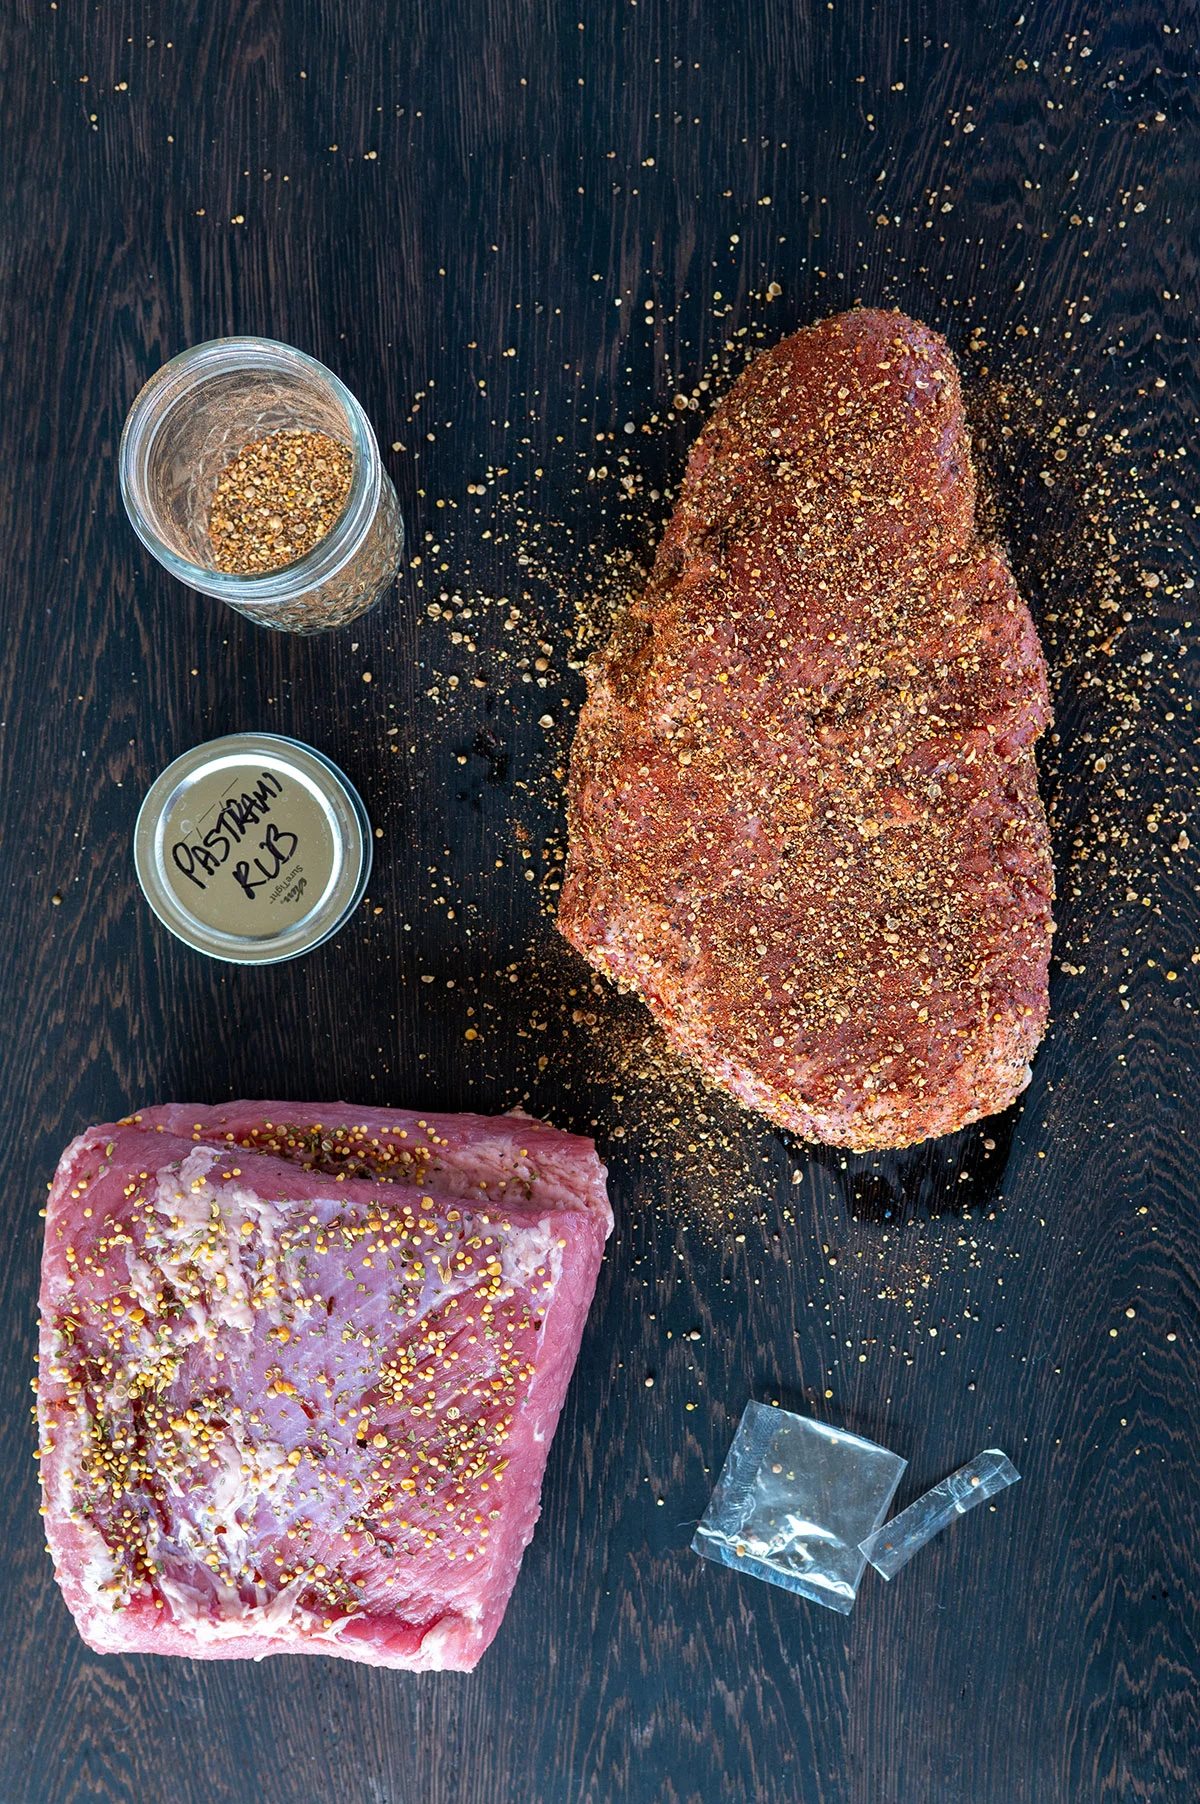
- Insufficient Spices: The classic pastrami bark is built upon a generous coating of black pepper, coriander, and sometimes mustard seeds. If the spice rub is too sparse or lacks these key ingredients, the bark will be underdeveloped.
- Lack of Surface Moisture: Smoke particles adhere to the surface of the meat by sticking to the moisture present. If the meat dries out too quickly during the initial stages of smoking, the spices and smoke will not adhere effectively.
- Low Smoker Temperature: While low temperatures are crucial for tenderizing the meat, excessively low temperatures in the early stages of smoking might not generate enough heat to properly set the spices and initiate the Maillard reaction that forms the bark.
- Early Wrapping: Wrapping the meat too early in the smoking process, before a satisfactory bark has formed, will steam the exterior and prevent further development of the crust.
- Inadequate Smoke Penetration: A weak smoke output from the smoker means less particulate matter to adhere to the meat’s surface, resulting in a less pronounced bark.
How to Fix It: Cultivating the Perfect Crust
Achieving a superior bark involves understanding its formation and applying the right techniques.
- Generous Spice Rub: Apply the spice rub liberally to all surfaces of the meat. Ensure the rub contains a significant proportion of coarse black pepper and coriander seeds, which are traditional and effective.
- Initial Dry Phase: Allow the meat to smoke uncovered for the initial few hours of cooking. This "dry phase" is crucial for allowing the surface to dry out slightly, creating a tacky surface for the spices and smoke to adhere to.
- Optimal Smoker Temperature: Maintain a smoker temperature in the range of 225-275°F (107-135°C). This temperature is high enough to promote bark formation without drying out the meat too quickly.
- Strategic Wrapping: Wait until a good bark has begun to form before considering wrapping the meat, typically after 4-6 hours of smoking, or when the internal temperature reaches around 160-165°F (71-74°C).
- Smoke Management: Ensure your smoker is producing a consistent, clean smoke. A "thin blue smoke" is ideal, as it imparts flavor without the acridity that can result from "white smoke."
- Post-Cook Bark Enhancement: If the bark is still not as pronounced as desired after cooking, you can sometimes enhance it by briefly broiling the finished product or by searing slices in a hot cast-iron skillet. However, this should be a last resort, as it can affect the overall texture.
The Elusive Smoke Flavor: When Pastrami Isn’t Smoky Enough
The defining characteristic that distinguishes pastrami from its corned beef cousin is the smoky infusion. If your pastrami lacks this essential element, it indicates a fundamental issue with the smoking process itself, rather than a recipe flaw.

Why It Happens: The Mechanics of Smoke Infusion
The absence of sufficient smoky flavor points to problems with how the smoker is operating or how the meat is exposed to smoke.
- Insufficient Wood/Fuel: The most direct cause is simply not using enough smoking wood or charcoal. This could be due to an inadequate amount of wood chunks or chips, or a fire that is burning too hot and fast, consuming the fuel before it can adequately produce smoke.
- Poor Airflow/Ventilation: Smokers require a balance of airflow. If the vents are too closed, the fire might smolder inefficiently, producing little smoke. Conversely, if the vents are too open, the fire burns too hot, consuming the fuel quickly and producing less smoke.
- Short Smoking Times: If the total smoking time is too brief, the meat will not have enough opportunity to absorb smoke flavor.
- Smoker Design/Efficiency: Some smokers are inherently more efficient at imparting smoke flavor than others. Older or poorly maintained smokers might not be effectively generating or circulating smoke.
- Using the Wrong Type of Wood: While not an issue of "not enough" smoke, using very mild woods might result in a less pronounced smoky flavor than desired. Hardwoods like oak, hickory, or mesquite are typically favored for their robust smoke profiles.
How to Fix It: Boosting Smoke Infusion
Increasing the smoky character of pastrami requires a focus on the mechanics of smoking.
- Ample Smoking Wood: Ensure you are using a sufficient quantity of your chosen smoking wood. For longer cooks like brisket, this means adding wood periodically throughout the entire smoking duration.
- Maintain a Clean Fire: Aim for a clean-burning fire that produces "thin blue smoke." Avoid thick, white, acrid smoke, which imparts an unpleasant flavor. Adjust vents and fuel accordingly.
- Optimize Airflow: Learn the ventilation system of your specific smoker. A good rule of thumb is to have the intake vents open enough to maintain the desired temperature and the exhaust vent partially open to allow for proper circulation.
- Extended Smoking Time: Allow adequate time for smoking. Brisket can take 8-12 hours or more, depending on size and temperature. Longer smoking periods equate to more smoke absorption.
- Consider a Smoker Tube or Maze: For smokers that struggle to produce consistent smoke, a smoke tube or maze filled with wood pellets can provide an extended and controlled smoke output.
- Wood Choice: Experiment with different types of hardwood. Oak, hickory, and mesquite are popular for their strong smoke flavors, while fruitwoods like apple or cherry offer a milder, sweeter smoke.
The Flip Side: When Pastrami is Too Smoky
While under-smoked pastrami is a common concern, it is also possible to impart too much smoke, leading to an overpowering and bitter flavor profile.
Why It Happens: The Over-Smoke Syndrome
Excessive smoke flavor is typically the result of prolonged exposure to dense, acrid smoke or an imbalance in the smoking process.
- Prolonged Exposure: The longer meat is exposed to smoke, the more flavor it will absorb. If the smoking period extends far beyond what is necessary for tenderness and the desired bark, the smoke flavor can become dominant.
- "Dirty" or Acrid Smoke: Burning wood at too high a temperature or smoldering damp wood can produce "dirty" smoke. This smoke is heavy, white, and contains bitter compounds that will be absorbed by the meat.
- Poor Ventilation: Inadequate ventilation can cause smoke to "stagnate" around the meat, leading to over-saturation.
- Too Much Wood: Using an excessive amount of wood, especially hardwoods known for their strong smoke, can quickly lead to an overwhelming flavor.
- Low Smoker Temperature (Paradoxically): While high temperatures burn fuel quickly, very low temperatures can sometimes lead to smoldering and inefficient burning, producing more of the bitter, heavy smoke.
How to Fix It: Dialing Back the Smoke
Correcting overly smoky pastrami requires a measured approach to both immediate fixes and preventative strategies.
- Immediate Mitigation (Post-Smoke):
- Resting: A sufficient resting period after smoking can sometimes allow the smoke flavor to mellow slightly.
- Pairing with Mild Sides: Serve the overly smoky pastrami with bland or slightly sweet accompaniments that can help to cut through the intense smoke flavor.
- Preventative Measures:
- Monitor Smoke Quality: Always aim for "thin blue smoke." If you see thick white smoke, adjust your fire management (add more oxygen or use drier wood).
- Balanced Wood Usage: Use smoking wood in moderation. It’s often better to add wood periodically than to overload the smoker at the beginning of the cook.
- Proper Ventilation: Ensure your smoker has adequate airflow to allow for smoke circulation and escape.
- Targeted Smoking Times: Understand that smoke flavor is primarily absorbed in the early stages of smoking. Once a good bark has formed, the primary goal shifts to cooking the meat to tenderness. You may not need to smoke the entire duration.
- Wood Choice: Consider using milder woods like fruitwoods if you are concerned about over-smoking.
The Crumbling Slice: Why Pastrami Falls Apart
Achieving those coveted, clean slices of deli-style pastrami is a testament to proper cooking and preparation. When slices crumble, it signals an issue with the meat’s structure or how it was handled post-cook.
Why It Happens: Structural Integrity Issues
The tendency for pastrami slices to crumble rather than slice cleanly is usually a result of how the meat’s connective tissues have or have not broken down, and how it was sliced.
- Under-cooking: As discussed in the "dry or tough" section, insufficient cooking time means the collagen has not fully rendered into gelatin. The muscle fibers remain tightly bound and lack the cohesive structure needed for clean slicing.
- Incorrect Slicing Against the Grain: Brisket has distinct grain patterns. Slicing with the grain will result in long, stringy, and easily separable muscle fibers, leading to crumbling. Slicing against the grain shortens these fibers, creating a more tender and sliceable product. Identifying the grain direction is crucial.
- Insufficient Resting: A lack of resting time means the meat is still tightly contracted. When sliced immediately after cooking, the juices are not yet redistributed, and the meat is more prone to falling apart.
- Over-rendering of Fat: While fat is crucial for moisture, if the meat is cooked at excessively high temperatures or for too long, the intramuscular fat can render out completely, leaving the muscle fibers unsupported and prone to disintegration.
How to Fix It: Ensuring Sliceability
To achieve perfect pastrami slices, focus on the cooking, resting, and slicing techniques.
- Ensure Proper Cooking: Cook the brisket to the internal temperature and probe-tender stage described earlier (195-205°F or 90-96°C). The meat should yield easily to a probe.
- Crucial Resting Period: This cannot be overstated. A minimum of 1-4 hours of resting is essential. The longer, the better, within reason. Resting allows the muscle fibers to relax and reabsorb moisture, creating a more stable structure.
- Identify the Grain: Before slicing, carefully examine the brisket to determine the direction of the muscle fibers. Brisket often has two distinct grain directions, especially if you are using a packer cut.
- Slice Against the Grain: This is paramount. Use a sharp knife (a long, slicing knife or a sharp chef’s knife) and slice across the muscle fibers. The slices should hold their shape.
- Thin Slicing: For true deli-style pastrami, slices should be very thin. This requires a sharp knife and a steady hand, or ideally, a meat slicer. Thin slicing also makes the meat more forgiving if there are minor structural imperfections.
- Chill Slightly (Optional): Some pitmasters find that slightly chilling the meat after resting but before slicing can firm it up, making it easier to slice thinly. However, avoid refrigerating it for too long, as this can dry it out.
The Curious Case of the Non-Pink Pastrami
The expectation of a distinct pink hue in cured and smoked meats like pastrami is common, often associated with cured sausages and jerky. However, the absence of this pink color does not necessarily indicate a problem.
Why It Happens: The Chemistry of Color
The pink color in cured meats is primarily due to the presence of sodium nitrite (or nitrate, which converts to nitrite). This curing agent reacts with myoglobin, the protein in meat responsible for its red color, to create a stable pink pigment called nitrosomyoglobin.
- Absence or Insufficient Curing Salt: If sodium nitrite or nitrate was not used in the curing brine or rub, the meat will not develop the characteristic pink color. This is often the case when people opt for a "natural" cure using celery powder (a source of naturally occurring nitrates).
- Meat Type and Myoglobin Content: Different cuts and types of meat have varying levels of myoglobin. While beef is rich in myoglobin, the specific cut and even the animal’s diet can influence its concentration.
- Curing Time and Temperature: The reaction between curing agents and myoglobin is temperature-dependent and requires sufficient time. If the meat was not cured long enough, or if the curing temperature was too low, the reaction might be incomplete.
- Cooking Temperature: While nitrosomyoglobin is relatively stable, extremely high cooking temperatures can sometimes cause it to degrade, leading to a fading of the pink color. However, this is less common than issues with the curing process itself.
- Nitrate vs. Nitrite: If using sodium nitrate (which requires a two-step conversion process in the meat to become active nitrite), the pink color might be less pronounced or take longer to develop compared to using sodium nitrite directly.
How to Fix It: Understanding and Managing Color
The "fix" for non-pink pastrami is primarily about understanding the cause and managing expectations, as the color is a byproduct of the curing process.
- Embrace Natural Cures: If you prefer to avoid artificial curing salts, understand that your pastrami will likely have a more natural, brown or greyish interior. The flavor and texture will still be excellent, even without the visual cue of pink.
- Ensure Proper Curing Salt Usage: If you intend to achieve the pink color, ensure you are using a curing salt (like Prague Powder #1 for nitrite) and measuring it accurately according to a reliable recipe. Over-reliance on natural sources like celery powder can lead to inconsistent results.
- Adhere to Curing Protocols: Follow recommended curing times and temperatures. This ensures the curing agents have sufficient opportunity to interact with the meat.
- Focus on Flavor and Texture: Ultimately, the pink color is an aesthetic element. Prioritize achieving the correct flavor, tenderness, and smoky notes, which are the true hallmarks of great pastrami. A well-executed pastrami that is not pink is still a delicious success.
By understanding these common pitfalls and implementing the recommended solutions, home cooks and aspiring pitmasters can significantly improve their pastrami-making endeavors, transforming potential disappointments into delicious successes. The journey to perfect pastrami is one of patience, precision, and a willingness to learn from every cook.