
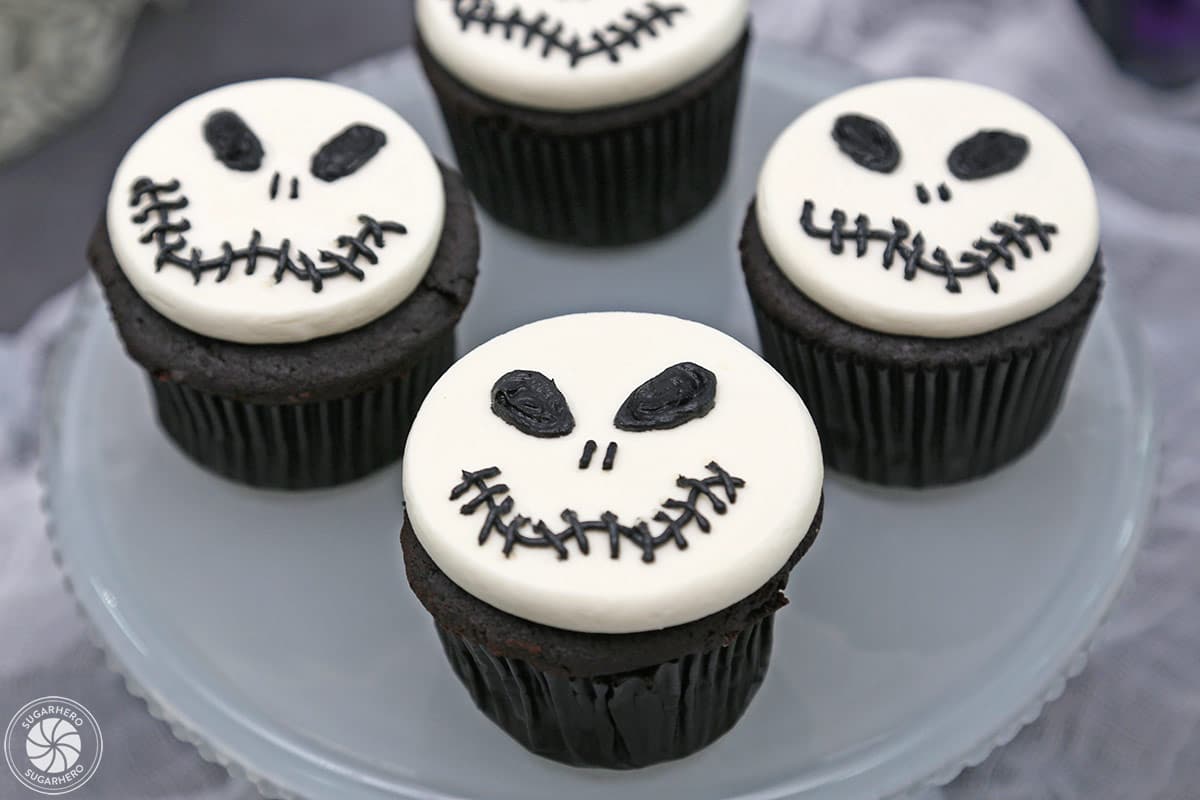
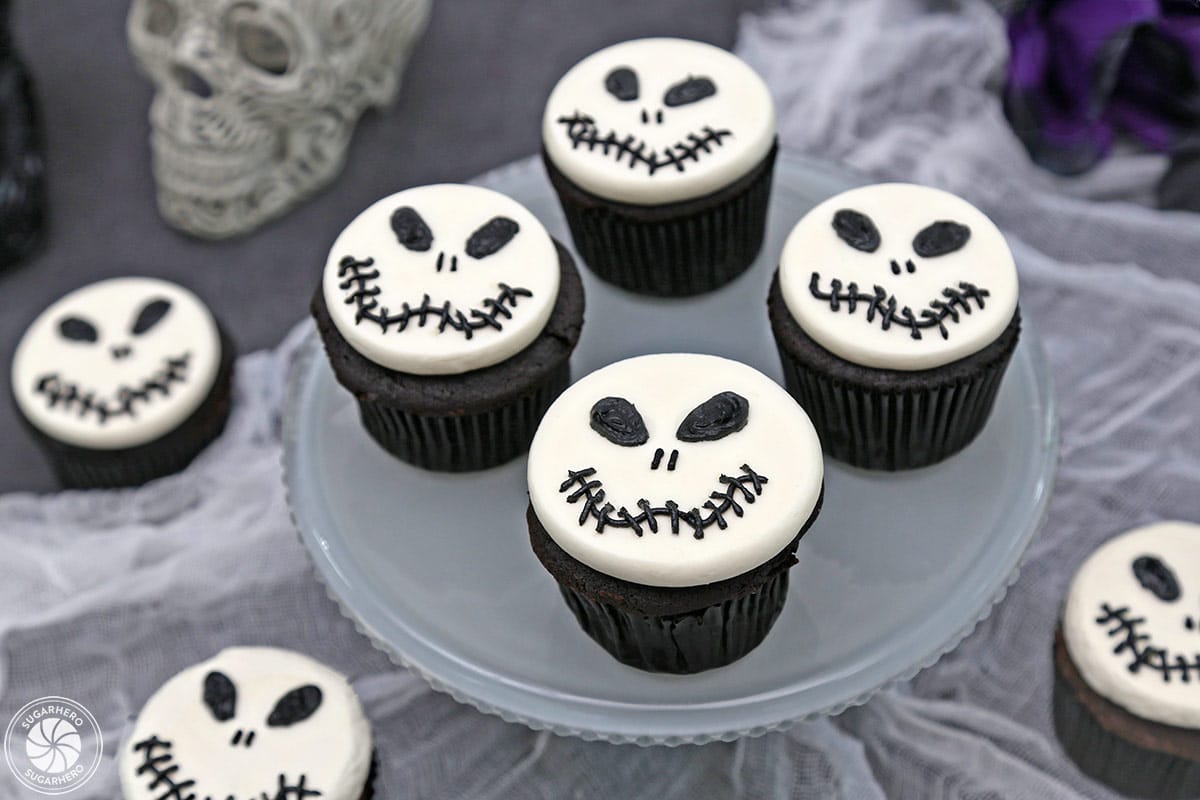
Celebrating spooky season in style just got a little easier with these remarkably simple yet undeniably adorable Skull Cupcakes. This guide will walk you through the process of creating a charmingly creepy skull design using buttercream, perfect for any Halloween gathering or festive treat. The technique, while appearing intricate, is surprisingly straightforward, making it accessible for bakers of all skill levels. These cupcakes offer a delightful blend of festive flair and deliciousness, promising to be a hit among both children and adults.
The inspiration behind these cupcakes draws a clear parallel to iconic Halloween imagery, particularly the universally recognized skull motif, often associated with mystery, the supernatural, and the playful side of the macabre. While the article mentions Jack Skellington-inspired faces, the fundamental design relies on the classic skull shape, a symbol that transcends specific characters and embodies the spirit of Halloween itself. The versatility of this design allows for customization, whether you opt for a more cartoonish or a slightly more stylized interpretation.
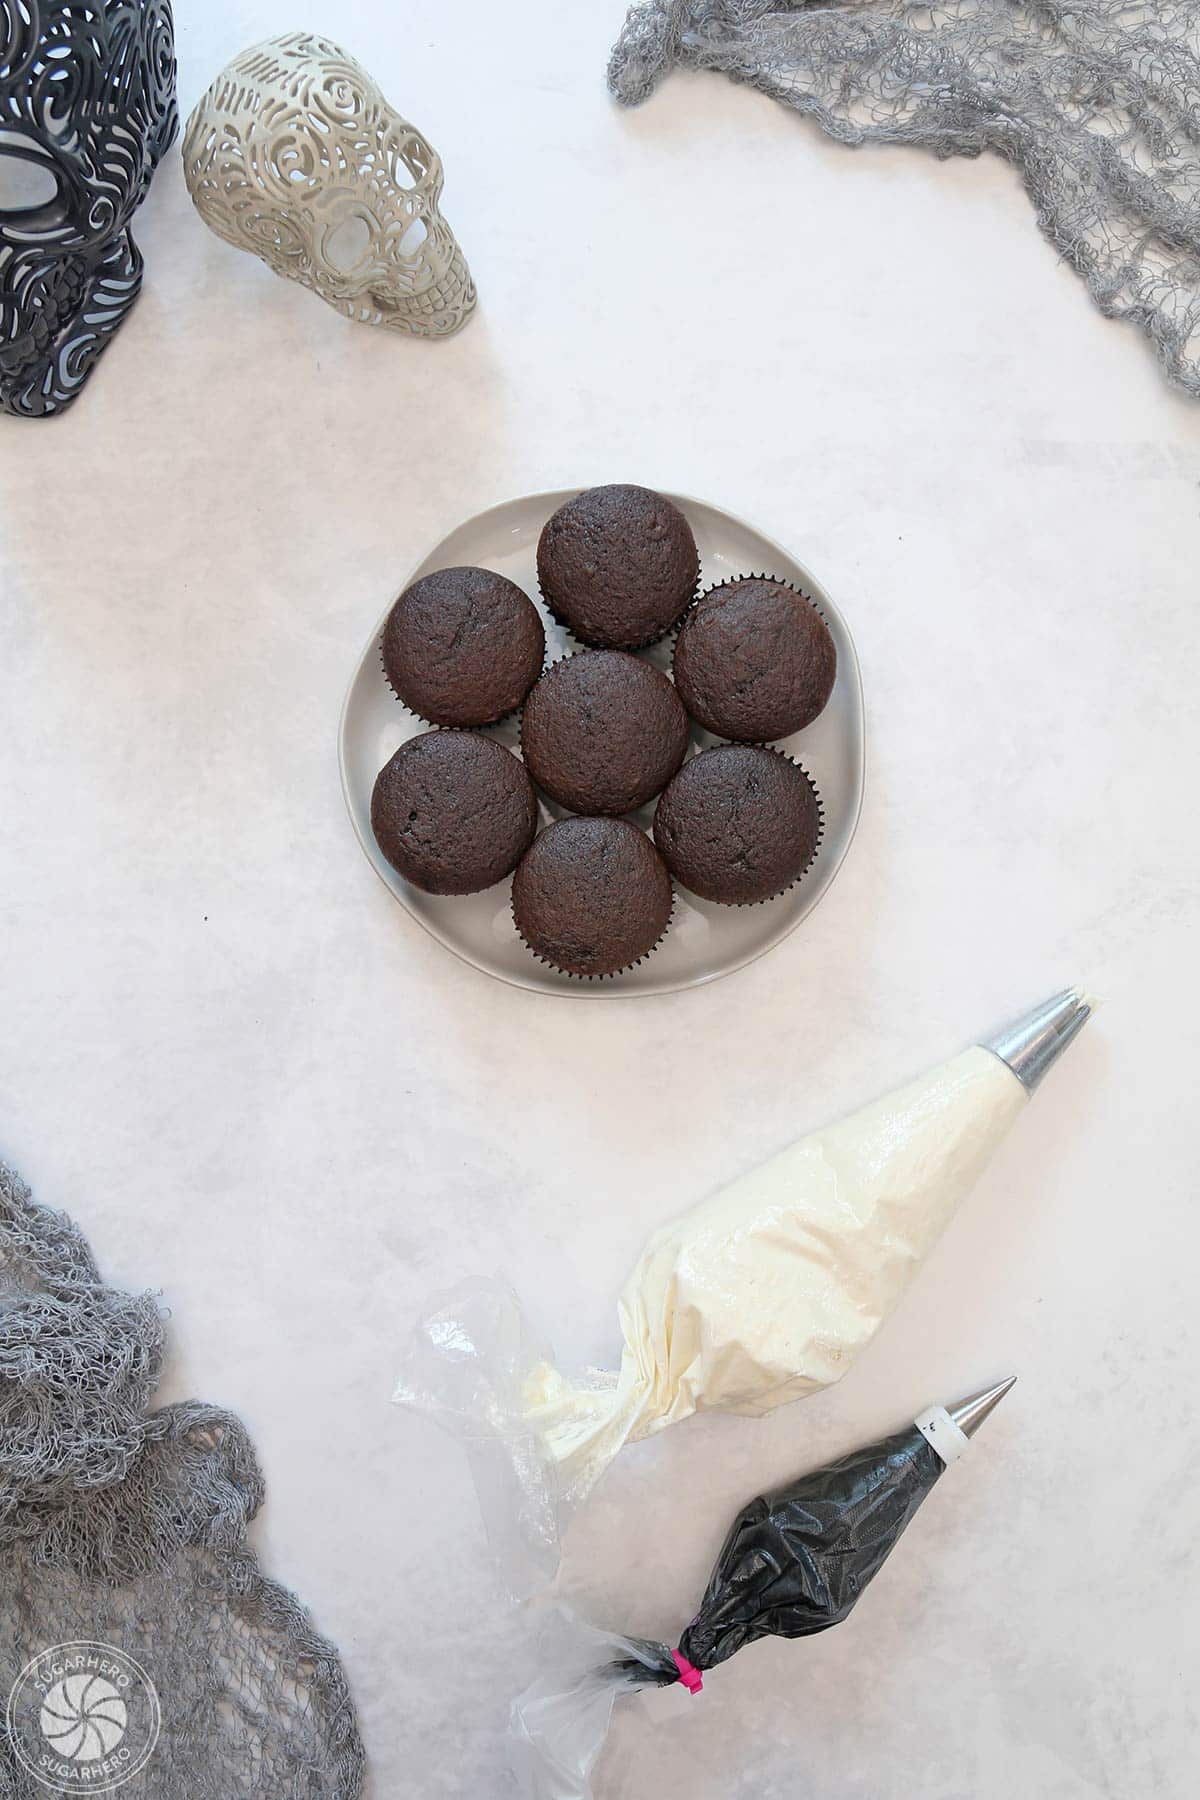
The ease of execution is a key selling point. The recipe emphasizes that achieving this festive look requires minimal specialized ingredients or techniques. At its core, the decoration relies on two key components: baked cupcakes and two distinct colors of buttercream. For those seeking convenience, the article explicitly permits the use of a favorite cake mix as a foundation. However, for bakers who prefer a homemade touch, a comprehensive list of cupcake recipes is available for inspiration, ensuring that the base of the treat is just as satisfying as its decoration.
This article serves as a comprehensive resource, providing not only the essential recipe but also a detailed photo tutorial to guide decorators through each step. The aim is to demystify the process, making it approachable and enjoyable. The resulting treats are not merely desserts but edible art, designed to enhance the Halloween atmosphere and provide a fun, interactive baking experience.
What You’ll Need: Essential Ingredients and Equipment
Crafting these festive Skull Cupcakes requires a surprisingly minimal set of ingredients and tools, making it an accessible project for home bakers. The core elements focus on the cupcakes themselves and the decorative frosting.
Ingredients:
The foundation of these cupcakes can be as simple or as elaborate as you desire. The recipe encourages the use of a favorite cake mix for a quick and easy base, or for those who prefer a from-scratch approach, a variety of homemade cupcake recipes are recommended. The primary decorative elements are:
- Buttercream Frosting: A stable and versatile buttercream is essential for creating the skull design. This typically involves unsalted butter, powdered sugar, vanilla extract, and a small amount of milk or cream to achieve the desired consistency.
- Food Coloring: Two key colors are necessary: a base color for the skull’s face and a contrasting color for the facial features. White or a light cream color is ideal for the skull’s face, providing a stark canvas. Black is the quintessential color for the eyes, nose, and mouth, offering a dramatic and instantly recognizable effect. For those aiming for a true, deep black, specific gel or powdered food colorings are recommended, as liquid colorings can alter the frosting’s consistency and require excessive amounts to achieve the desired shade.
Equipment:
The equipment needed is standard for most baking endeavors, with a few specific items for decorative piping.
- Baking Pans and Liners: Standard cupcake pans and liners are required for baking the cupcakes.
- Piping Bags and Tips: These are crucial for applying the buttercream with precision. A round tip is generally suitable for creating the basic shapes of the skull features, while a larger round tip or a spatula can be used for frosting the cupcakes themselves. If piping bags and tips are unavailable, a heavy-duty resealable plastic bag with a small corner snipped off can serve as a makeshift piping tool.
- Spatula: An offset spatula is useful for spreading the base layer of frosting smoothly over the cupcakes.
- Parchment Paper: This is helpful for creating a flat surface when inverting frosted cupcakes, as detailed in the tutorial.
Recipe and Step-by-Step Decorating Guide
This section outlines the complete recipe for the Skull Cupcakes, followed by a detailed photo tutorial to guide you through the decorating process.
Recipe: Skull Cupcakes
This recipe yields approximately 24 cupcakes.
For the Cupcakes:
- Ingredients for your preferred cupcake recipe (e.g., cake mix and accompanying ingredients, or from-scratch ingredients for a chocolate or vanilla cake).
For the Frosting:
- 1 cup (227g) unsalted butter, softened
- 4 cups (480g) powdered sugar
- 1/4 cup (60ml) milk or heavy cream
- 1 teaspoon vanilla extract
- Black gel food coloring (or black cocoa powder)
- White gel food coloring (optional, for brighter white)
Instructions:
Make the Frosting:
- In a large bowl, beat the softened butter with an electric mixer until creamy and smooth.
- Gradually add the powdered sugar, alternating with the milk or cream, beating until well combined and smooth.
- Add the vanilla extract and continue to beat until the frosting is light and fluffy.
- Divide the frosting into two bowls.
- To one bowl, add black gel food coloring (or black cocoa powder) and mix until a deep, uniform black color is achieved. If using gel coloring, start with a small amount and add more as needed. For a more intense black, consider adding a tablespoon of black cocoa powder to the frosting.
- To the second bowl, add white gel food coloring if a brighter white is desired, and mix until uniform.
Frost the Cupcakes:
- Bake and cool your cupcakes according to your chosen recipe. Ensure they are completely cool before frosting to prevent the frosting from melting.
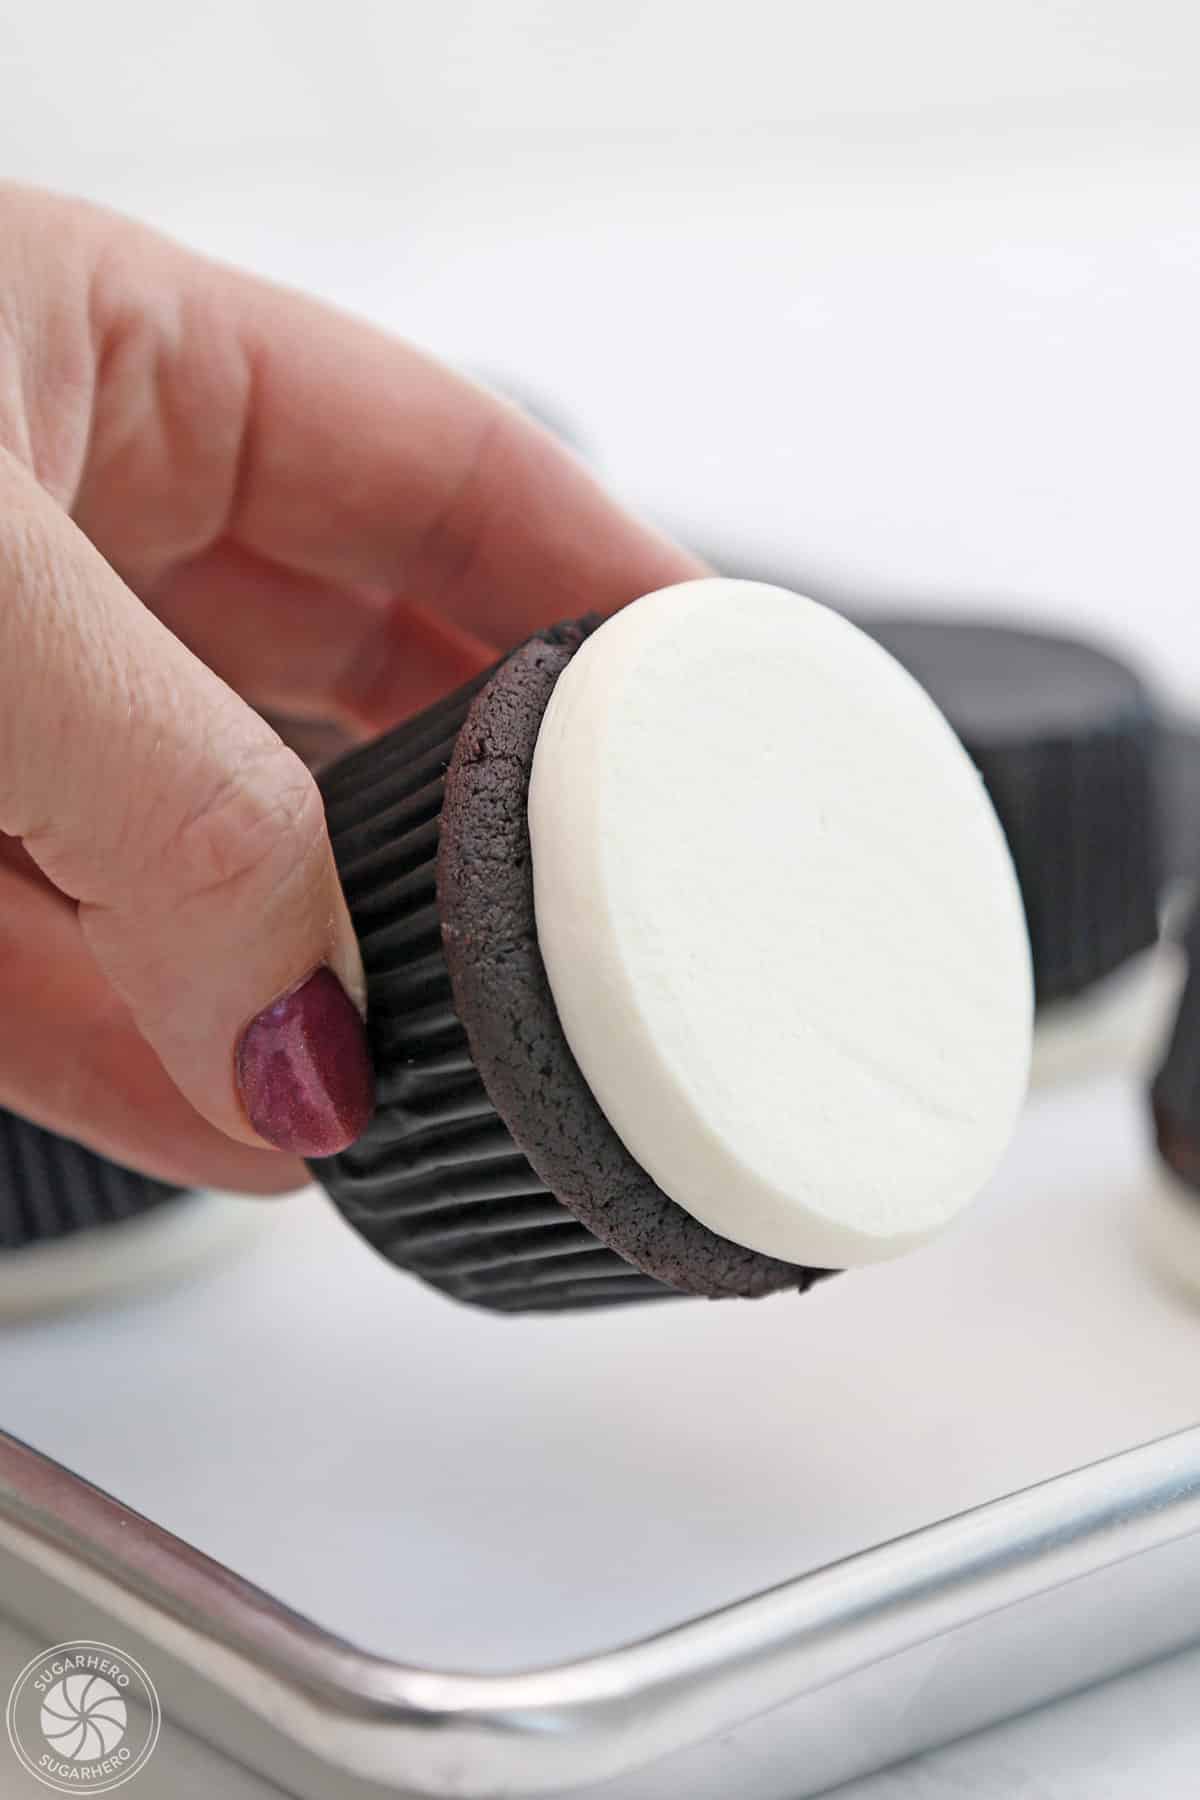
- Using an offset spatula, spread a generous layer of the white buttercream evenly over the top of each cupcake, creating a smooth, flat surface. This will serve as the base for the skull.
Decorate the Cupcakes:
- Prepare your piping bags. Fill one piping bag fitted with a small round tip with the black frosting.
- Eyes: On the white surface of a cupcake, pipe two medium-sized circles for the eyes, placing them slightly apart.
- Nose: Below and between the eyes, pipe a small inverted triangle or two small dots to represent the nose cavity.
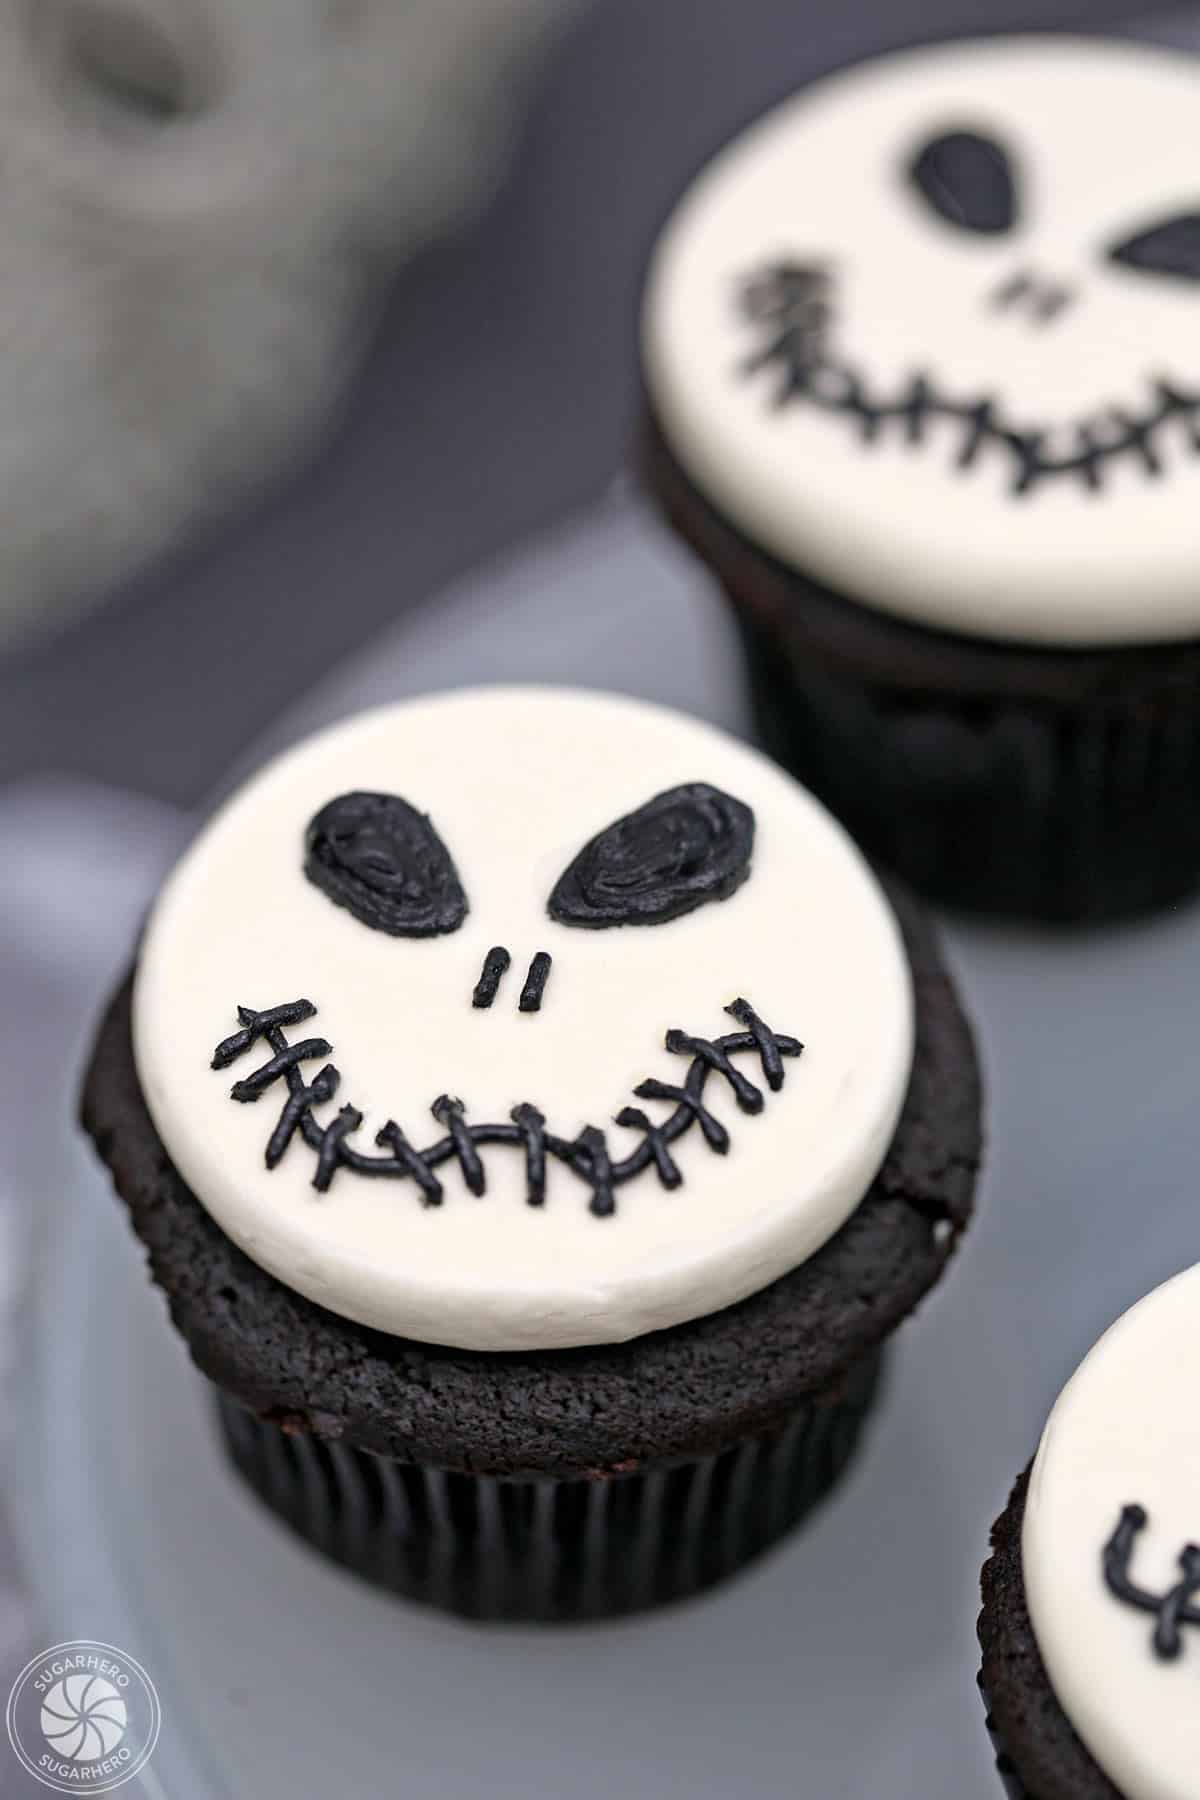
- Mouth: To create a mouth, pipe a thin, curved line below the nose, or a series of short, vertical lines to mimic teeth.
- Repeat these steps for all remaining cupcakes. For a variation, you can pipe a single, larger circle for the forehead and then add the eye and nose details within this area.
Photo Tutorial: How to Make Skull Cupcakes
The following steps, accompanied by visual cues, further illustrate the decorating process.
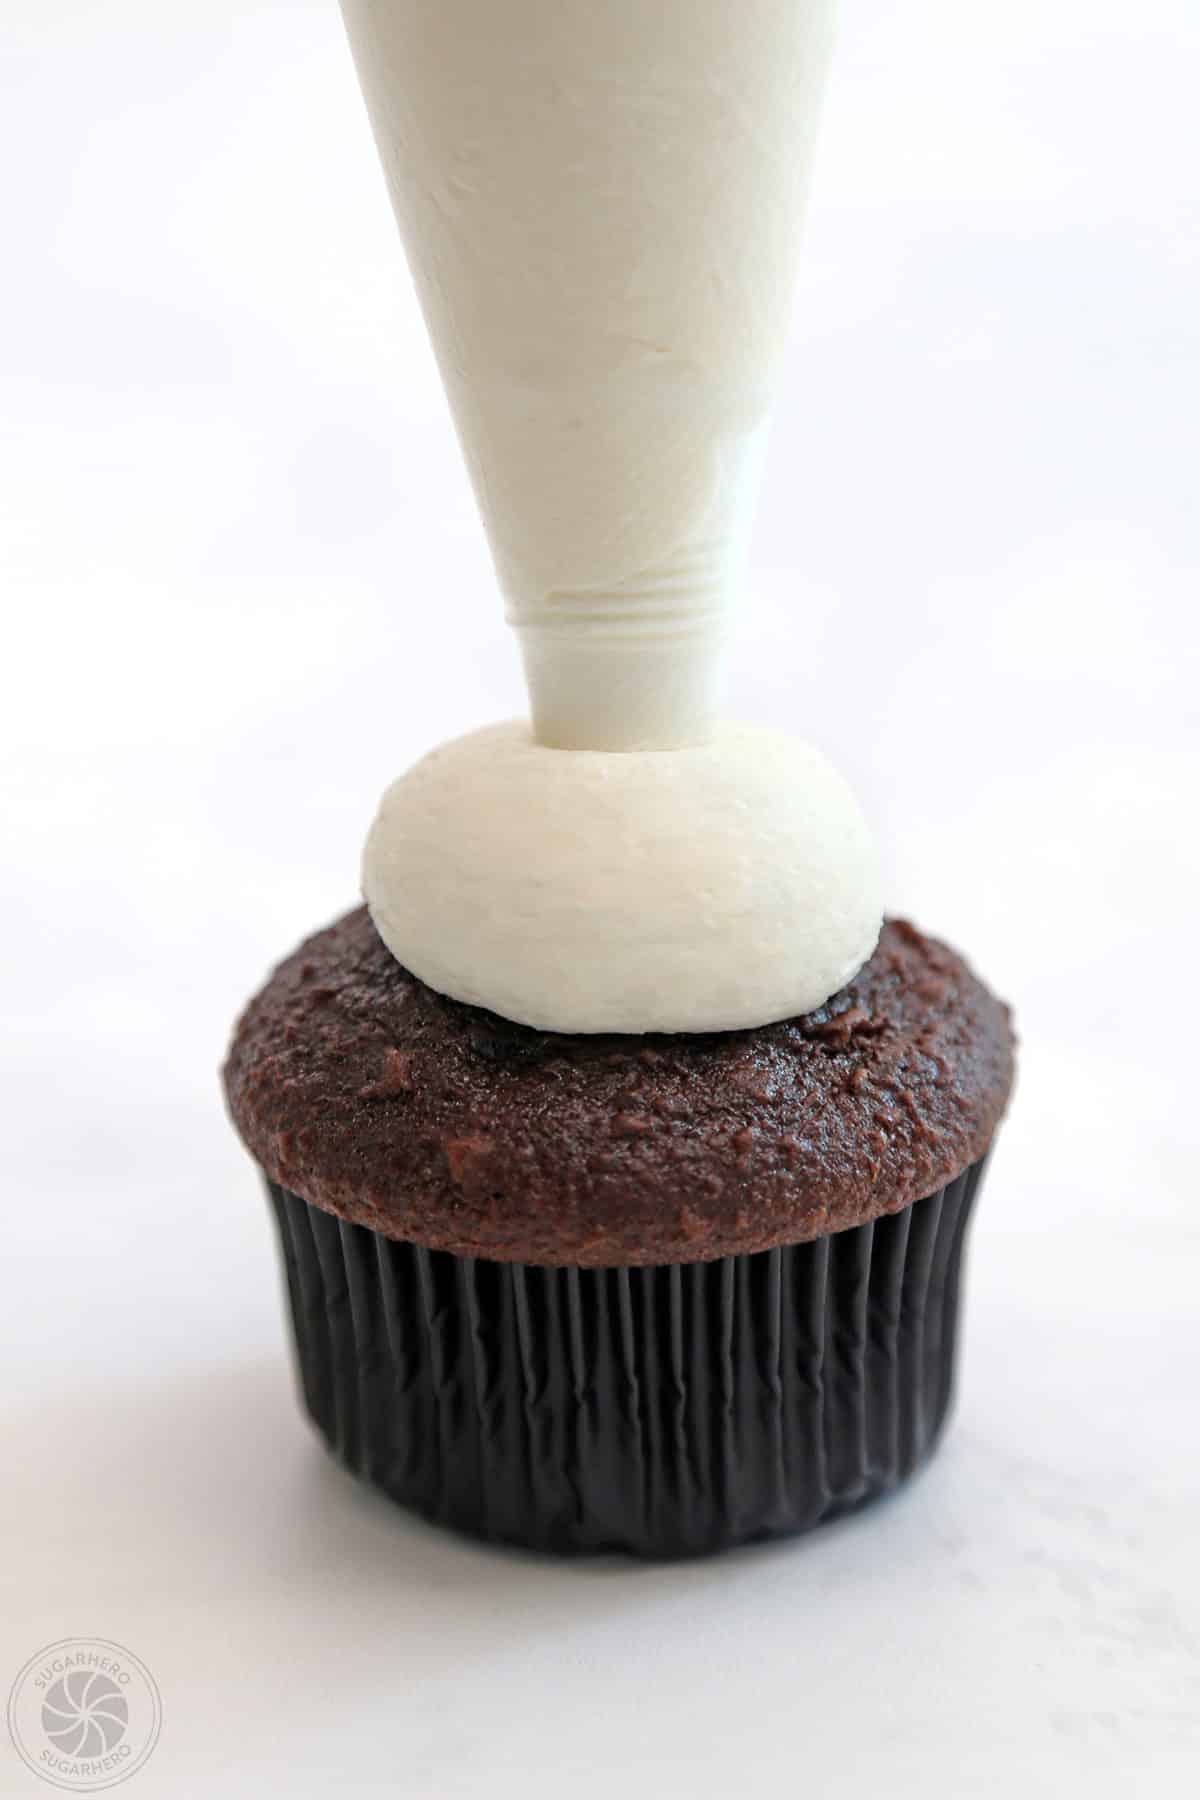
Step 1: Frosting the Base
Begin by applying a smooth, even layer of white buttercream to the top of each cooled cupcake. This creates the canvas for your skull design. Ensure the frosting is level to provide a stable surface for piping.
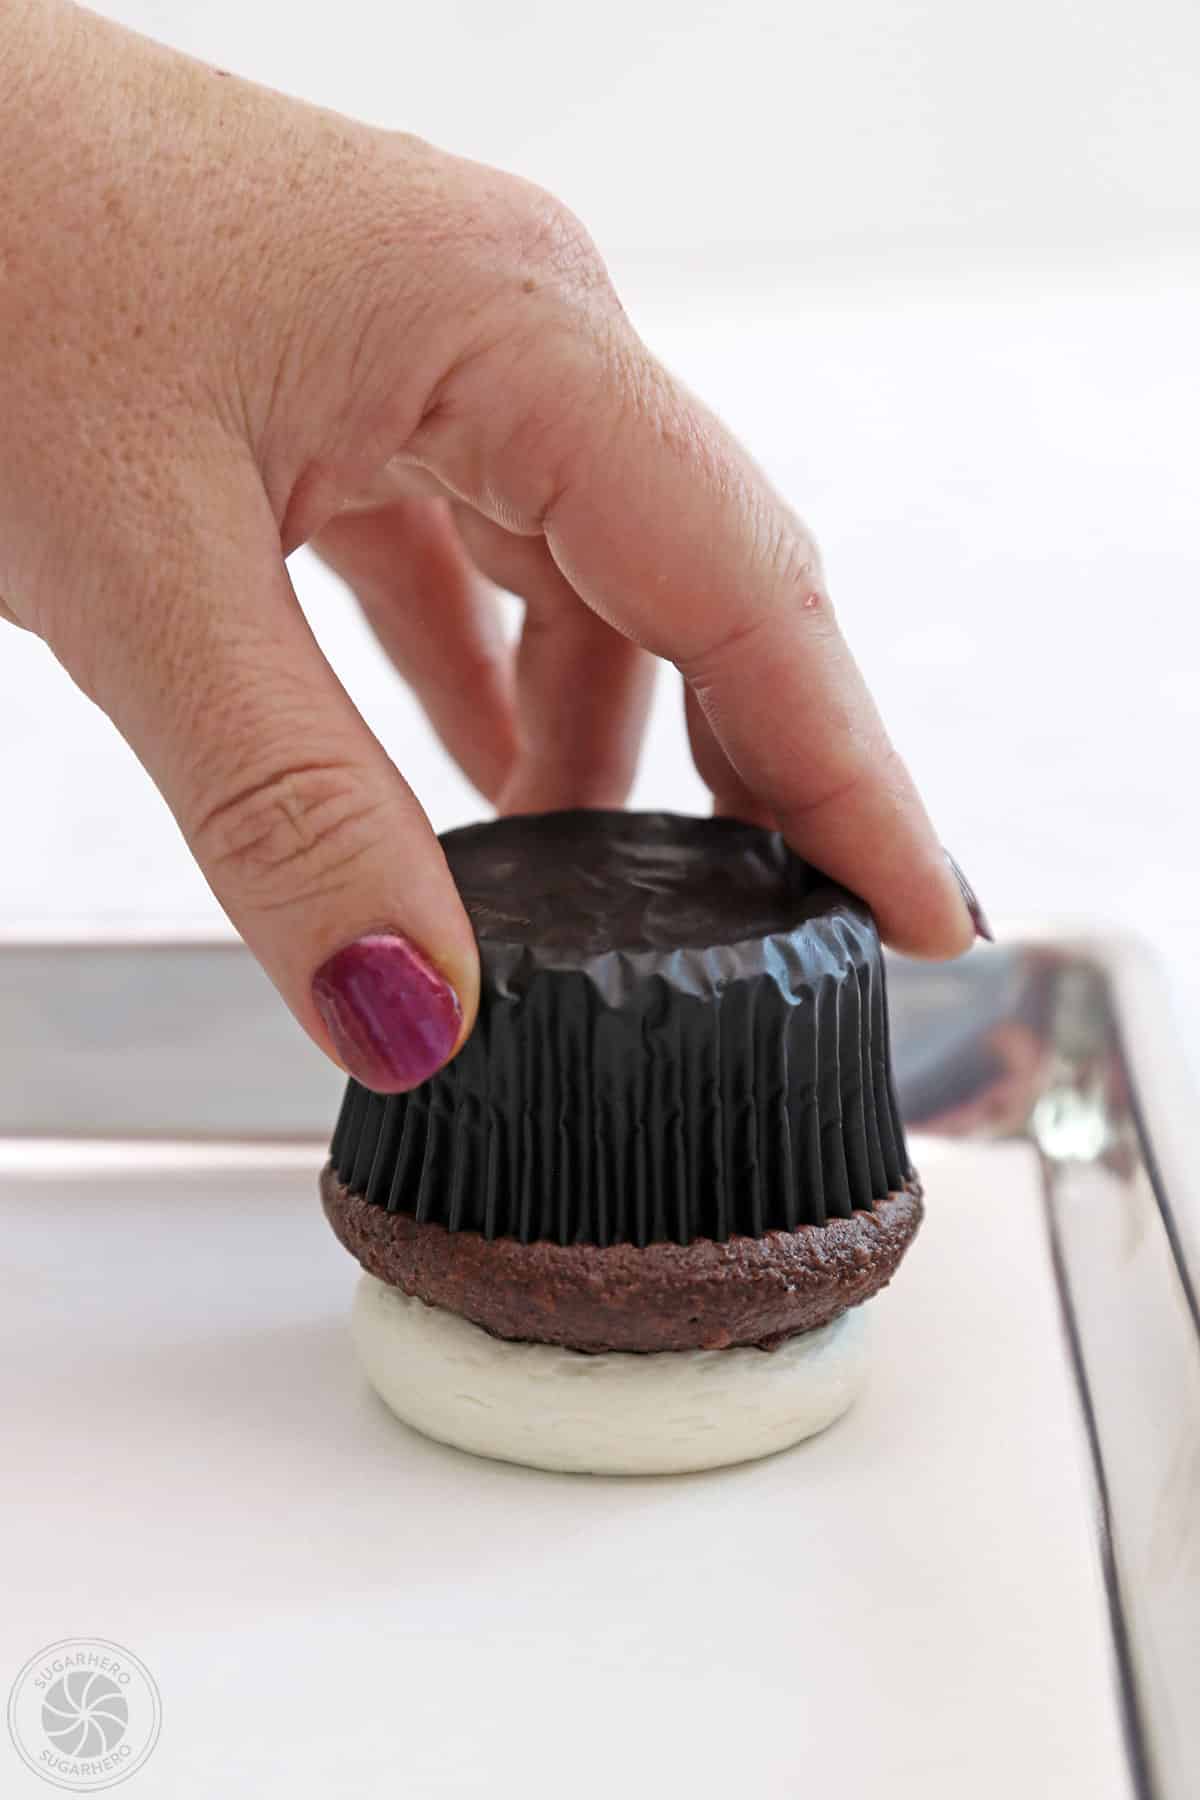
Step 2: Inverting the Cupcake (Optional Technique)
For a slightly different texture and a more uniform base, some decorators prefer to invert the frosted cupcake onto a parchment-lined baking sheet. This creates a perfectly flat surface for the skull features.
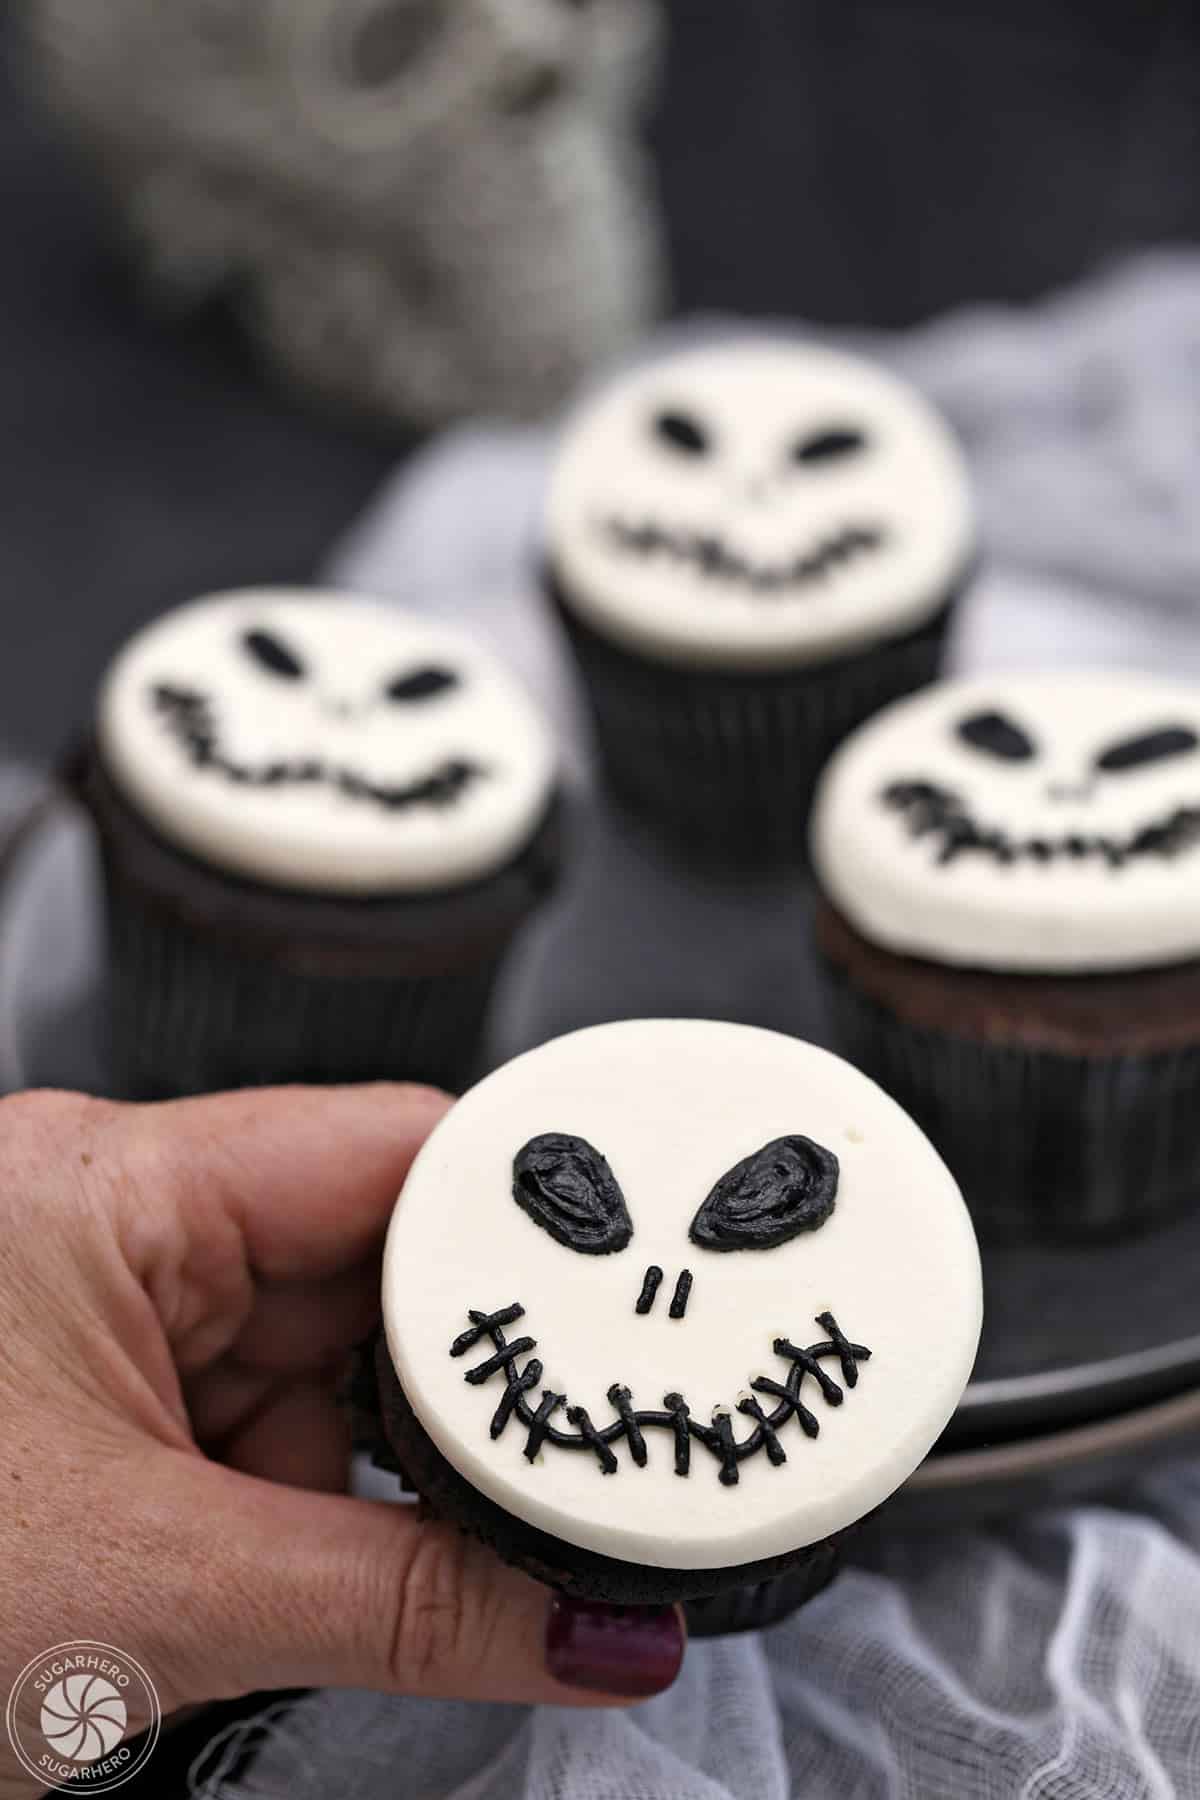
Step 3: Piping the Skull Features
Using a piping bag with a small round tip filled with black frosting, carefully pipe the eyes, nose, and mouth onto the white frosting base. The placement and size of these features will determine the expression of your skull.
Step 4: Completing the Design
Continue piping the facial features for all cupcakes, ensuring consistent placement for a cohesive batch. The simplicity of the design allows for quick execution, even when decorating a larger quantity.
Tips and FAQs for Perfect Skull Cupcakes
To ensure your Skull Cupcakes turn out as intended and to troubleshoot any potential issues, consider these helpful tips and answers to frequently asked questions.
Tips for Success:
- Achieving True Black Frosting: Creating a deep, opaque black frosting can be challenging. For the most vibrant results, it is highly recommended to use a high-quality black gel or powdered food coloring. Avoid liquid food colorings, as they are less concentrated and can dilute the frosting. Furthermore, allowing the colored frosting to rest for at least 24 hours in an airtight container (with plastic wrap pressed directly onto the surface to prevent a crust) allows the color to fully develop and deepen. If time is limited, or if you wish to reduce the amount of food coloring used, consider incorporating 2-3 tablespoons of black cocoa powder into the frosting. Black cocoa powder provides a rich, dark color and a subtle chocolate flavor.
- Adjusting Frosting Consistency: The texture of buttercream can be influenced by various factors, including the brand and temperature of the butter, and the ambient temperature of your kitchen. If the frosting is too stiff, add a small amount of milk or cream, a teaspoon at a time, until the desired consistency is reached. If it’s too thin, gradually add more powdered sugar.
- Piping Bag Alternatives: In the absence of specialized piping bags and tips, heavy-duty resealable plastic bags can be effectively used. Simply fill the bag with frosting, seal it, and snip a small corner to create an opening for piping.
- Make-Ahead Strategies: Both the cupcakes and the frosting can be prepared in advance to save time on the day of your event. Baked and completely cooled cupcakes can be frozen in airtight containers for up to a month. Thaw them at room temperature in their container before decorating. The buttercream frosting can be made up to a week in advance. Store it in an airtight container with plastic wrap pressed directly onto the surface to prevent a crust from forming. Refrigerate the frosting and allow it to come to room temperature before whipping it on medium speed until it regains its light and creamy texture.
Frequently Asked Questions:
-
What if I don’t have piping bags and tips?
As mentioned, heavy-duty resealable plastic bags can be a suitable substitute. Fill the bag with frosting, seal it tightly, and snip a small corner to create a nozzle for piping. For very simple designs, a spoon or a small spatula can also be used to spread frosting, though it will create a less defined look. -
How to make ultra black frosting?
The key to achieving ultra black frosting lies in using high-quality black gel or powdered food coloring and allowing the frosting to rest for at least 24 hours. Black cocoa powder can also be incorporated to enhance the color and add flavor. Avoid liquid food colorings. Ensure the frosting is whipped thoroughly after resting to restore its texture.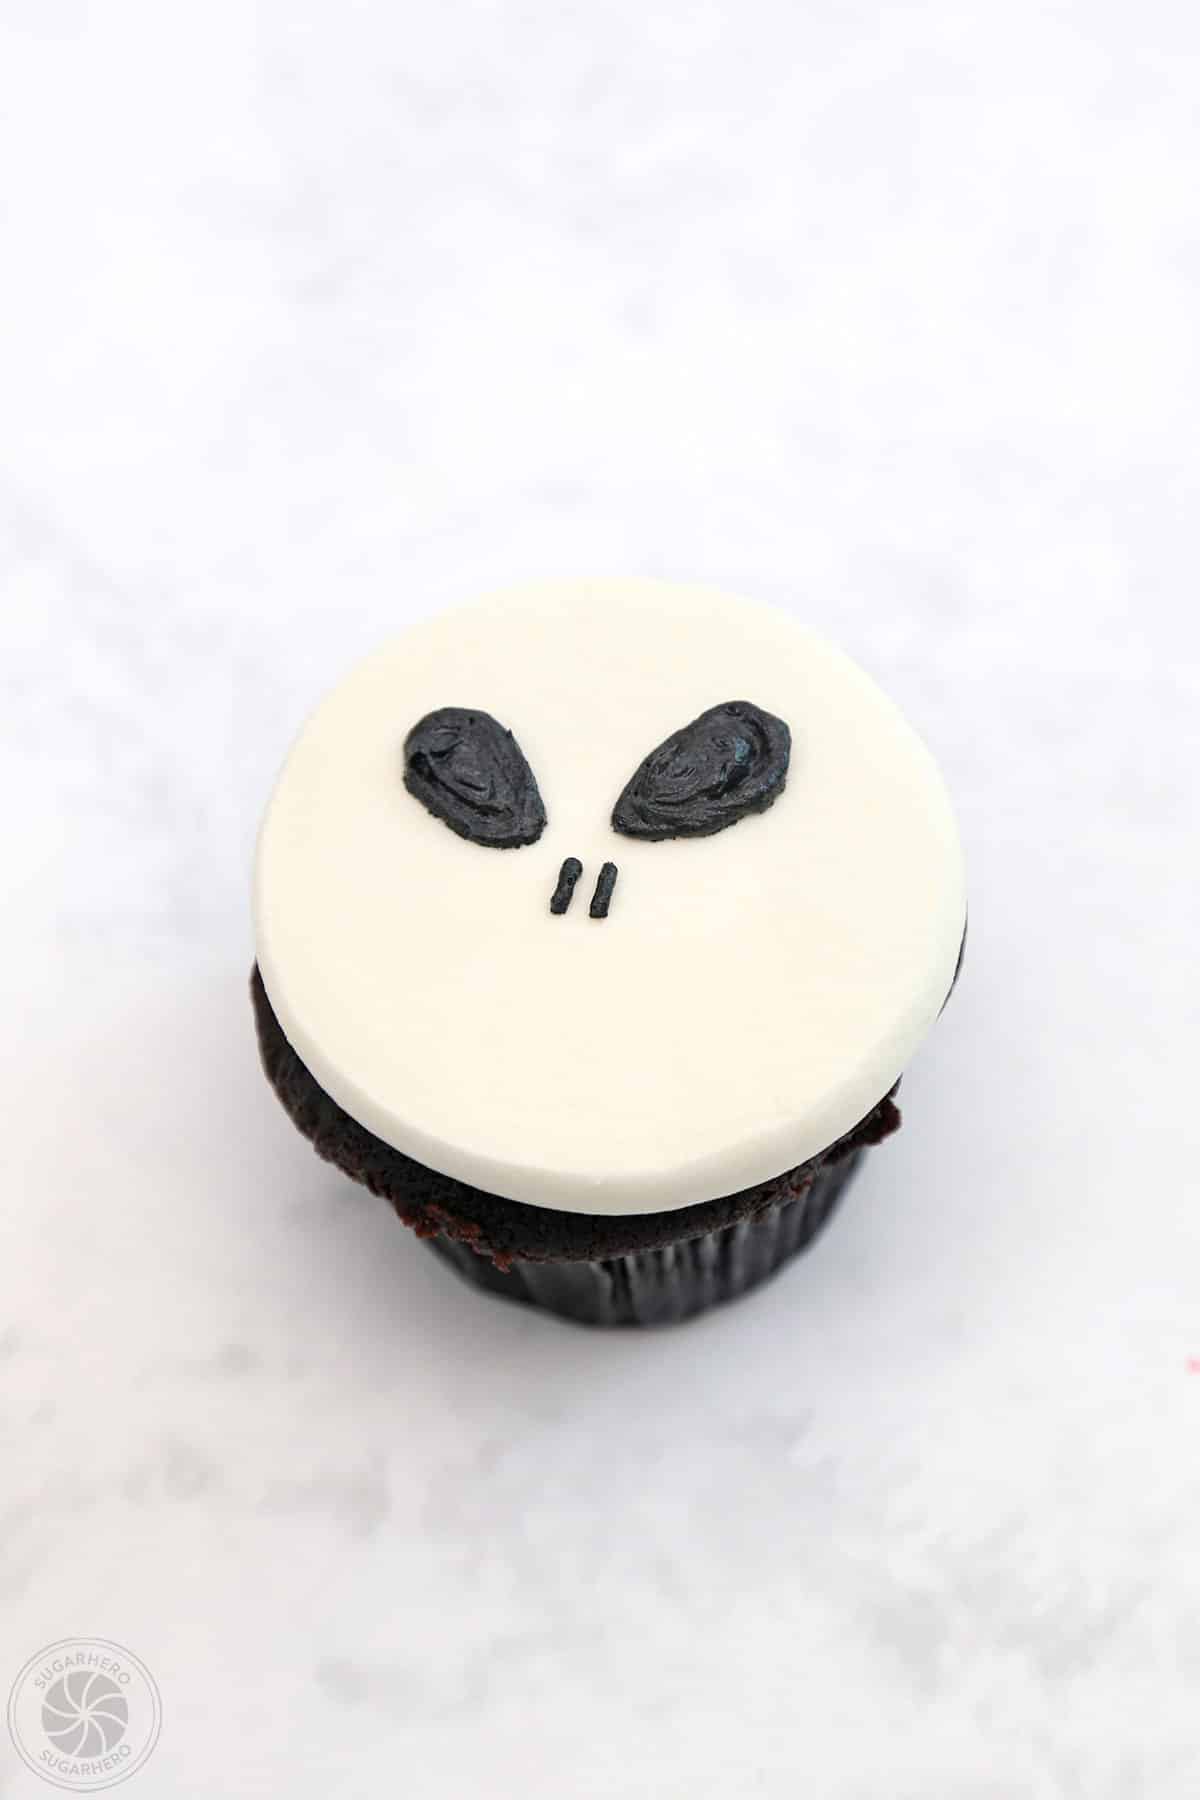
-
Make-Ahead Tips:
Both components can be prepared in advance. Cupcakes can be baked and frozen for up to a month. Frosting can be made up to a week in advance and stored in the refrigerator. Remember to bring them to room temperature and re-whip the frosting before use. -
Storage Information:
Store finished Skull Cupcakes in an airtight container at room temperature for 2-3 days. For longer storage, refrigerate them for up to a week. It’s recommended to allow chilled cupcakes to come to room temperature before serving to ensure optimal taste and texture.
The Broader Context of Halloween Baking
Halloween, as a cultural phenomenon, has increasingly become a significant occasion for culinary creativity and themed food preparation. The tradition of "trick-or-treating" is deeply intertwined with the consumption of sweets, making baked goods a central element of the holiday’s festivities. In recent years, there has been a notable rise in the popularity of elaborate Halloween-themed desserts, driven by social media trends, accessible crafting tutorials, and a growing consumer interest in visually appealing and thematically relevant food.
The appeal of Skull Cupcakes, for instance, lies in their iconic and easily recognizable design. The skull motif has long been associated with Halloween, symbolizing mystery, the supernatural, and the playful embrace of the macabre. This imagery resonates with a wide audience, making skull-themed treats a perennial favorite. The simplicity of the buttercream decoration described in this article democratizes this trend, allowing individuals with varying levels of baking experience to participate in creating festive treats.
The demand for such themed recipes often surges in the weeks leading up to Halloween. Food bloggers, culinary websites, and social media platforms become hubs for sharing innovative and accessible Halloween baking ideas. The data from these platforms indicates a consistent and significant interest in recipes that are both visually striking and relatively easy to execute. For instance, searches for "Halloween cupcakes," "easy Halloween treats," and "skull decorations" typically peak in early October.
The implications of this trend extend beyond mere consumption. The act of baking and decorating Halloween treats has become a cherished family activity for many. It fosters creativity, encourages skill-building, and provides a tangible way to celebrate the holiday spirit. Furthermore, these visually appealing treats often become conversation starters and focal points at Halloween parties and gatherings, contributing to the overall festive atmosphere. The accessibility of online tutorials and readily available ingredients ensures that this tradition continues to grow, making Halloween baking a beloved and anticipated part of the annual celebration for many households. The ease with which these Skull Cupcakes can be made further solidifies their place as a go-to recipe for a memorable and spooktacular Halloween.