As the leaves turn to hues of amber and crimson, and a crisp chill permeates the air, the season of spooky celebrations draws near. Halloween, with its delightful blend of the eerie and the whimsical, offers a perfect canvas for creative culinary endeavors. Among the myriad of festive treats, cupcakes often take center stage, providing a portable and customizable delight for parties, school events, or simply an evening of trick-or-treating festivities. This year, a particularly charming and surprisingly accessible recipe for Skull Cupcakes is emerging as a standout option, promising to add a touch of playful macabre to any Halloween gathering. Designed for both novice bakers and seasoned decorators alike, these cupcakes transform simple baked goods into miniature edible works of art, featuring a straightforward buttercream skull design that is both eye-catching and delightfully "to die for."
The allure of these Skull Cupcakes lies not only in their festive theme but also in their inherent simplicity. The recipe, as detailed by culinary enthusiasts, bypasses the need for complex sculpting or specialized tools, instead relying on the accessible medium of buttercream frosting. This approach democratizes elaborate-looking desserts, making them achievable for anyone with a desire to impress. The core of the design hinges on the strategic application of two distinct frosting colors – typically a base color for the skull’s canvas and a contrasting color for the facial features – creating an instantly recognizable and endearing skull motif. While the article suggests utilizing a favorite cake mix for expediency, it also offers a wealth of homemade cupcake recipes for those who prefer to start from scratch, underscoring a commitment to flexibility and personalization.
The historical context of Halloween treats provides a rich backdrop for understanding the enduring appeal of such themed desserts. For centuries, autumnal festivals have been marked by special foods, often incorporating elements of harvest bounty and symbolic representations of the changing seasons. The modern iteration of Halloween, particularly in Western cultures, has seen a proliferation of commercially produced and homemade sweets designed to evoke a sense of playful fright. From candy corn to pumpkin-shaped cookies, these confections serve not just as treats but as integral components of the holiday’s festive atmosphere, fostering shared experiences and cherished memories. The Skull Cupcake trend can be seen as a contemporary evolution within this tradition, blending classic Halloween imagery with the ever-popular medium of cupcakes.
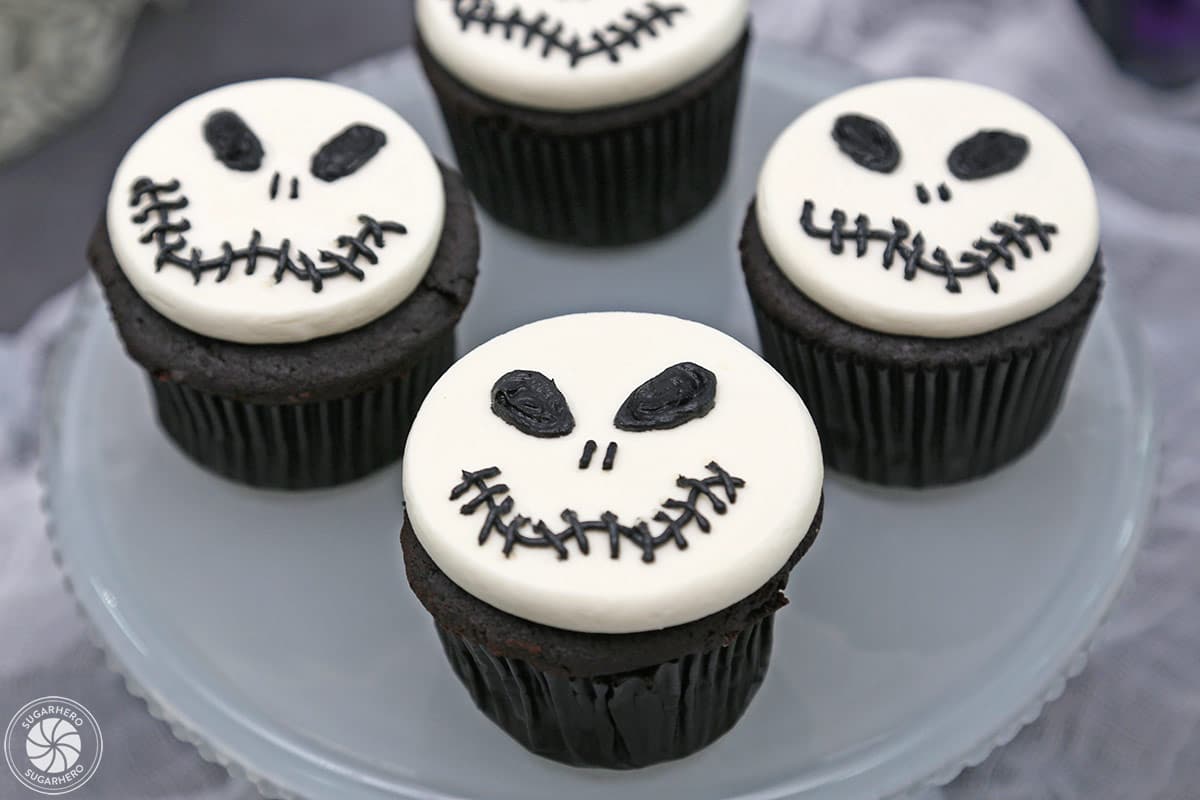
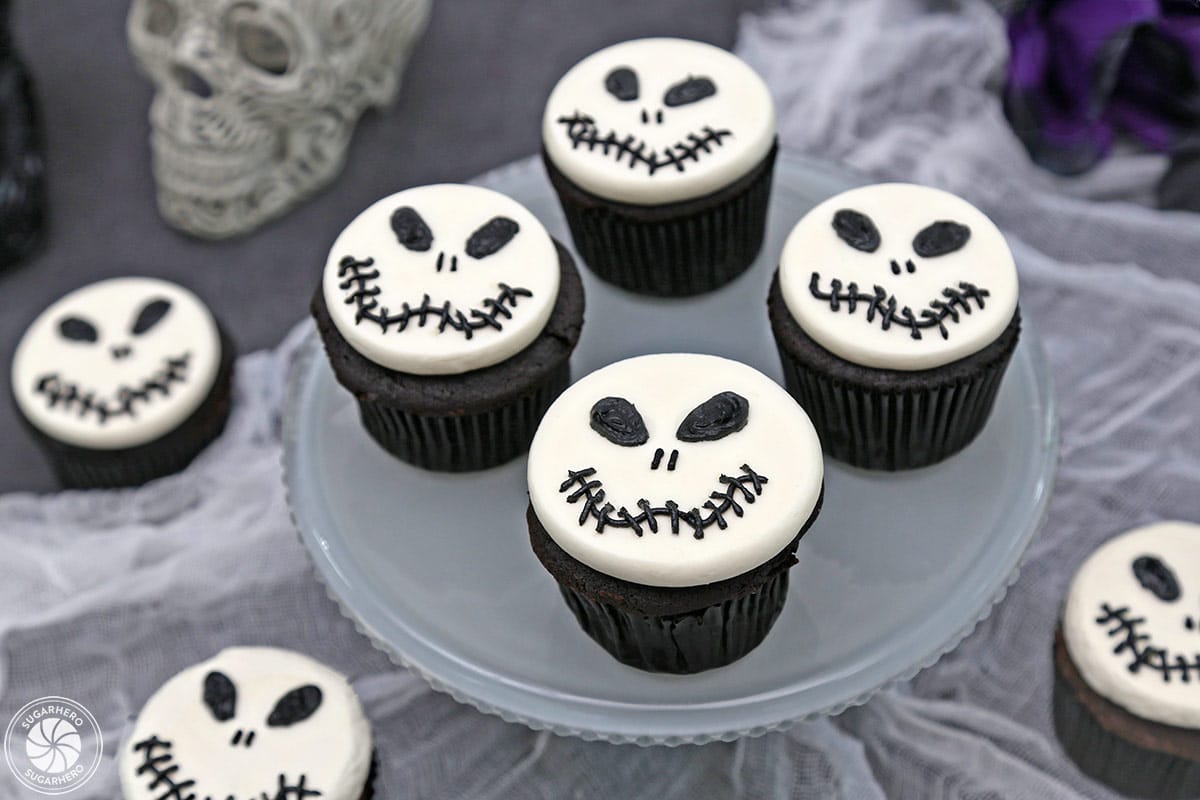
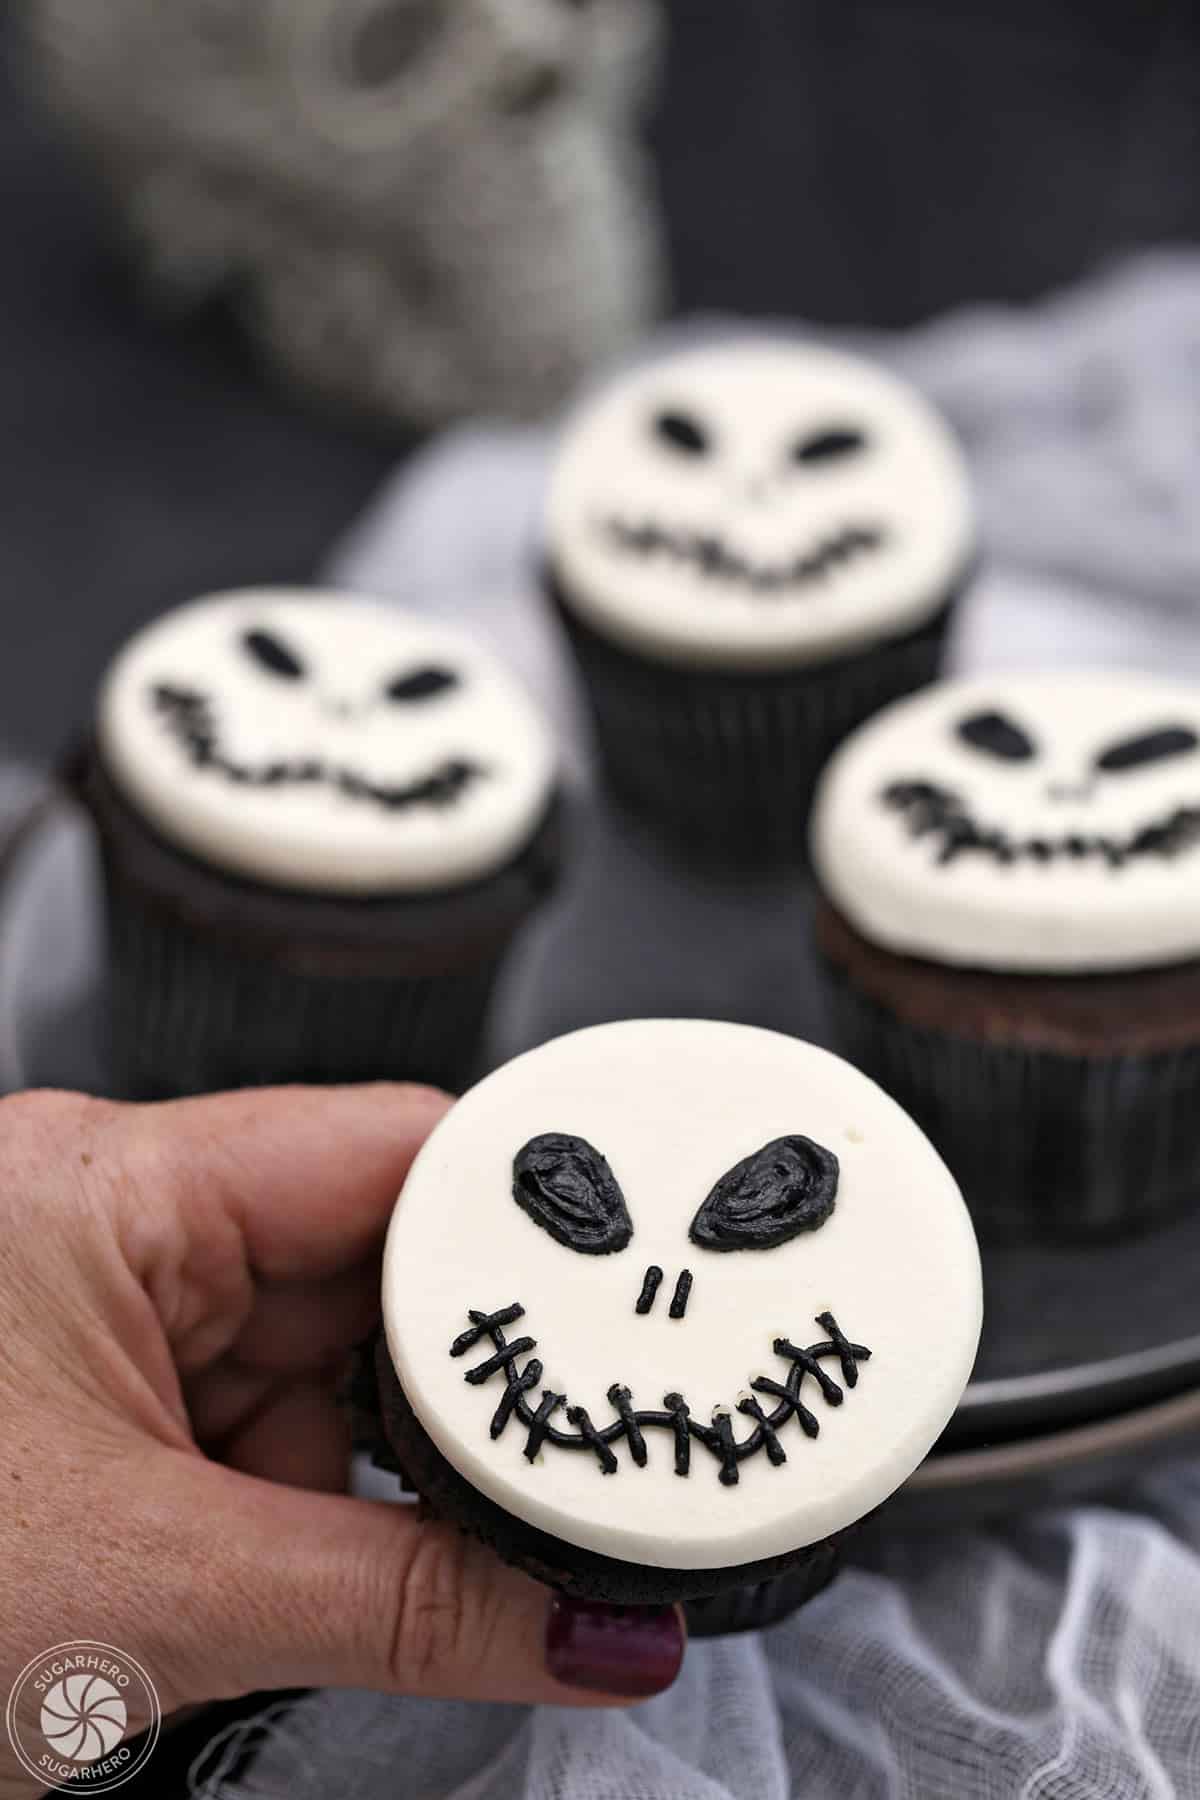
The creation of these Skull Cupcakes is presented as a step-by-step process, complete with a detailed photo tutorial, demystifying each stage of decoration. This visual guide is crucial for bakers who may be less experienced with piping techniques. The process typically begins with baked and fully cooled cupcakes, serving as the edible foundation. A base layer of frosting is then applied, creating a smooth surface for the skull’s features. The iconic skull design is then brought to life through the careful piping of key elements: two circular eye sockets, often rendered with black frosting, and a simple triangular or elongated shape for the nasal cavity. The mouth can be depicted in various ways, from a subtle line to a more pronounced row of "teeth," allowing for subtle variations in expression and overall spookiness.
Essential Ingredients and Equipment for Skull Cupcakes

To embark on the creation of these festive treats, a minimal yet specific set of ingredients and equipment is required. The recipe emphasizes that elaborate components are not necessary, thereby reducing potential barriers to entry for home bakers.
Ingredients:
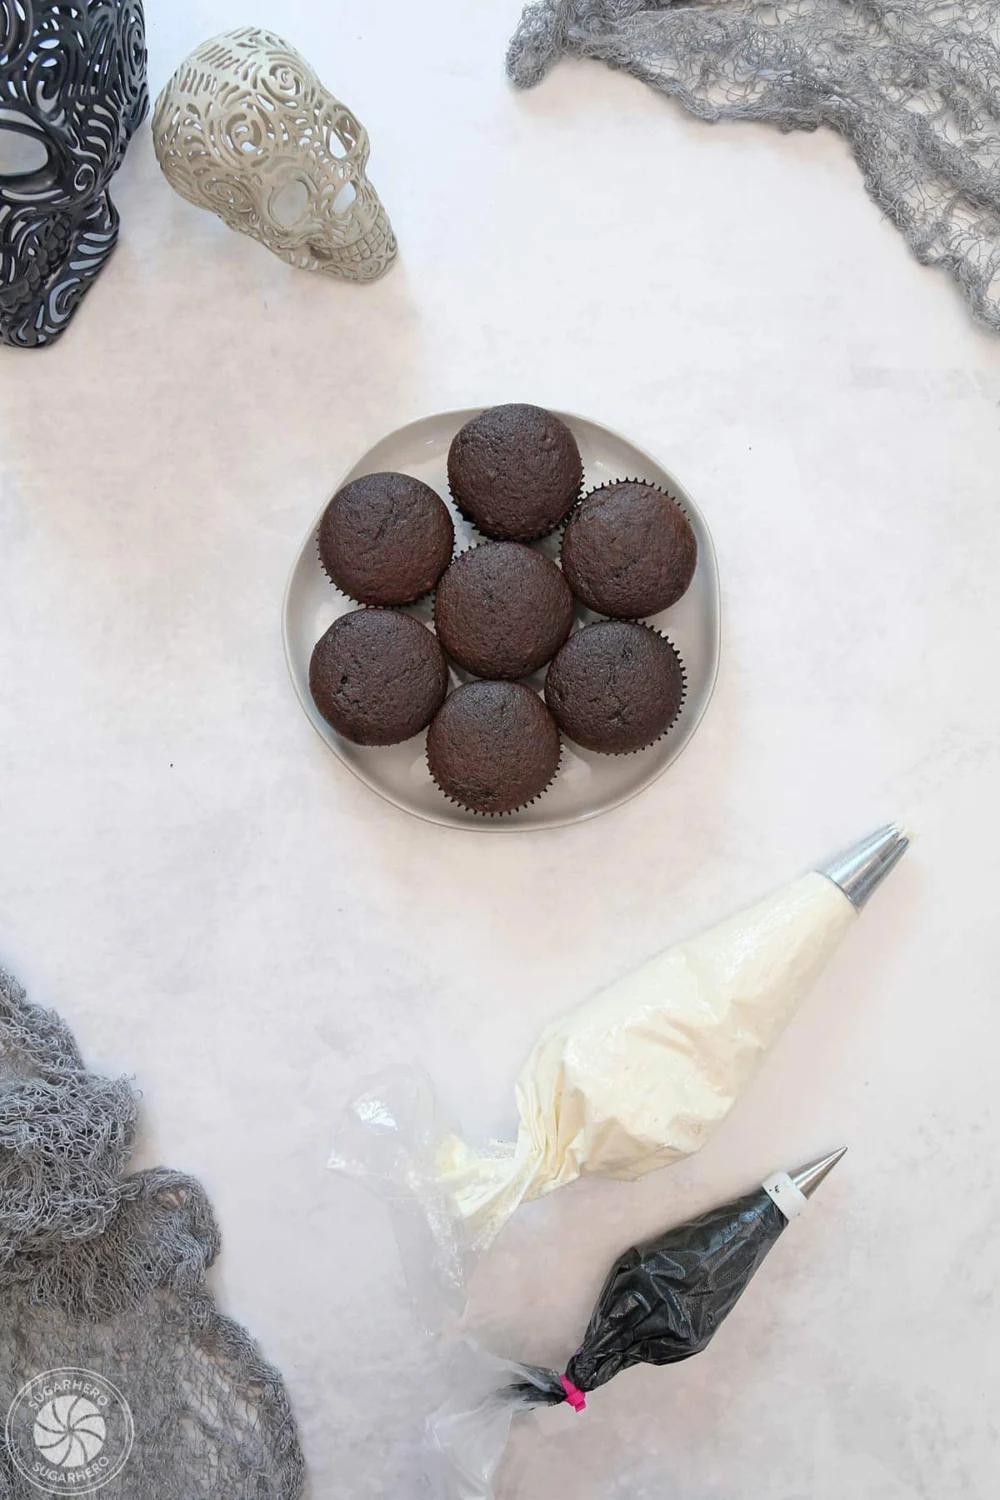
- Baked Cupcakes: The foundation of the dessert. The article recommends using a favorite cake mix or exploring a curated list of homemade cupcake recipes for those who prefer to bake from scratch. Common choices include classic vanilla, rich chocolate, or even a spiced pumpkin flavor to further embrace the autumnal theme. The key is to ensure they are completely cooled before frosting to prevent the buttercream from melting.
- Buttercream Frosting: This forms the visual canvas and the decorative elements. The recipe typically calls for a standard buttercream base, which can be easily prepared using butter, powdered sugar, and a liquid, such as milk or heavy cream. The article provides a specific recipe for a reliable buttercream.
- Food Coloring: Crucial for achieving the desired visual impact. Two primary colors are usually needed:
- White or a light base color: This serves as the primary color for the skull’s face, providing a stark contrast for the darker features.
- Black: This is essential for the eye sockets, nasal cavity, and potentially the mouth. Achieving a true, deep black can be a nuanced process, and the article offers specific advice on this.
- Optional Additions: Some recipes may include vanilla extract for added flavor in the frosting or a touch of salt to balance the sweetness.
Equipment:
- Piping Bags: These are indispensable for controlled application of frosting. Disposable piping bags are a convenient option, while reusable silicone bags offer a more sustainable choice.
- Piping Tips: Specific tips are recommended for creating the desired shapes. A round tip (such as a Wilton #12 or larger) is ideal for the eye sockets, while a smaller round tip can be used for the nose and mouth details. Alternatively, a simple Ziploc bag with a corner snipped off can serve as a makeshift piping bag.
- Offset Spatula or Butter Knife: Useful for applying a smooth base layer of frosting onto the cupcakes, ensuring an even surface for decoration.
- Baking Sheets and Parchment Paper: Essential for chilling the frosted cupcakes, which helps the buttercream set and makes handling easier. Parchment paper provides a non-stick surface and facilitates cleanup.
- Measuring Cups and Spoons: Standard baking tools for accurately measuring ingredients.
- Kitchen Scale (Recommended): For bakers who prioritize precision, a kitchen scale is recommended for accurate ingredient measurements, as weight measurements are often considered more reliable in baking.
Crafting the Perfect Black Frosting: A Crucial Step
Achieving a truly vibrant and opaque black frosting is often cited as one of the more challenging aspects of decorative baking. The article provides valuable insights into this process, highlighting that patience and the right ingredients are key.
Techniques for Deep Black Frosting:
- Gel or Powdered Food Coloring: The article strongly advises against using liquid food coloring, as it is less concentrated and requires a significantly larger volume to achieve a dark hue, potentially altering the frosting’s consistency and flavor. High-quality gel or powdered food colorings, such as Americolor Ultra Black, are recommended for their intense pigment.
- Time is of the Essence: A critical piece of advice is to allow the colored frosting to "cure" or sit for at least 24 hours. This resting period allows the color molecules to fully develop and deepen, resulting in a richer, more impactful black. This preparation step suggests that advance planning is beneficial for achieving the most striking results.
- Black Cocoa Powder: For those seeking to minimize the use of food coloring or add a subtle chocolate note, incorporating 2 to 3 tablespoons of black cocoa powder into the frosting recipe is suggested. Black cocoa powder, known for its deep color and less intense chocolate flavor compared to Dutch-processed cocoa, can significantly contribute to achieving a dark hue.
- Storage and Rejuvenation: Once the black frosting is prepared and colored, it should be stored in an airtight container with a layer of plastic wrap pressed directly onto the frosting’s surface to prevent a crust from forming. Before use, it needs to be brought back to room temperature and then beaten on medium speed to restore its light and creamy texture.
The Decoration Process: A Visual Journey
The photo tutorial, a cornerstone of the article’s instructional content, guides users through the practical application of the frosting to create the skull design. This visual narrative breaks down the process into manageable steps, making it accessible even for those with limited decorating experience.
Step-by-Step Frosting and Decorating:
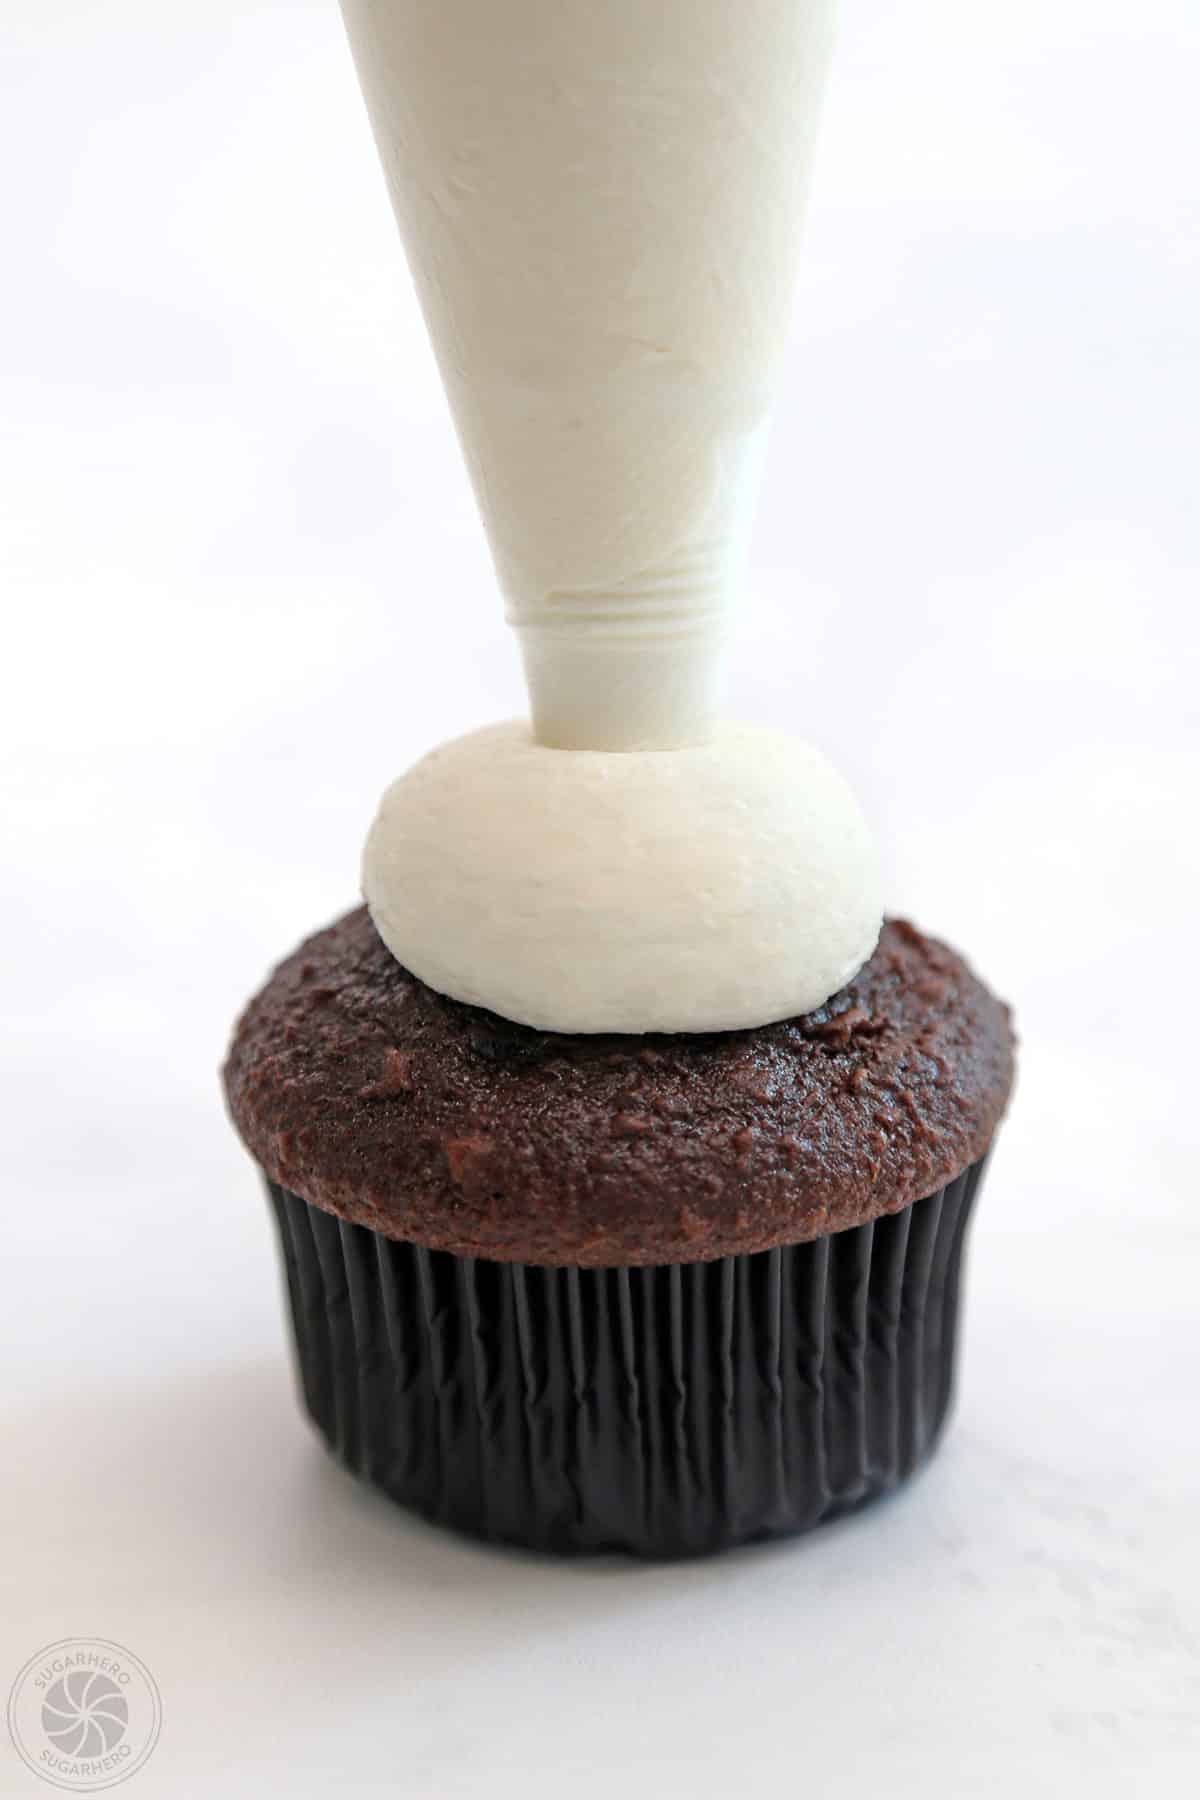
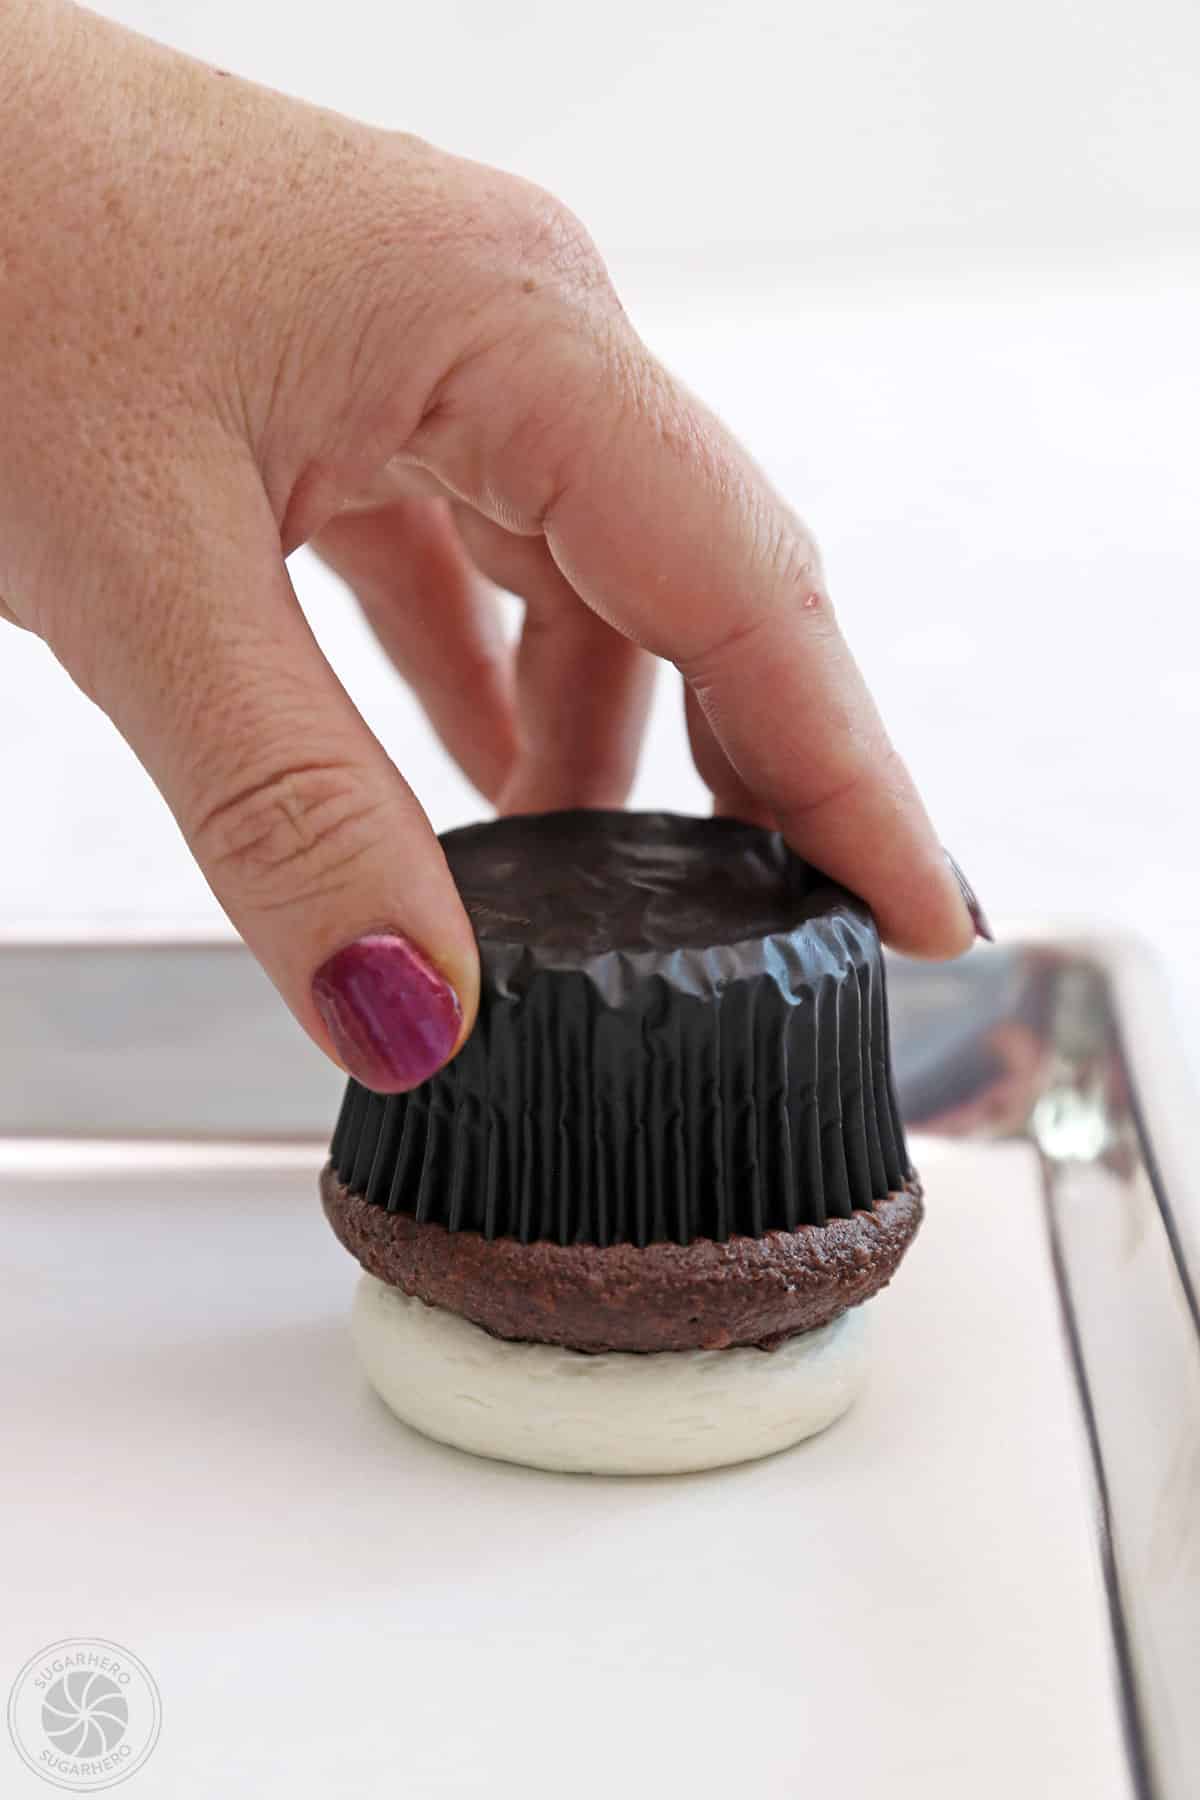
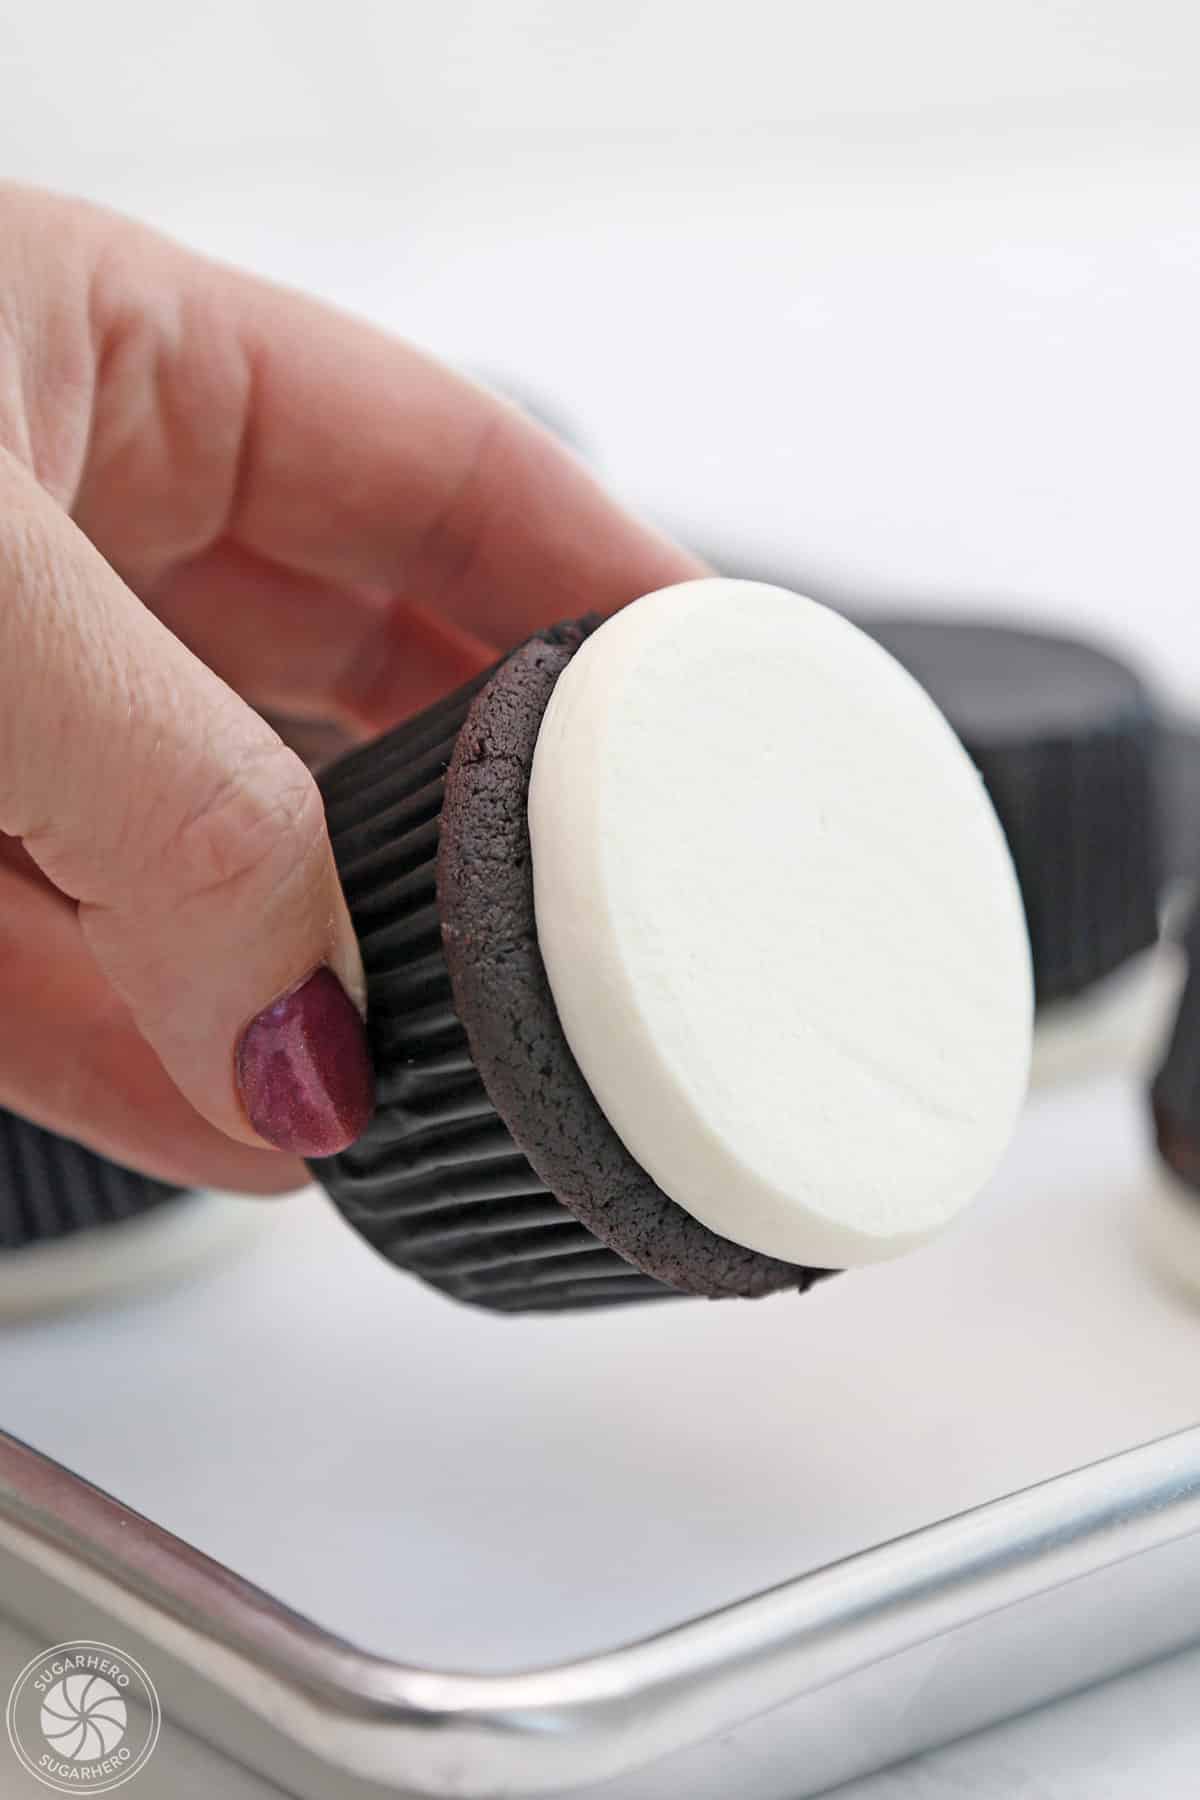
- Prepare the Base Frosting: The cupcakes are first frosted with the chosen base color (typically white or a light hue). This is often done by piping a generous mound of frosting onto the center of the cupcake.
- Smooth the Surface: Using an offset spatula or the back of a spoon, the piped frosting is gently smoothed to create an even, slightly domed surface that will serve as the canvas for the skull’s features. This step is crucial for a clean and professional look.
- Pipe the Eye Sockets: With black frosting in a piping bag fitted with a round tip, two circular eye sockets are carefully piped onto the frosted cupcake. The size and placement of these circles are key to the skull’s recognizability.
- Add the Nasal Cavity: A smaller round tip is then used to pipe the nasal cavity, typically a small triangle or an inverted heart shape, positioned between and slightly below the eye sockets.
- Create the Mouth: The mouth can be rendered in various styles. A simple, slightly curved line can suggest a closed mouth, while a jagged or tooth-lined design can convey a more animated or menacing expression. This detail allows for creative interpretation and personalization.
- Setting the Frosting: Once decorated, the cupcakes are often placed on a parchment-lined baking sheet and chilled. This helps the buttercream firm up, making the cupcakes easier to handle and transport, and preventing smudging of the delicate designs.
Timeline and Planning: Making Ahead for Convenience
For those planning Halloween parties or events, the ability to prepare components in advance can significantly reduce day-of stress. The article provides practical advice on make-ahead strategies:
- Frosting Preparation: The buttercream, including the coloring of the black frosting, can be made up to a week in advance. Proper storage in an airtight container with a protective layer of cling wrap is essential. Before use, the frosting should be brought to room temperature and re-whipped to its ideal consistency. This advance preparation of the frosting is particularly beneficial for the black component, allowing ample time for the color to develop.
- Cupcake Baking and Storage: Baked and cooled cupcakes can be frozen for up to a month in airtight containers. This allows bakers to prepare the cake base well in advance of the decorating session. Upon thawing, the cupcakes should be allowed to reach room temperature before frosting.
Broader Impact and Implications: The Rise of Accessible Themed Baking
The popularity of recipes like these Skull Cupcakes reflects a broader trend in the culinary world: the democratization of visually appealing and themed baking. Social media platforms, particularly Pinterest and Instagram, have become powerful engines for sharing and discovering creative food ideas. This visual sharing culture empowers home bakers to attempt more intricate designs, with recipes that break down complex techniques into simple, achievable steps. The accessibility of these Skull Cupcakes signifies a shift where elaborate aesthetics are no longer exclusive to professional bakers; rather, they are within reach of anyone with a desire to participate in the festive spirit of holidays like Halloween.
The implications of such accessible recipes extend beyond individual enjoyment. They foster a sense of community among bakers, encouraging the sharing of tips, variations, and the collective celebration of creative culinary achievements. Furthermore, these types of recipes contribute to the overall festive atmosphere of holidays, making celebrations more engaging and memorable for families and friends. The simple yet effective design of the Skull Cupcakes ensures that they will remain a popular choice for Halloween celebrations, embodying the holiday’s spirit of playful spookiness.
Storage and Serving Recommendations
For optimal freshness and taste, the article recommends storing extra cupcakes in an airtight container at room temperature for 2 to 3 days. For longer storage, up to a week, refrigeration is advised. However, it is crucial to allow chilled cupcakes to return to room temperature before serving to ensure the best texture and flavor.
In conclusion, the ease and charm of these Skull Cupcakes make them an ideal choice for anyone looking to elevate their Halloween celebrations. By demystifying the process of decorative frosting and providing practical tips for preparation and execution, this recipe empowers bakers of all skill levels to create a memorable and delightfully spooky treat that is sure to be a hit. The blend of simple ingredients, accessible techniques, and iconic Halloween imagery ensures that these Skull Cupcakes will continue to be a cherished part of autumn festivities for years to come.