Making pastrami at home is a rewarding culinary endeavor, transforming a humble cut of meat into a flavorful delicacy. However, achieving this success hinges on a scientific approach to curing, where precision in measurement, strict temperature control, and diligent hygiene are paramount. The process, while seemingly complex, can be safely navigated by treating it as a meticulous experiment, ensuring the delicious outcome is as safe as it is satisfying. This guide delves into the essential safety protocols and best practices for home pastrami production, empowering aspiring pitmasters to confidently embark on this flavorful journey.
The Science of Safe Pastrami Curing
At its core, curing meat is a preservation technique that relies on salt, time, and temperature to inhibit microbial growth and develop unique textures and flavors. For pastrami, this typically involves a dry or wet brine, followed by smoking and steaming. The inherent risks associated with curing, particularly the potential for botulism and other foodborne illnesses, necessitate a rigorous adherence to established safety guidelines. These guidelines are not mere suggestions but are founded on decades of food science research and public health recommendations.

Essential Safety Protocols for Home Curing
The journey to perfectly cured pastrami begins long before the meat hits the smoker. It starts with understanding and implementing fundamental safety principles.
Maintaining Cold Chain Integrity
Temperature is arguably the most critical factor in preventing the proliferation of harmful bacteria. The "danger zone" for bacterial growth is generally considered to be between 40°F (4.4°C) and 140°F (60°C). During the curing process, especially when the meat is in a brine or dry rub, it must remain consistently below 40°F.
- Refrigerator Temperature: Ensure your refrigerator is set to 40°F (4.4°C) or below. Regularly check the temperature with a reliable thermometer.
- Brine Cooling: If preparing a wet brine, cool it thoroughly in the refrigerator before immersing the meat. Never add meat to a warm or room-temperature brine.
- Curing Environment: The entire curing period, whether in a refrigerator or a dedicated curing chamber, must be maintained at a consistent, safe temperature. Fluctuations can compromise the safety of the product.
- Handling Time: Minimize the time raw meat or brined meat spends at room temperature. Plan your workflow to move efficiently between steps.
Precision in Curing Agent Measurement
The curing agents, primarily salt and curing salts like sodium nitrite (often found in Prague Powder #1), are not just for flavor; they are essential for inhibiting the growth of Clostridium botulinum, the bacteria responsible for botulism.

- Accurate Weighing: Curing salts, in particular, must be measured with extreme accuracy. Using a digital scale that measures in grams is crucial. Over- or under-dosing can have serious health implications.
- Understanding Ratios: Recipes for curing salts are typically based on precise percentages of the meat’s weight. Deviating from these ratios can lead to unsafe products or undesirable flavor profiles. For example, the recommended level of sodium nitrite for dry curing is typically around 0.25% of the meat’s weight.
- Commercial Curing Mixes: When using pre-mixed curing salts, always follow the manufacturer’s instructions precisely. Understand the concentration of nitrites in the mix.
- Recipe Verification: Cross-reference recipes from reputable sources. Ensure the amounts of curing salts are consistent with established food safety guidelines.
Ensuring Full Brine Contact
Whether using a wet brine or a dry cure, ensuring the entire surface of the meat is in contact with the curing agent is vital for even preservation.
- Submersion: In wet brines, the meat must be fully submerged. If the meat floats, use a weight to keep it submerged.
- Even Coating: For dry cures, ensure every surface of the meat is thoroughly coated with the curing mixture. Turn and rub the meat periodically to ensure even distribution.
- Container Choice: Use non-reactive containers for brining (e.g., food-grade plastic, glass, or stainless steel). Avoid aluminum or cast iron, which can react with the salt and acids.
Proper Labeling and Dating
In any food preservation process, clear and accurate labeling is a non-negotiable safety step.
- Date of Preparation: Always label containers with the date the curing process began.
- Contents: Clearly indicate what the container holds (e.g., "Beef Brisket – Curing Brine").
- Expiration/Use By: While home-cured meats have a generally longer shelf life than fresh, knowing the start date helps manage consumption timelines. For cured but uncooked meats, it’s advisable to use them within a specific timeframe after the curing period.
The Curing Timeline: A Chronological Approach to Safety
Understanding the timeline of the pastrami curing process is essential for maintaining safety at each stage.
- Preparation of Cure: This involves meticulously measuring salt, curing salts, and other spices. This step should be done with utmost care to ensure the correct ratios.
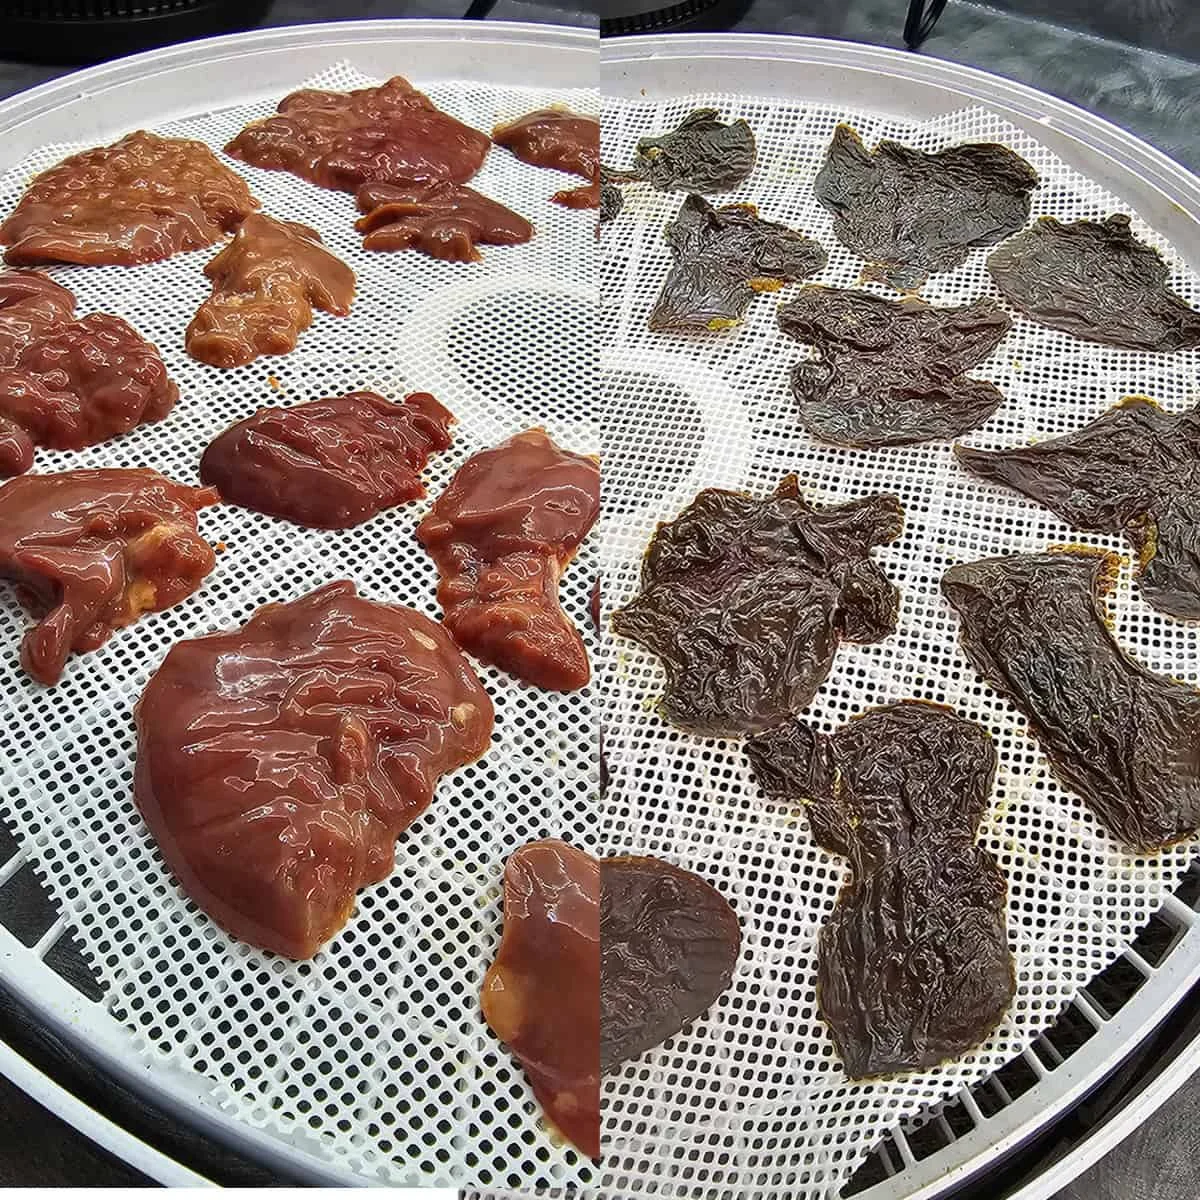
- Brining/Dry Curing: The meat is immersed in a brine or coated in a dry cure and placed in a temperature-controlled environment. This period can range from several days to a couple of weeks, depending on the cut and desired outcome. Throughout this phase, maintaining the cold chain is paramount.
- Rinsing and Drying: After curing, the meat is typically rinsed to remove excess salt and then dried thoroughly. This step is crucial for allowing the smoke to adhere properly and for preventing surface moisture that can lead to spoilage.
- Smoking: The meat is smoked at controlled temperatures. While smoking contributes to flavor and preservation, it does not guarantee the elimination of all pathogens. Therefore, the preceding curing steps are still critical.
- Steaming (Optional but Traditional): Many pastrami recipes call for steaming after smoking. This further tenderizes the meat and helps render the fat.
- Cooling and Storage: Once cooked, the pastrami must be cooled properly and stored safely.
Storage Times: Refrigeration and Freezing Guidelines
Once your pastrami has undergone the entire curing, smoking, and cooking process, it transitions from a preservation project to a cooked food item. As such, its storage life is dictated by standard food safety guidelines for cooked meats.
Refrigerator Storage
- Duration: Properly cooked and cooled pastrami can be stored in the refrigerator for 3 to 4 days.
- Packaging: For optimal freshness and to prevent drying out, wrap the pastrami tightly in plastic wrap or place it in an airtight container.
- Cross-Contamination: Always store cooked pastrami separately from raw meats to prevent cross-contamination.
Freezer Storage
- Duration: For longer storage, pastrami freezes exceptionally well. It can maintain its quality in the freezer for up to 2 to 3 months. Beyond this, while still safe, the quality may degrade.
- Packaging: To prevent freezer burn, wrap the pastrami tightly in plastic wrap, followed by a layer of aluminum foil or a freezer-safe bag. Removing as much air as possible is key.
- Slicing Before Freezing: Consider slicing the pastrami before freezing. This makes it easier to thaw only the amount you need for a meal.
Best Practices for Pastrami Handling and Consumption
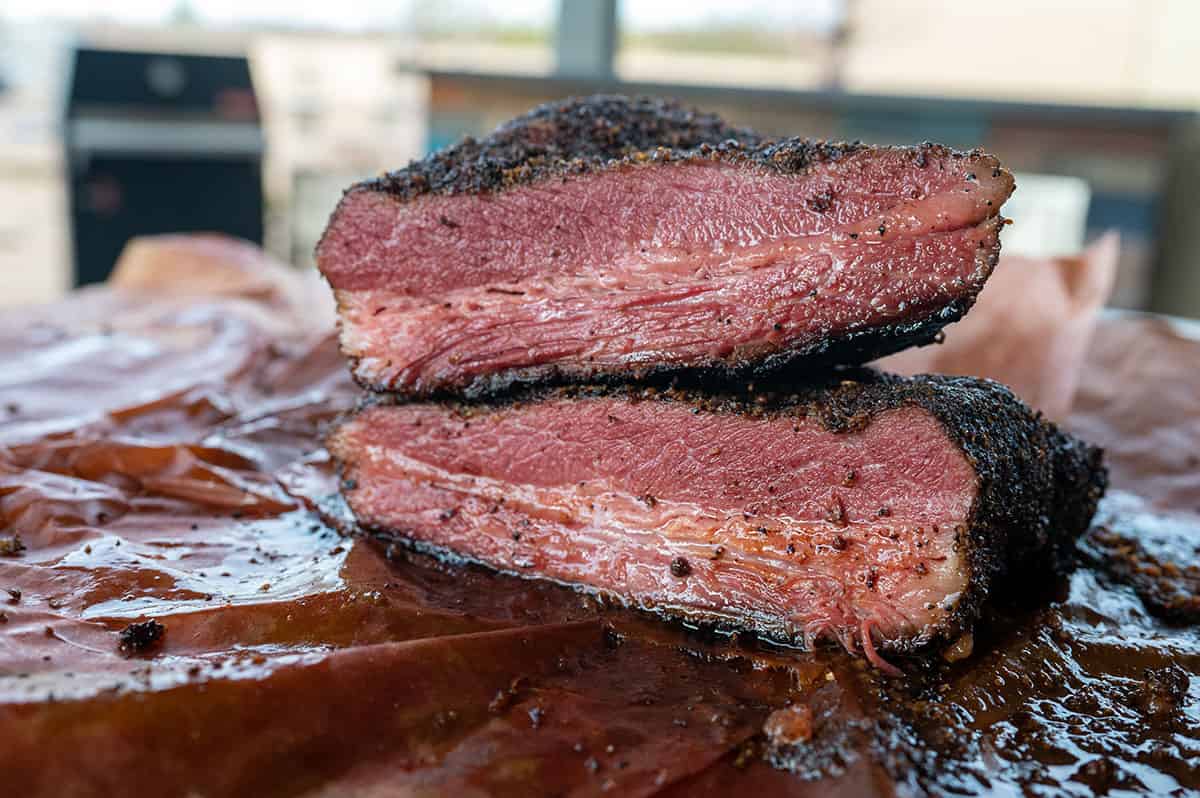
- Cook Thoroughly: Always ensure the pastrami has been cooked to a safe internal temperature, typically 160-165°F (71-74°C) for a fully cooked product, though traditional pastrami often reaches higher temperatures during smoking and steaming for tenderness.
- Cool Promptly: After cooking, cool the pastrami rapidly. Dividing large portions into smaller ones can accelerate the cooling process.
- Reheat Safely: When reheating, ensure the internal temperature reaches 165°F (74°C) to kill any potential bacteria that may have grown during storage.
Reheating Safely
Reheating pastrami requires the same diligence as storing it. The goal is to bring the meat to a safe internal temperature while maintaining its quality.
- Methods: Reheating can be done in an oven, on a stovetop, or even in a microwave.
- Oven Reheating: This is often the preferred method for maintaining moisture and flavor. Wrap the pastrami in foil and heat at a moderate temperature (around 300-325°F or 150-160°C) until the internal temperature reaches 165°F (74°C).
- Stovetop Reheating: Slices of pastrami can be gently heated in a pan with a little liquid (water, broth, or even a splash of the steaming liquid from the original cooking process) over medium-low heat.
- Microwave Reheating: While convenient, microwaves can sometimes dry out meat. Reheat in short intervals, checking the temperature frequently.
- Avoid Overheating: Overheating can lead to dry, tough pastrami.
Deli Meat and Pregnancy Guidance: A General Note
For pregnant individuals, the consumption of deli meats, including homemade pastrami, requires careful consideration due to the risk of listeria contamination. Listeria monocytogenes can cause listeriosis, a serious infection that can lead to miscarriage, stillbirth, or severe illness in newborns.
- Risk Mitigation: While homemade pastrami, when cured and cooked according to strict safety guidelines, significantly reduces this risk, it’s important to understand that no food preservation method can guarantee 100% elimination of all potential pathogens.
- Consult Healthcare Providers: Pregnant individuals are strongly advised to consult with their healthcare providers regarding safe food consumption practices. They may recommend avoiding deli meats altogether or consuming them only when reheated to a very high internal temperature (165°F or 74°C).
Cross-Contamination and Brine Handling: Vigilance is Key
The raw brine used in curing pastrami, much like raw meat juices, is a potential breeding ground for bacteria. Strict hygiene practices are essential to prevent the spread of these microorganisms to other foods or surfaces.
Do’s of Brine Handling
- Do: Use dedicated utensils and containers for handling raw meat and brines.
- Do: Wash hands thoroughly with soap and warm water before and after handling raw meat and brines.
- Do: Sanitize all surfaces, cutting boards, and utensils that come into contact with raw meat or brine immediately after use.
- Do: Keep raw meat and brines separate from ready-to-eat foods at all times.
- Do: Dispose of used brine properly. Do not pour it down the sink if it contains raw meat particles that could clog plumbing. It is often best to solidify fats and then discard the liquid down a drain with plenty of running water.
Don’ts of Brine Handling
- Don’t: Taste raw brines.
- Don’t: Reuse brines that have been in contact with raw meat, unless they are being further processed into a cooked product where they will be fully heated.
- Don’t: Allow raw brine to drip or splash onto countertops, utensils, or other foods.
- Don’t: Store raw meat or brines in containers that have previously held ready-to-eat foods without thorough washing and sanitizing.
Quick Cleanup Routine
A consistent and thorough cleanup routine is the final layer of defense against foodborne illness.
- Immediate Sanitization: As soon as you finish handling raw meat or brine, wash all utensils, cutting boards, and surfaces with hot, soapy water.
- Rinse and Dry: Rinse thoroughly and allow items to air dry or dry with a clean towel.
- Disinfect (Optional but Recommended): For an extra layer of safety, consider using a food-safe disinfectant spray on surfaces after washing.
- Handwashing: A final, thorough handwashing is always a good practice.
By approaching homemade pastrami production with a scientific mindset, prioritizing accurate measurements, maintaining strict temperature control, and practicing meticulous hygiene, home cooks can confidently create delicious and safe pastrami. This dedication to safety ensures that the rich flavors and satisfying textures of this beloved cured meat can be enjoyed without compromise.