For home bakers seeking to recreate the magic of artisanal pastries, a meticulously crafted recipe for sugar cookies with piped buttercream frosting offers a gateway to professional-level decorating. This guide delves into the nuances of achieving perfectly crisp-edged, tender-centered sugar cookies complemented by a smooth, stable buttercream ideal for intricate designs. The accompanying tutorial aims to demystify the art of piping, empowering even novice bakers to produce visually stunning results that rival those found in esteemed bakeries.

Mastering the Art of the Cut-Out Sugar Cookie
The foundation of this celebrated recipe lies in a foolproof cut-out sugar cookie dough. The key to its success is a balanced formulation that ensures the cookies maintain their shape during baking, a critical factor for intricate cut-outs and decorative piping. While many sugar cookie recipes can result in overly hard or crumbly textures, this particular blend is engineered for a delightful duality: a satisfying crispness at the perimeter giving way to a wonderfully tender interior. This textural harmony is paramount for creating a canvas that is both structurally sound and pleasant to consume.
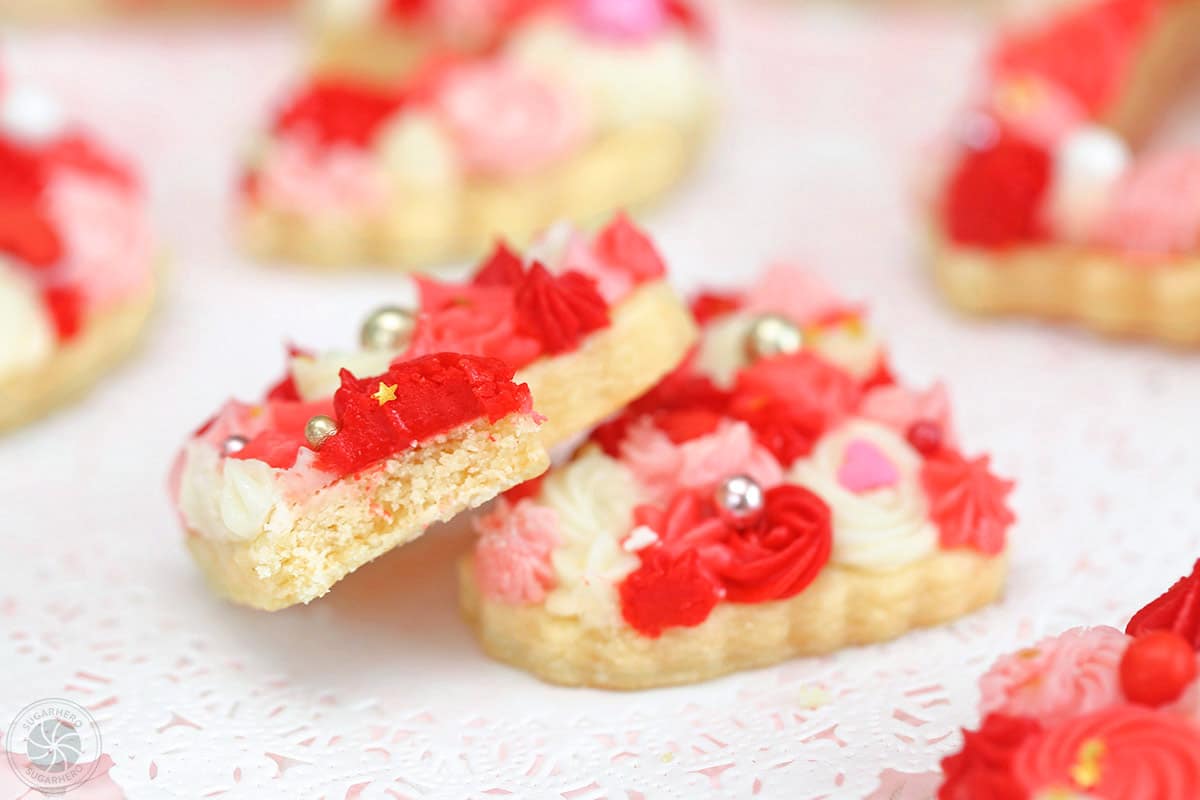
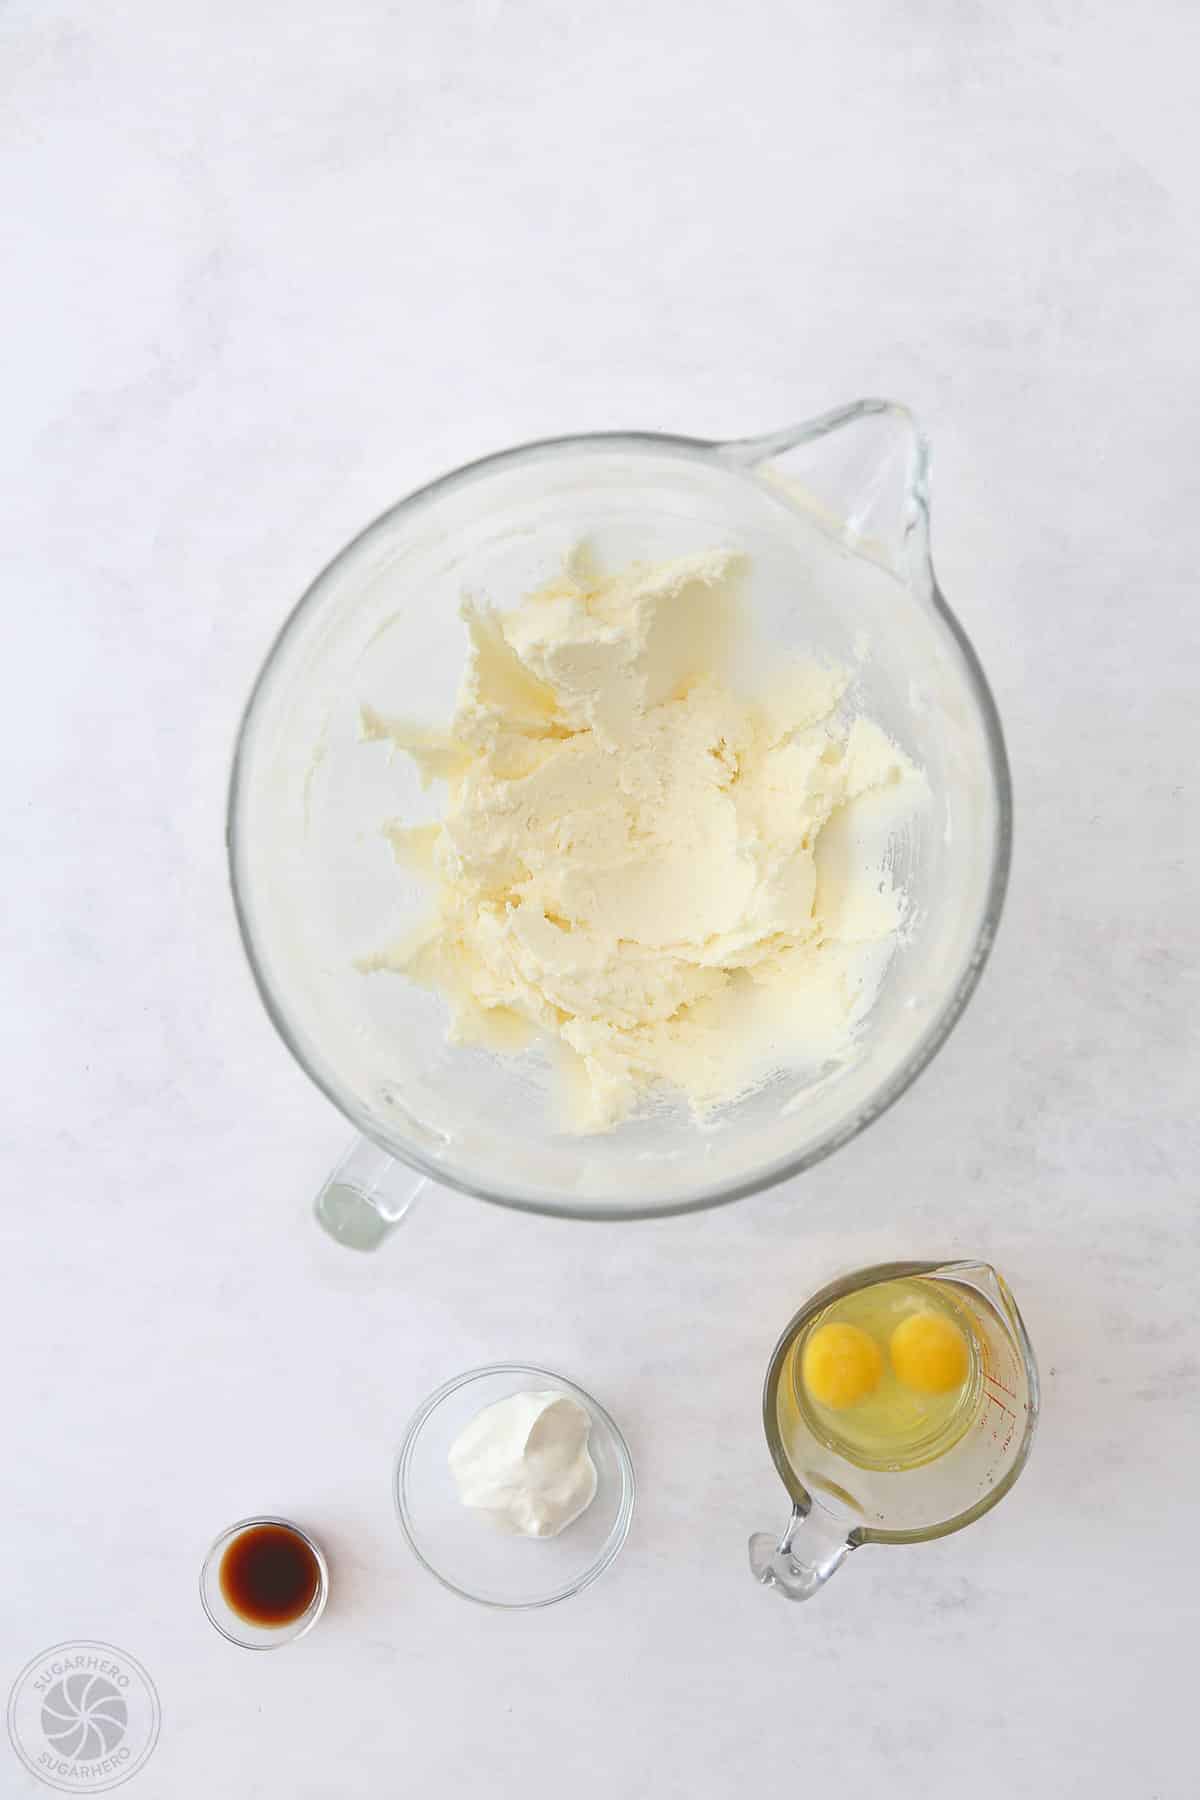
The recipe emphasizes the use of quality ingredients, a cornerstone of any successful culinary endeavor. For instance, the type of flour used can significantly impact the final texture. All-purpose flour, when properly measured, provides the necessary structure without being overly tough. The fat component, typically butter, is crucial for flavor and tenderness. Creaming the butter and sugar together until light and fluffy incorporates air, which contributes to the cookie’s lift and delicate texture. The inclusion of an egg acts as a binder, holding the ingredients together, while vanilla extract provides the classic, comforting aroma and taste. A touch of cornstarch or cream of tartar can further enhance the crispness and prevent spread, ensuring the cookies retain their precisely cut shapes.
The Science Behind the Perfect Bake
Achieving the ideal sugar cookie bake involves understanding fundamental baking principles. The resting period for the dough is not merely a suggestion but a scientific necessity. Chilling the dough allows the gluten to relax, preventing toughness. It also solidifies the fat, which controls spread during baking. When the chilled dough hits the oven, the fat melts more slowly, allowing the cookie to set before it spreads too thinly. This controlled melting is what contributes to those desirable crisp edges.
The baking temperature and time are equally critical. A moderate oven temperature (typically around 350°F or 175°C) ensures even baking without scorching. Overbaking will inevitably lead to dry, hard cookies, while underbaking can result in a doughy center. Vigilance during the final minutes of baking is key, as cookies can transition from perfectly baked to overdone very quickly. The visual cues – golden brown edges and a set, slightly puffed center – are reliable indicators of doneness.

Elevating with Effortless Buttercream Frosting
The visual appeal and palatability of these sugar cookies are further enhanced by a smooth, easy-to-pipe buttercream frosting. This American-style buttercream is a staple in home baking due to its simplicity and versatility. It typically consists of butter, powdered sugar, a liquid (such as milk or cream), and a flavoring agent (like vanilla extract). The ratio of butter to powdered sugar is key to achieving the desired consistency. Too much powdered sugar can make the frosting stiff and difficult to pipe, while too little can result in a runny, unmanageable texture.
The technique for creating a stable, pipeable buttercream involves the proper creaming of butter until it is light and fluffy, followed by the gradual addition of powdered sugar. This process incorporates air and creates a smooth emulsion. The addition of a small amount of liquid helps to achieve the correct consistency, and vanilla extract provides a foundational flavor. For vibrant colors, gel food coloring is recommended as it is more concentrated and will not significantly alter the frosting’s texture.
The Art of Piping: A Beginner’s Approach
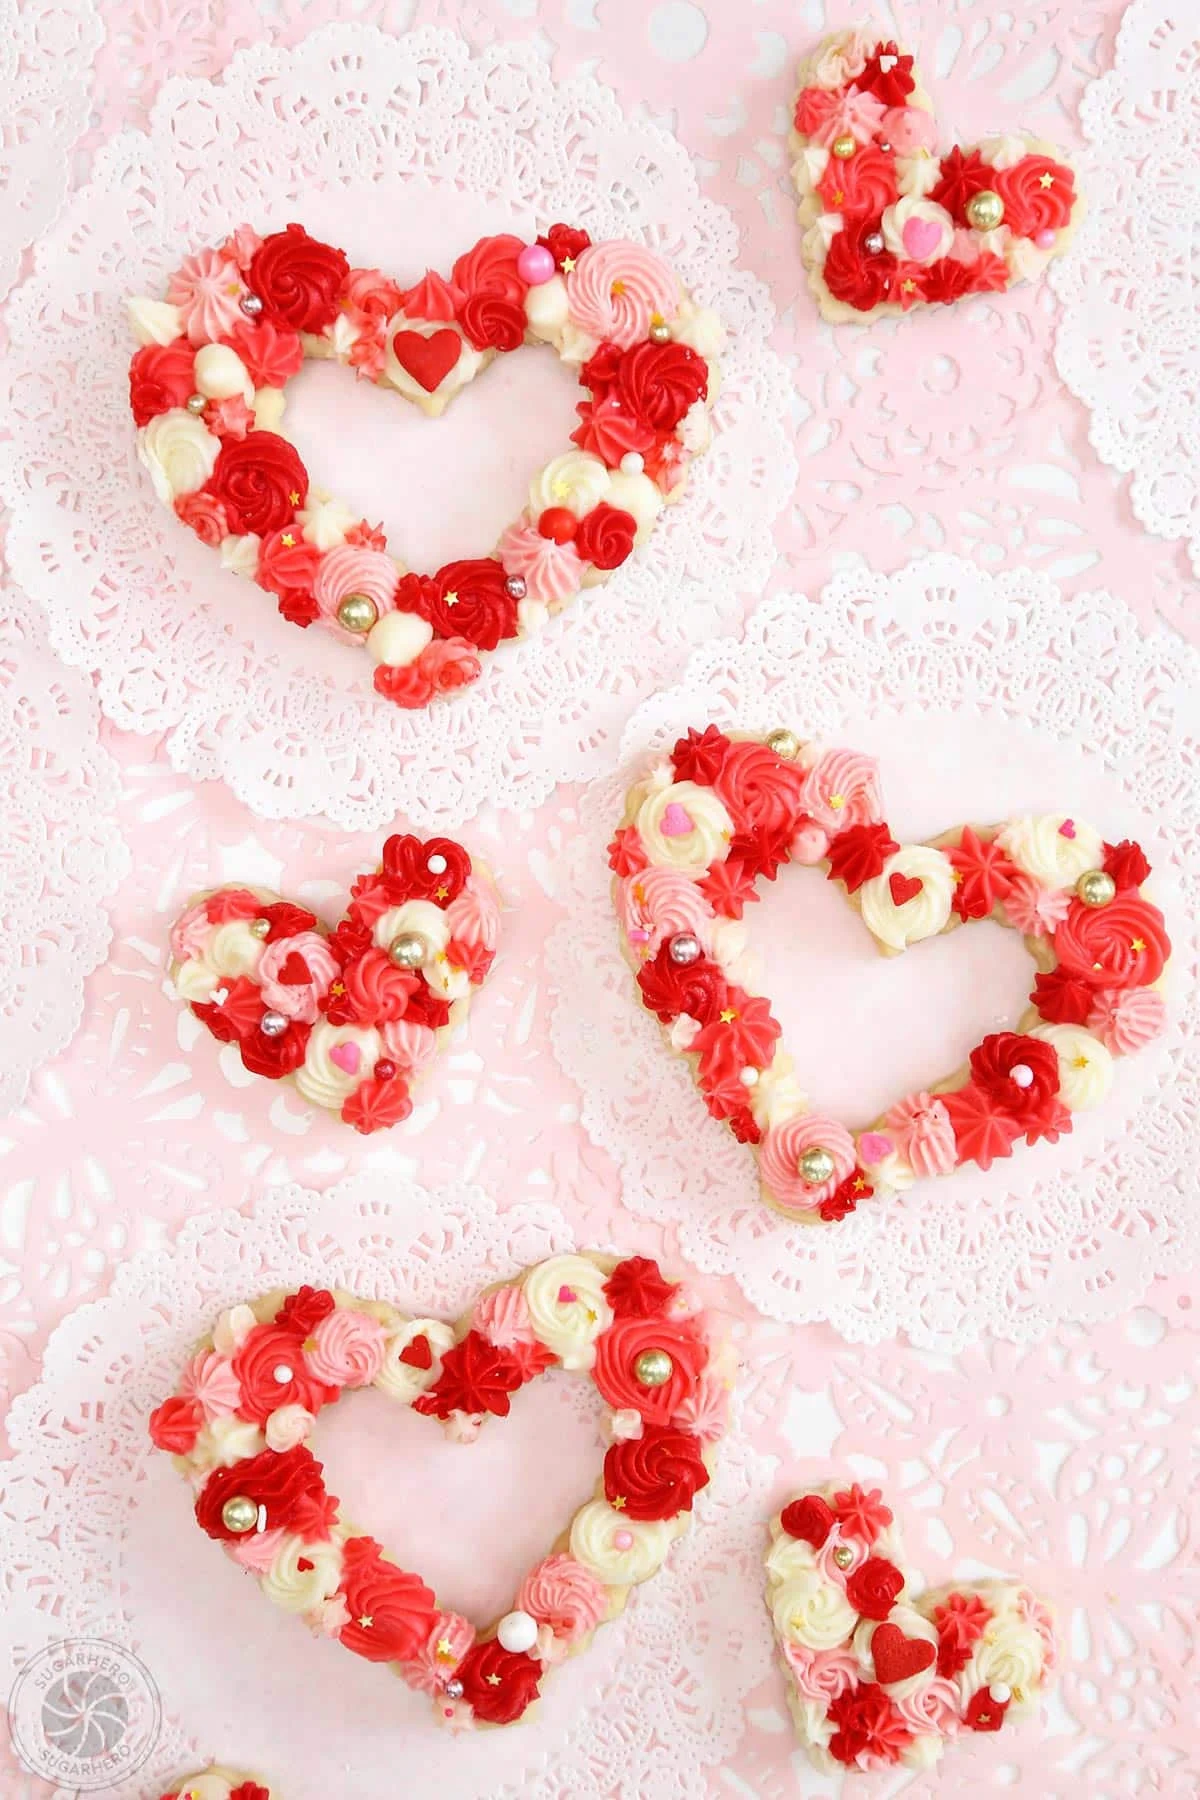
Piping frosting can often be a source of apprehension for novice bakers. However, this recipe champions a technique that prioritizes creativity over absolute precision, making it exceptionally beginner-friendly. The strategy involves using multiple piping bags, each filled with a different color of buttercream and fitted with a small star tip. The variation in tip sizes and colors allows for a dynamic and visually interesting design, even with simple piping techniques.
The beauty of this decorating method lies in its forgiving nature. There is no single "correct" way to apply the frosting. Bakers are encouraged to embrace a sense of playful abandon, piping swirls, dots, and zigzags of various colors adjacent to one another. The goal is not perfection but a charming, slightly chaotic mosaic that covers the cookie surface. Adding a final flourish of sprinkles can further enhance the visual appeal and add a subtle textural contrast. This approach transforms the decorating process from a daunting task into an enjoyable, expressive activity.
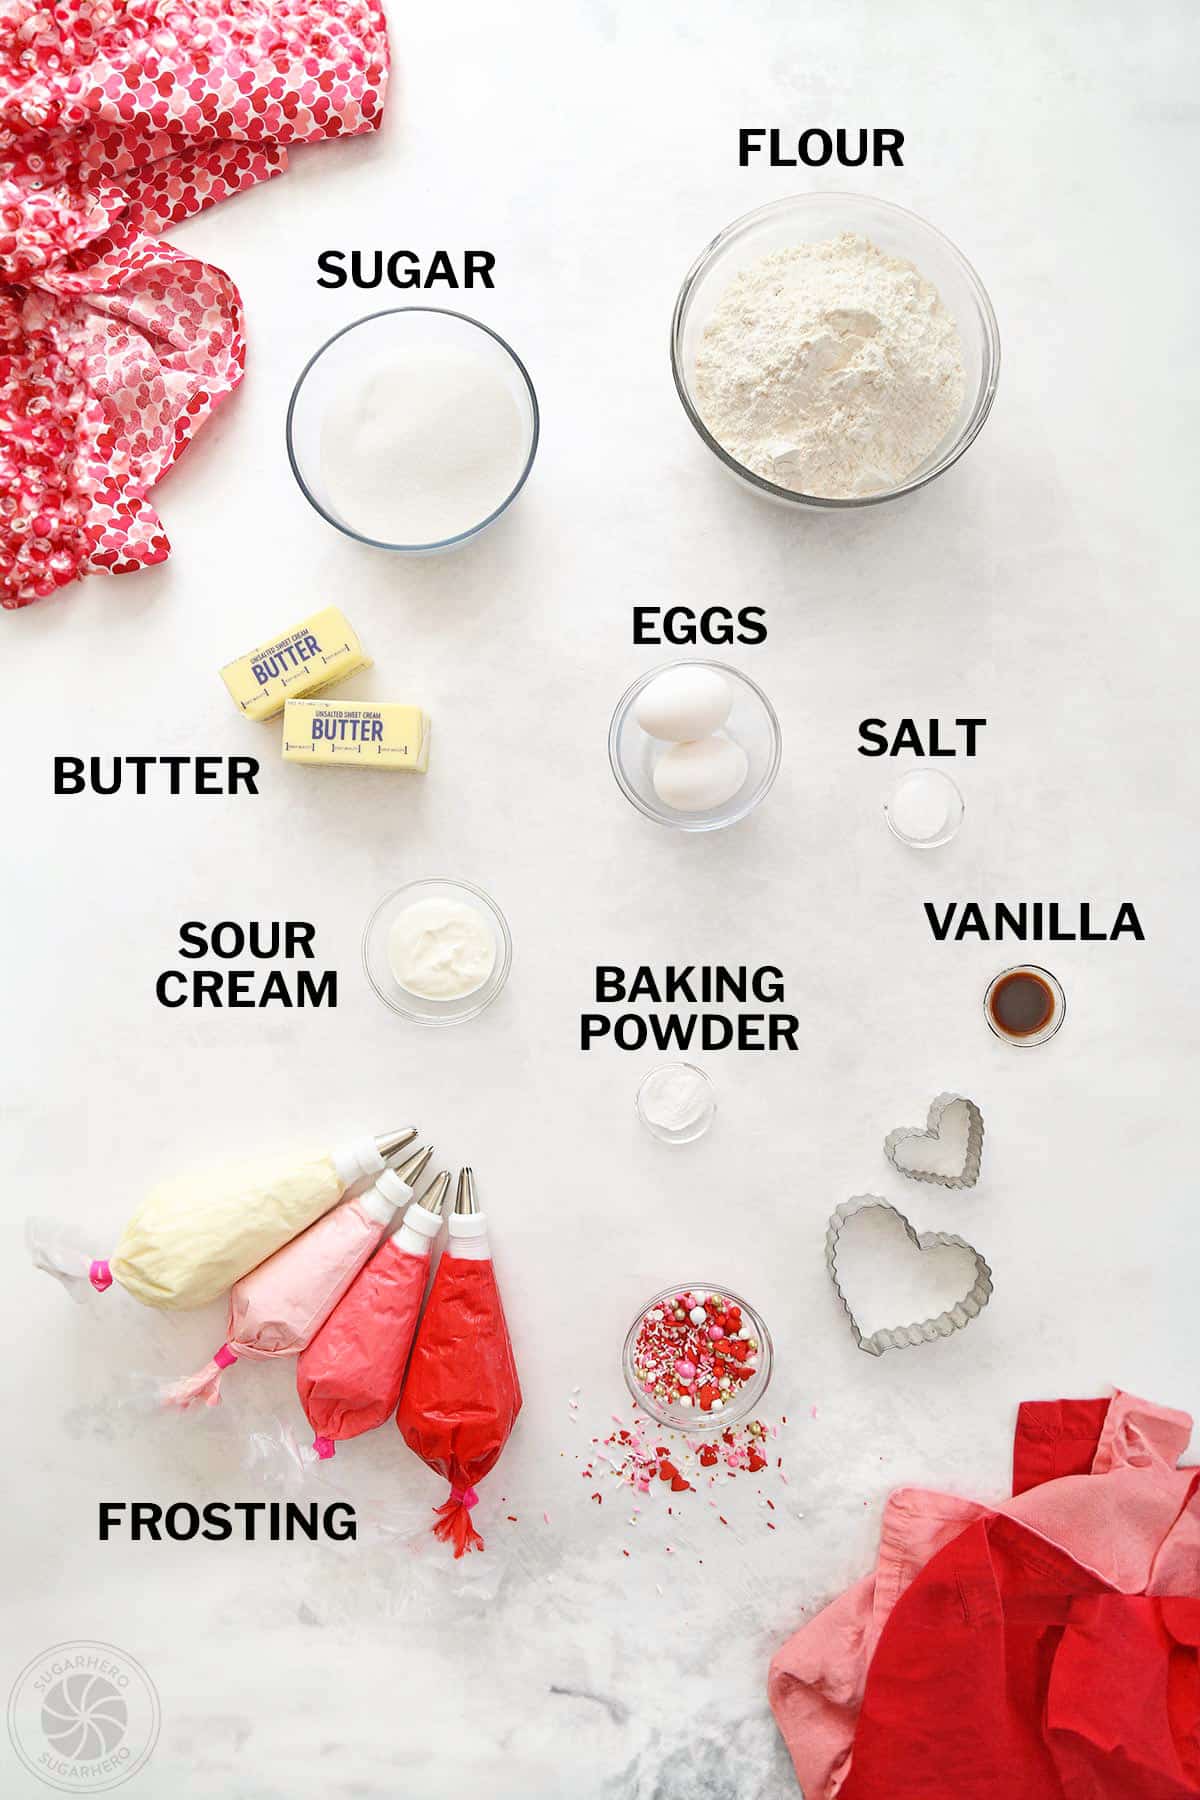
Ingredients and Equipment: The Baker’s Arsenal
To embark on this culinary journey, a well-stocked pantry and a few key pieces of equipment are essential.
Essential Ingredients for Sugar Cookies:
- All-Purpose Flour: Provides structure and is the base of the cookie dough.
- Granulated Sugar: Contributes sweetness and aids in browning and crispness.
- Unsalted Butter: Crucial for flavor, tenderness, and texture. Ensure it’s softened but not melted.
- Eggs: Act as binders and add richness.
- Vanilla Extract: Enhances flavor and aroma.
- Baking Powder: A leavening agent that helps the cookies rise slightly and maintain their shape.
- Salt: Balances sweetness and enhances overall flavor.
- Cornstarch (optional): Can contribute to a crisper texture.
Essential Ingredients for Buttercream Frosting:
- Unsalted Butter: The primary component, softened for optimal creaming.
- Powdered Sugar (Confectioners’ Sugar): Provides sweetness and structure. Sifting is recommended to avoid lumps.
- Milk or Cream: Adds moisture and helps achieve the desired piping consistency.
- Vanilla Extract: For classic flavor.
- Gel Food Coloring: For vibrant and diverse colors.
Essential Equipment:
- Mixing Bowls: Various sizes for combining dry and wet ingredients.
- Electric Mixer (Stand or Handheld): For efficiently creaming butter and sugar, and whipping frosting.
- Measuring Cups and Spoons: For accurate ingredient measurements (though a kitchen scale is highly recommended for precision).
- Rolling Pin: For uniformly rolling out cookie dough.
- Cookie Cutters: Various shapes to create desired cookie forms.
- Baking Sheets: Preferably heavy-duty, light-colored sheets for even baking.
- Parchment Paper: Prevents sticking and facilitates easy cleanup.
- Piping Bags: Disposable or reusable bags for holding and piping frosting.
- Piping Tips: Small star tips are ideal for this decorative technique.
- Spatulas: For scraping bowls and spreading frosting.
- Wire Cooling Racks: For allowing cookies to cool completely before frosting.
A Step-by-Step Culinary Journey
The process of creating these delightful sugar cookies is divided into distinct stages, each contributing to the final masterpiece.

Crafting the Sugar Cookie Dough:
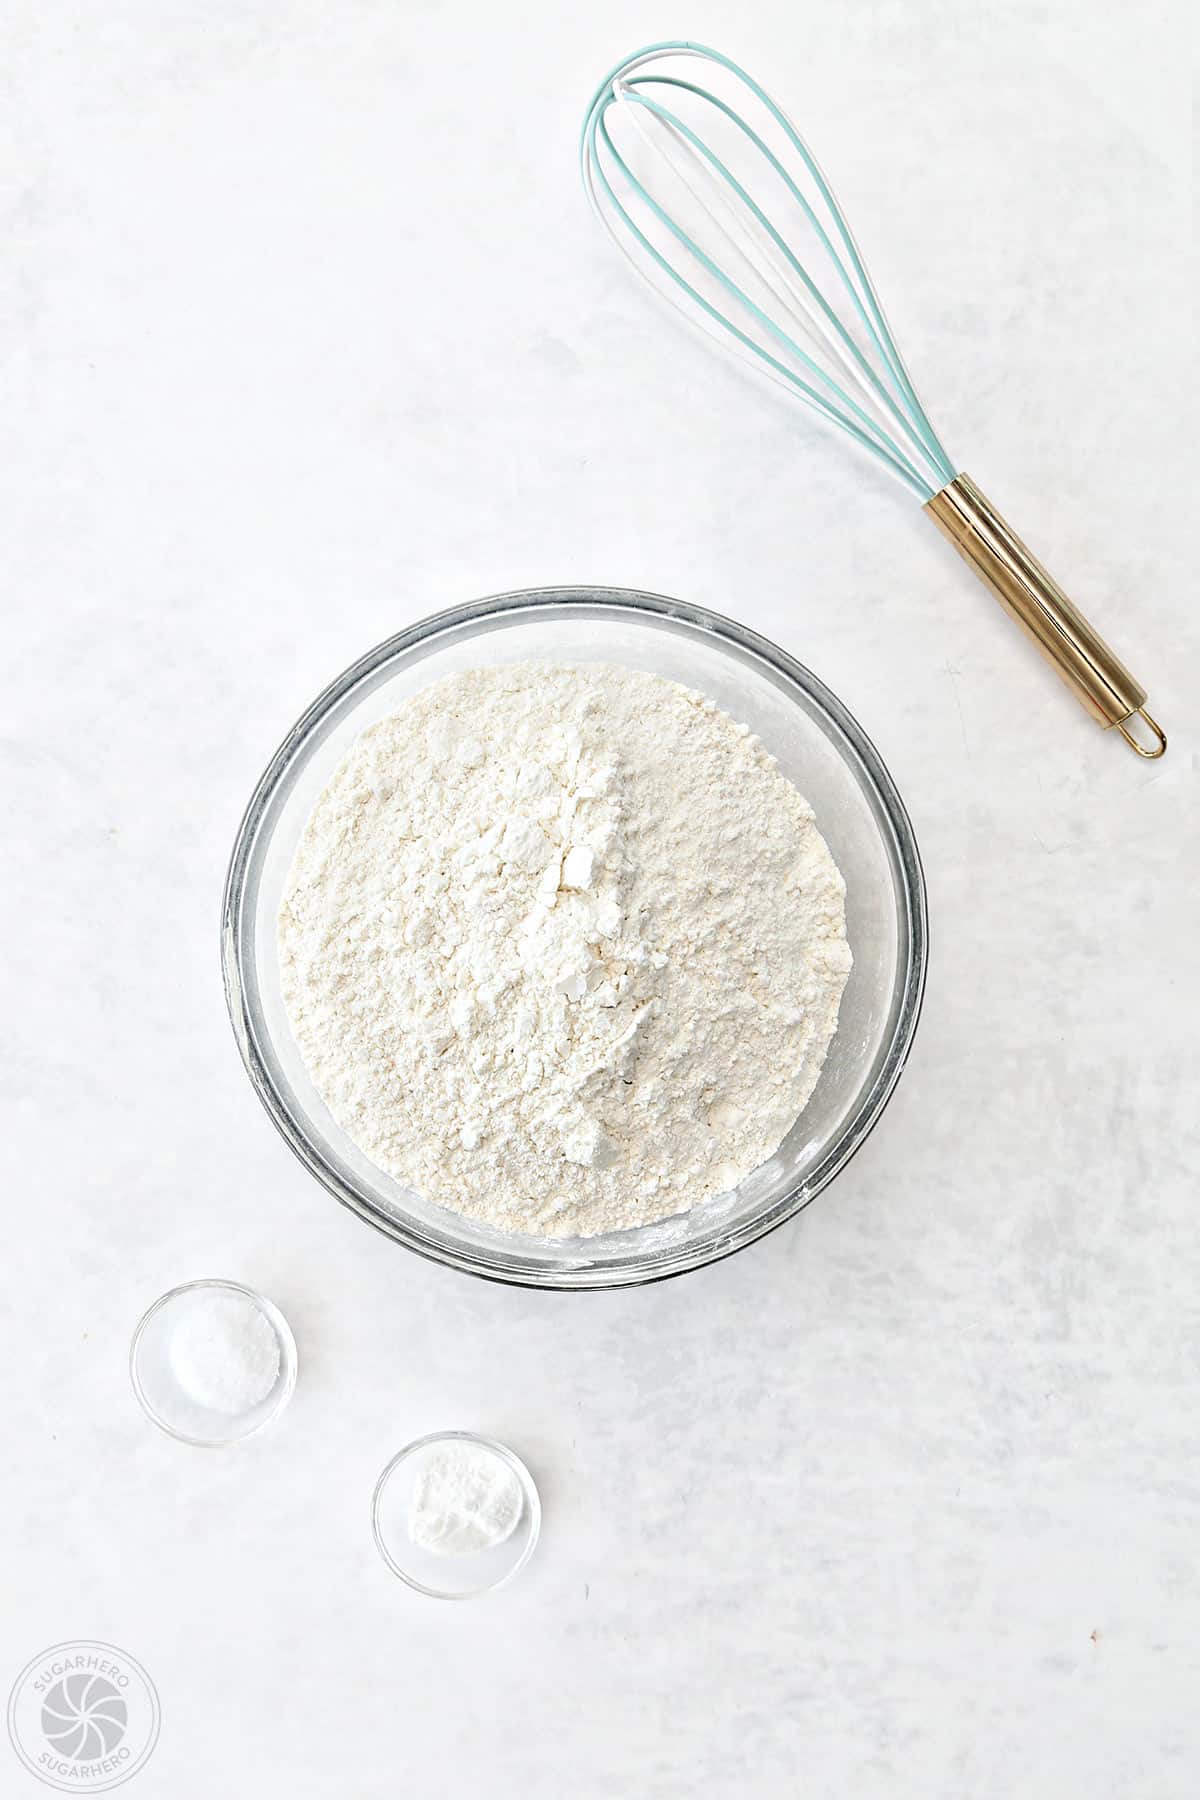
- Dry Ingredients: In a medium bowl, whisk together the all-purpose flour, baking powder, salt, and cornstarch (if using). This ensures the leavening agents are evenly distributed.
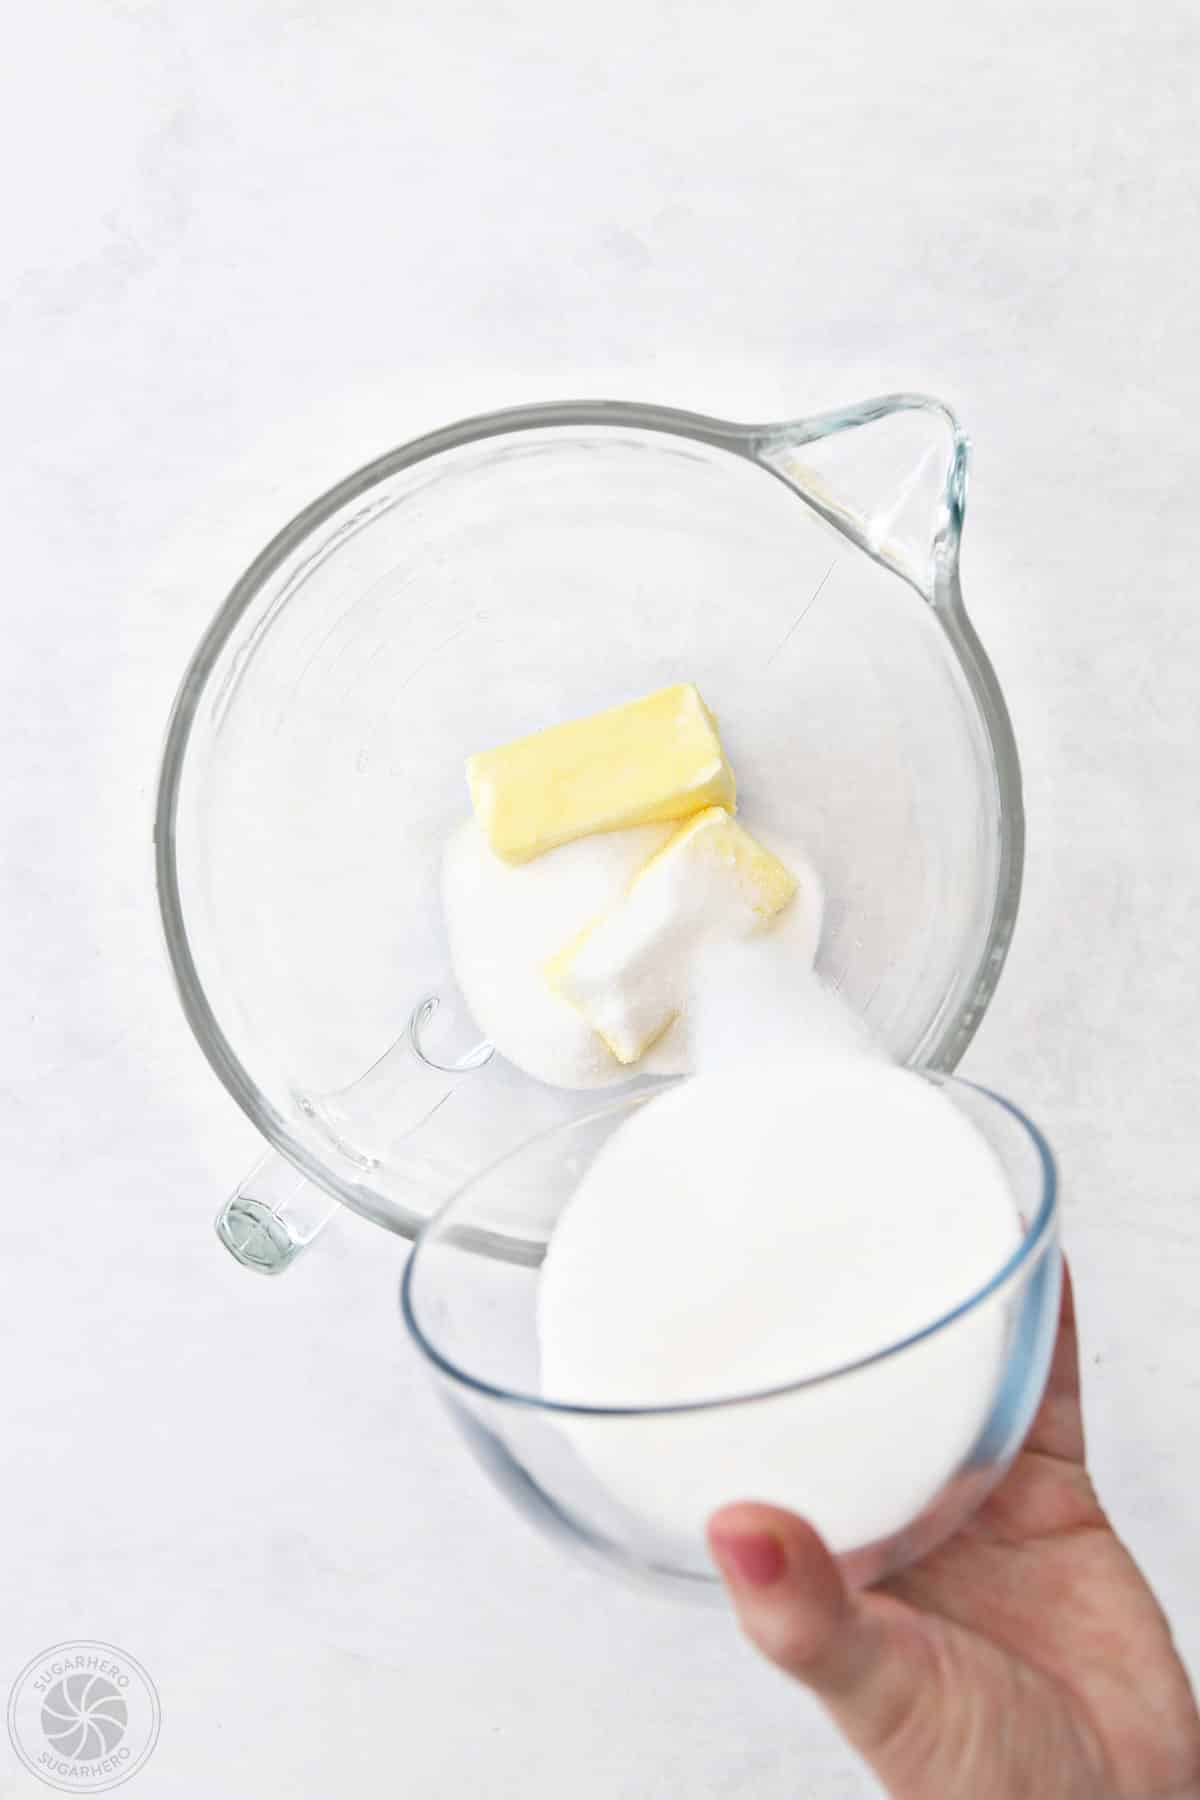
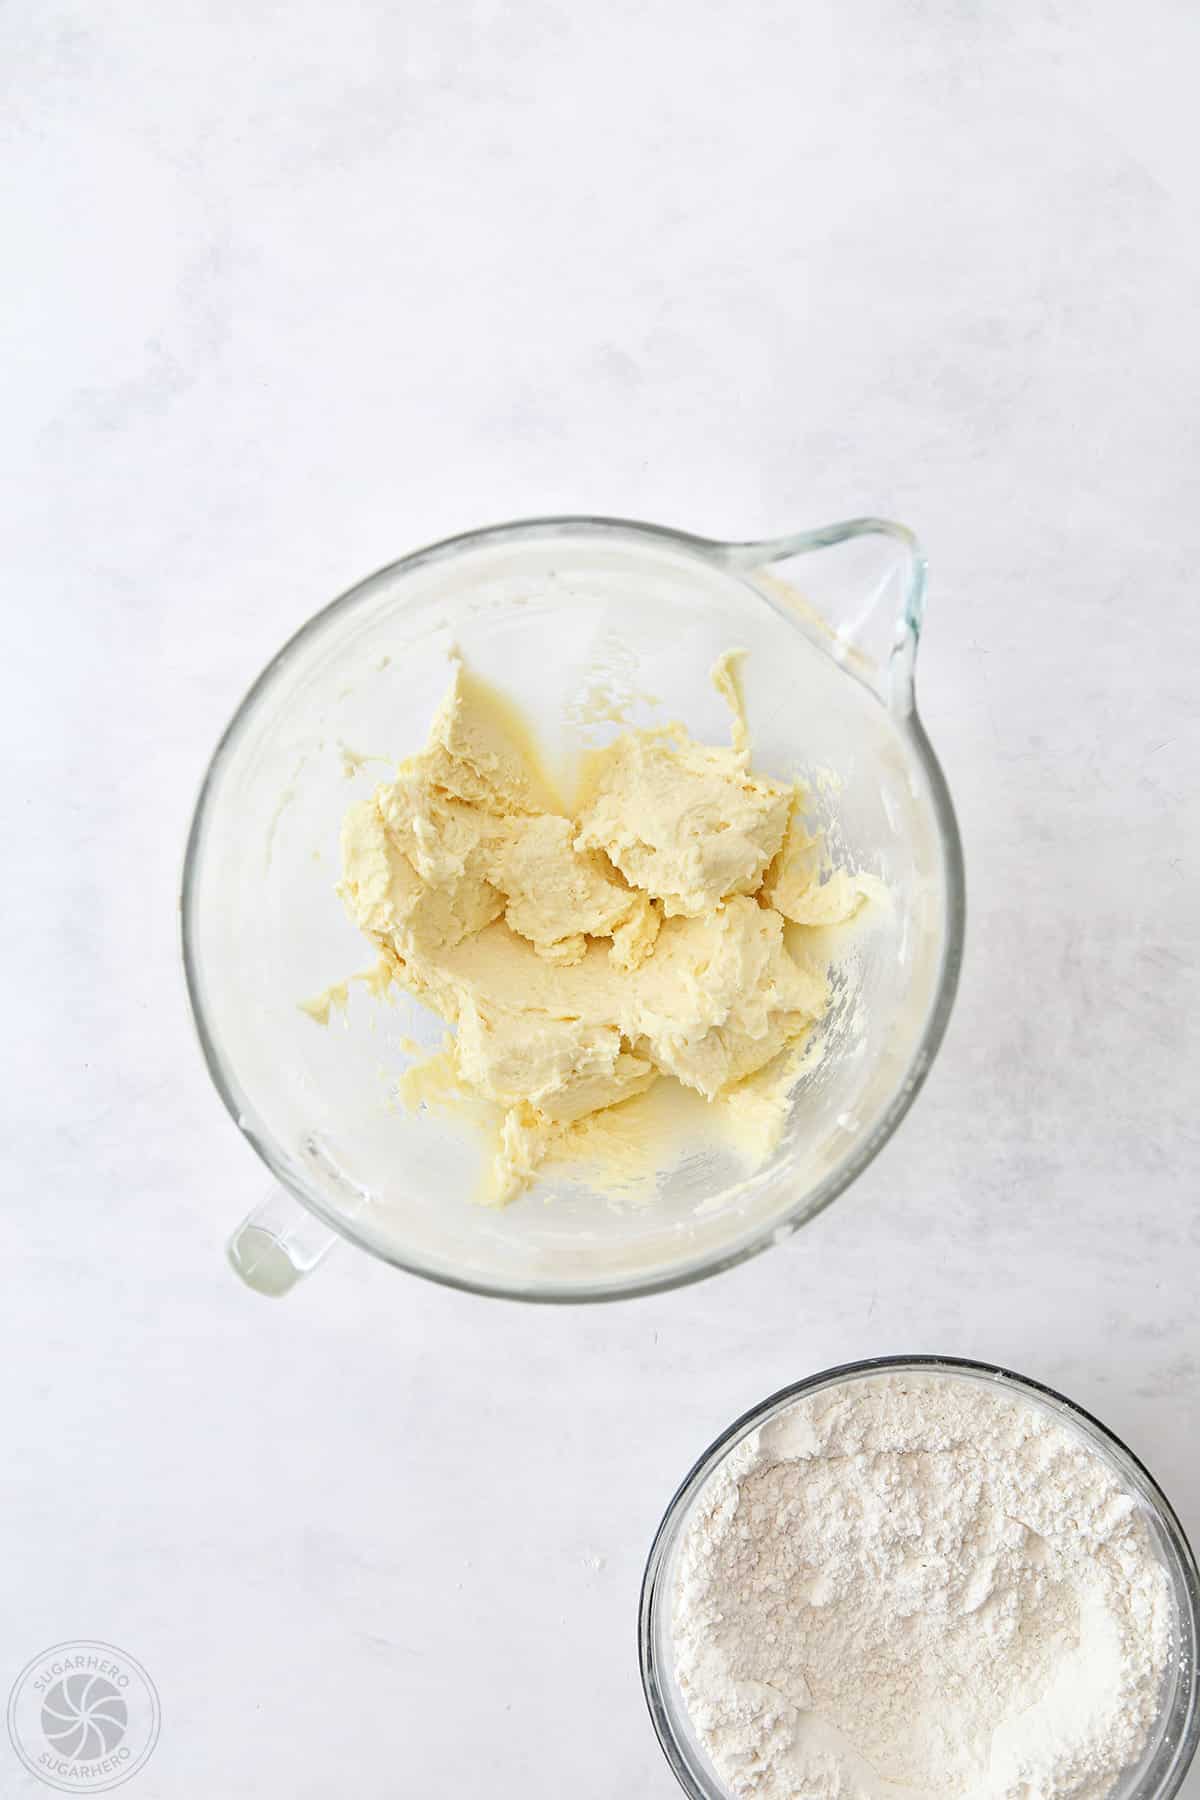
- Creaming Butter and Sugar: In a large mixing bowl, beat the softened unsalted butter and granulated sugar with an electric mixer on medium-high speed until the mixture is pale yellow, light, and fluffy. This process can take 3-5 minutes and is crucial for incorporating air.
- Adding Wet Ingredients: Beat in the eggs one at a time, ensuring each is fully incorporated before adding the next. Stir in the vanilla extract.
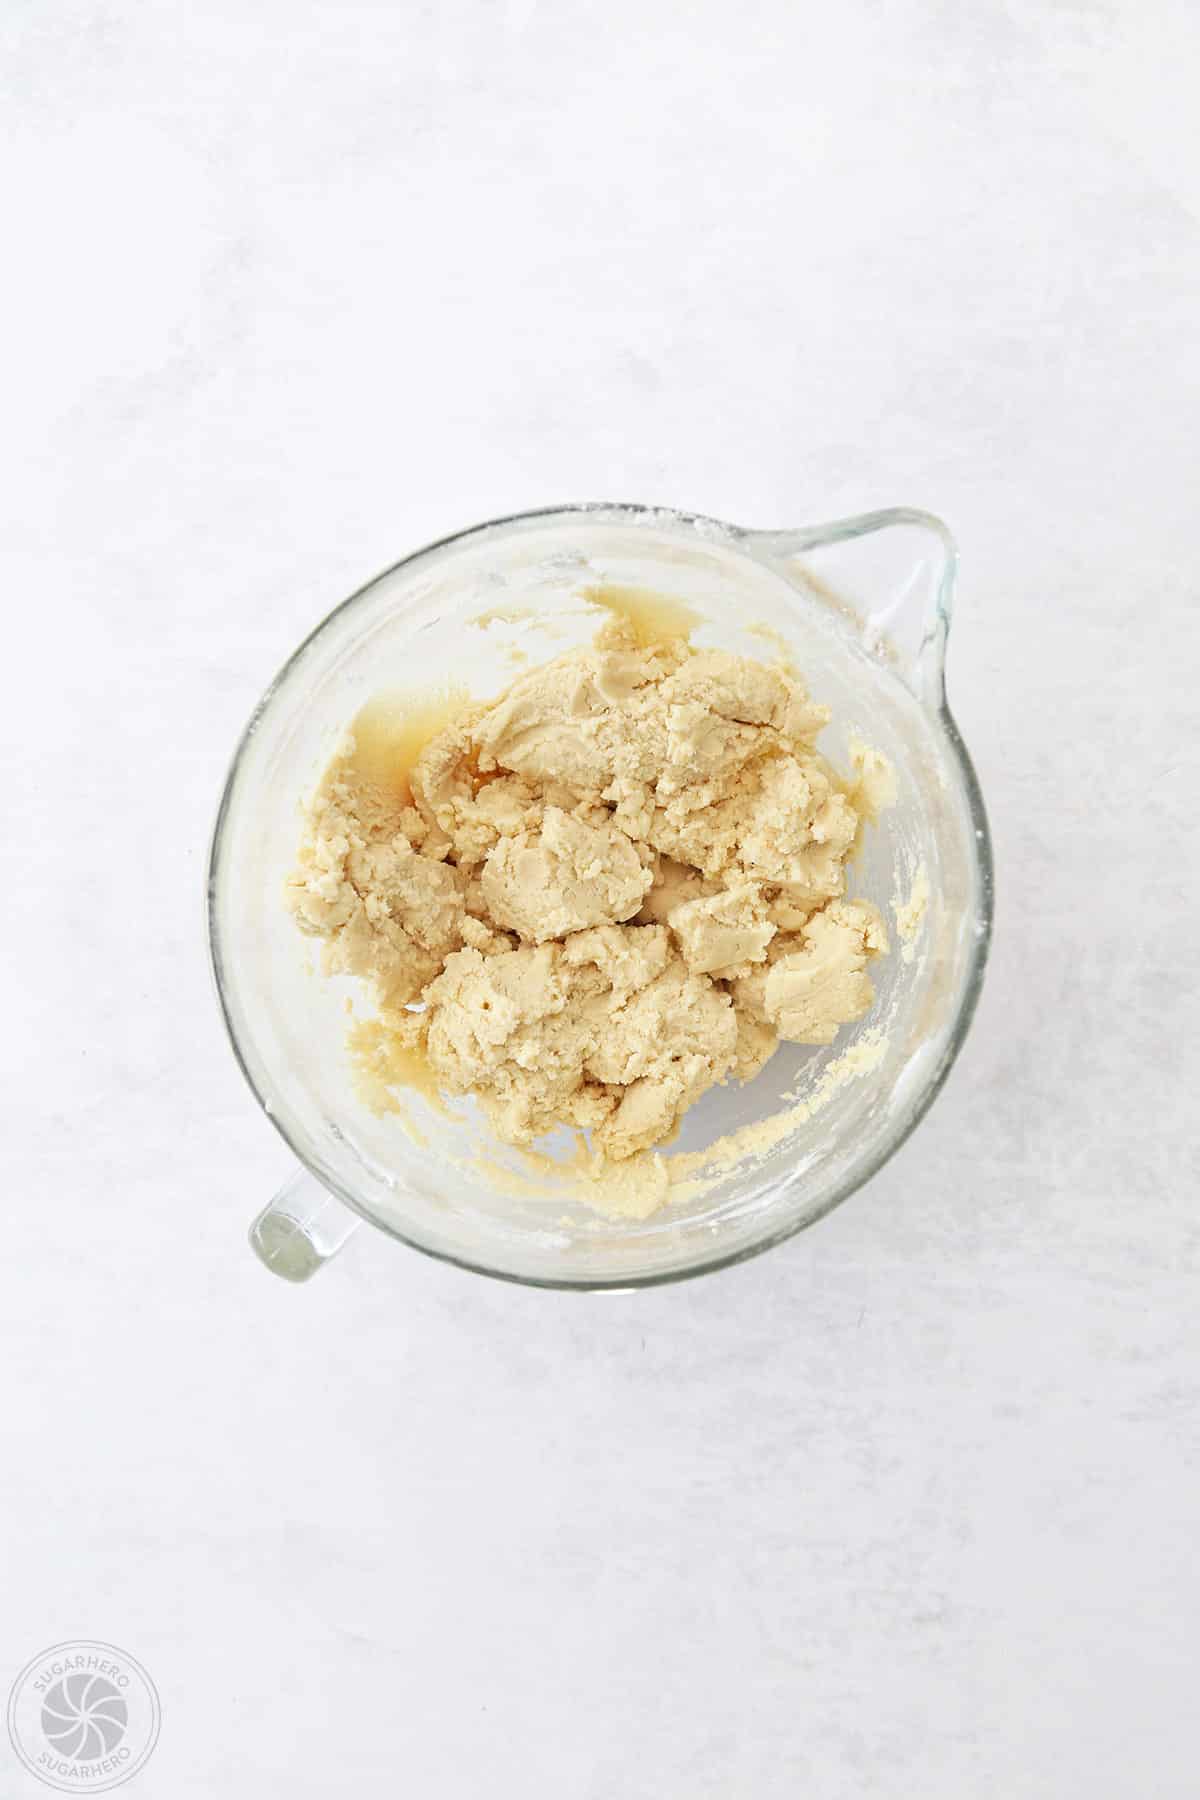
- Combining Wet and Dry: Gradually add the dry ingredients to the wet ingredients, mixing on low speed until just combined. Be careful not to overmix, as this can develop gluten and result in tough cookies.
- Chilling the Dough: Divide the dough into two flat discs, wrap them tightly in plastic wrap, and refrigerate for at least 1 hour, or until firm. This chilling period is essential for preventing excessive spreading during baking.
Baking the Cookies to Perfection:
- Preheating and Preparation: Preheat your oven to 350°F (175°C). Line baking sheets with parchment paper.
- Rolling and Cutting: On a lightly floured surface, roll out one disc of chilled dough to about 1/4-inch thickness. Use your desired cookie cutters to create shapes. Carefully transfer the cut-out cookies to the prepared baking sheets, leaving about 1-2 inches between them.
- Baking: Bake for 8-12 minutes, or until the edges are lightly golden brown and the centers are set. The exact baking time will vary depending on the size and thickness of your cookies.
- Cooling: Let the cookies cool on the baking sheets for a few minutes before transferring them to wire racks to cool completely. Ensure they are entirely cool before proceeding to the frosting stage.
Preparing the Buttercream Frosting:
- Creaming Butter: In a large mixing bowl, beat the softened unsalted butter with an electric mixer on medium-high speed until it is light and fluffy, about 2-3 minutes.
- Adding Powdered Sugar: Gradually add the sifted powdered sugar, about a cup at a time, mixing on low speed until incorporated. Increase the speed to medium-high and beat until the frosting is smooth and creamy.
- Adding Liquid and Flavoring: Add the vanilla extract and 1-2 tablespoons of milk or cream, beating until the frosting reaches a smooth, pipeable consistency. Add more liquid, a teaspoon at a time, if needed, but be careful not to make it too thin.
- Coloring the Frosting: Divide the buttercream into separate bowls for each desired color. Add gel food coloring gradually, mixing thoroughly until the desired shades are achieved.
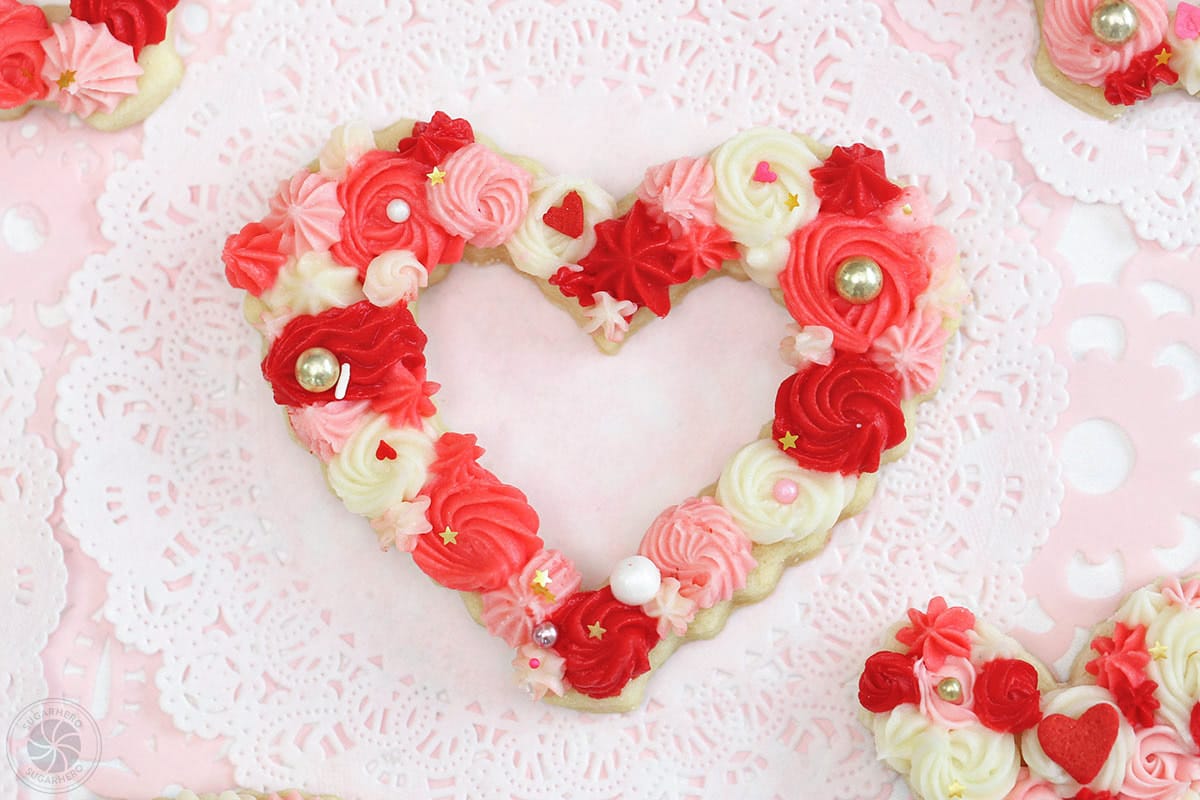
Decorating with Flair:
- Prepare Piping Bags: Fit each piping bag with a small star tip and fill each bag with a different color of buttercream frosting.
- Piping Technique: Hold the piping bag at a slight angle to the cookie. Apply gentle, consistent pressure to pipe various designs. Experiment with dots, swirls, lines, and rosettes, layering different colors next to each other. There is no right or wrong approach; embrace creative freedom.
- Adding Sprinkles: While the frosting is still wet, lightly sprinkle your decorated cookies with your chosen decorative sprinkles for a final touch.
- Setting: Allow the frosting to set completely before storing or serving.
Tips for Culinary Success
To ensure the most favorable outcome when preparing these sugar cookies, consider the following expert advice:
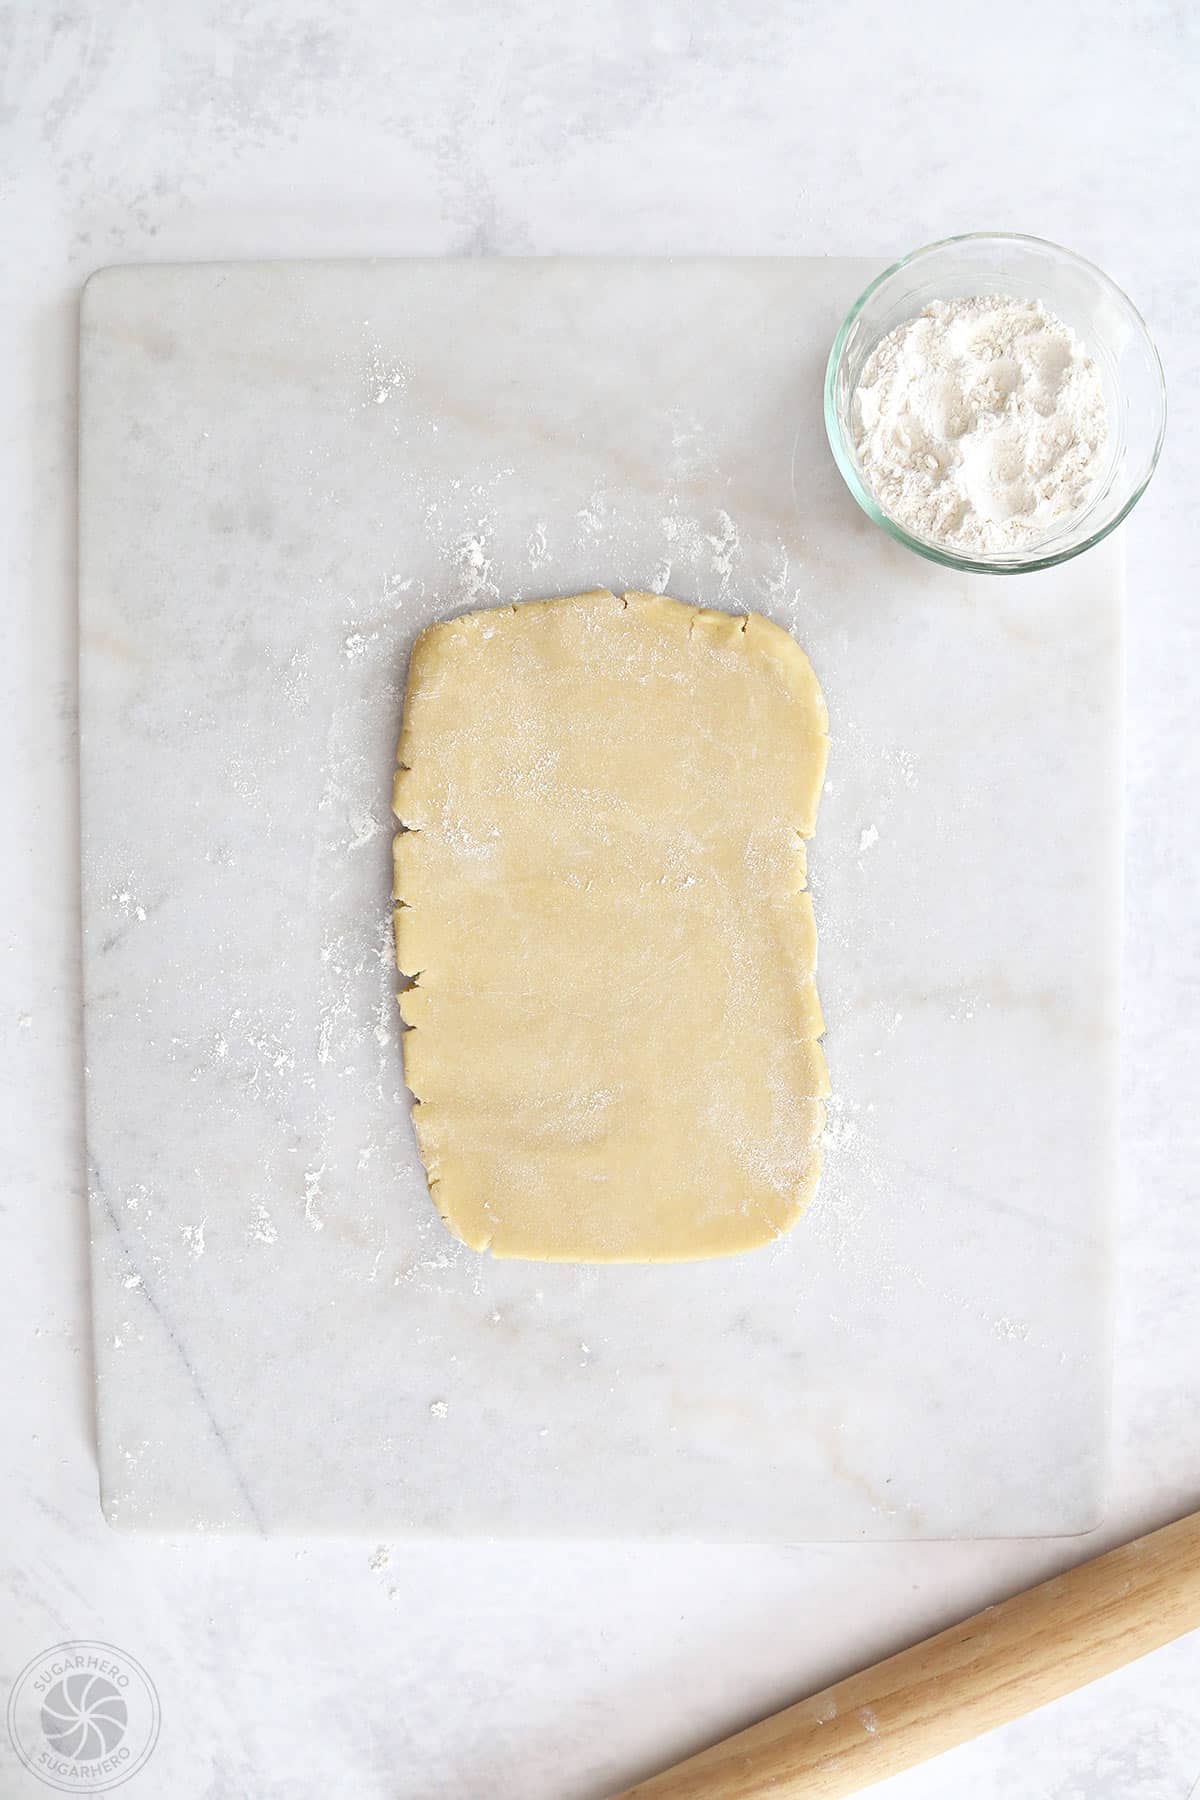
- Dough Consistency: If the dough becomes too soft to handle while cutting, return it to the refrigerator for a short period.
- Uniform Thickness: Rolling the dough to an even thickness is crucial for consistent baking times and appearance. Using rolling pin guides or shims can be helpful.
- Frosting Stability: For a frosting that holds its shape exceptionally well, ensure your butter is at the correct softened temperature and avoid adding too much liquid. If the frosting becomes too soft, chilling it briefly can help.
- Red Frosting Vibrancy: Achieving a true red hue can be challenging. Using a high-quality gel food coloring specifically designed for baking is recommended. Some recipes benefit from a small amount of beet powder or a longer resting period for the colored frosting to deepen its shade.
- Storage: Store cooled, unfrosted cookies in an airtight container at room temperature for up to a week. Frosted cookies should also be stored in an airtight container, with parchment paper between layers to prevent sticking.
Broader Implications and Culinary Trends
The enduring popularity of sugar cookies, particularly those suitable for decorating, speaks to a broader trend in home baking. As consumers seek more personalized and creative outlets, the ability to craft bespoke treats at home has gained significant traction. Recipes like this one, which offer both delicious results and accessible decorating techniques, empower individuals to engage with baking on a more sophisticated level. The rise of social media platforms has further amplified this trend, with home bakers sharing their creations and inspiring others, fostering a vibrant online community centered around culinary artistry. The accessibility of such recipes democratizes the art of baking, making it a rewarding hobby for a wider audience. The meticulous detail and vibrant presentation of these sugar cookies exemplify the current demand for aesthetically pleasing yet approachable homemade goods.