Creating visually striking desserts often involves incorporating elements that mimic real-world textures and materials. Among these, the appearance of glass has long captivated bakers and dessert artists, offering a way to add intricate detail and a touch of magic to their creations. Edible sugar glass, a translucent and brittle confection, serves this purpose perfectly, transforming ordinary baked goods into extraordinary edible art. This guide delves into the precise science and accessible techniques behind crafting flawless edible sugar glass, empowering both novice bakers and seasoned professionals to achieve stunning results.
The Allure of Edible Sugar Glass
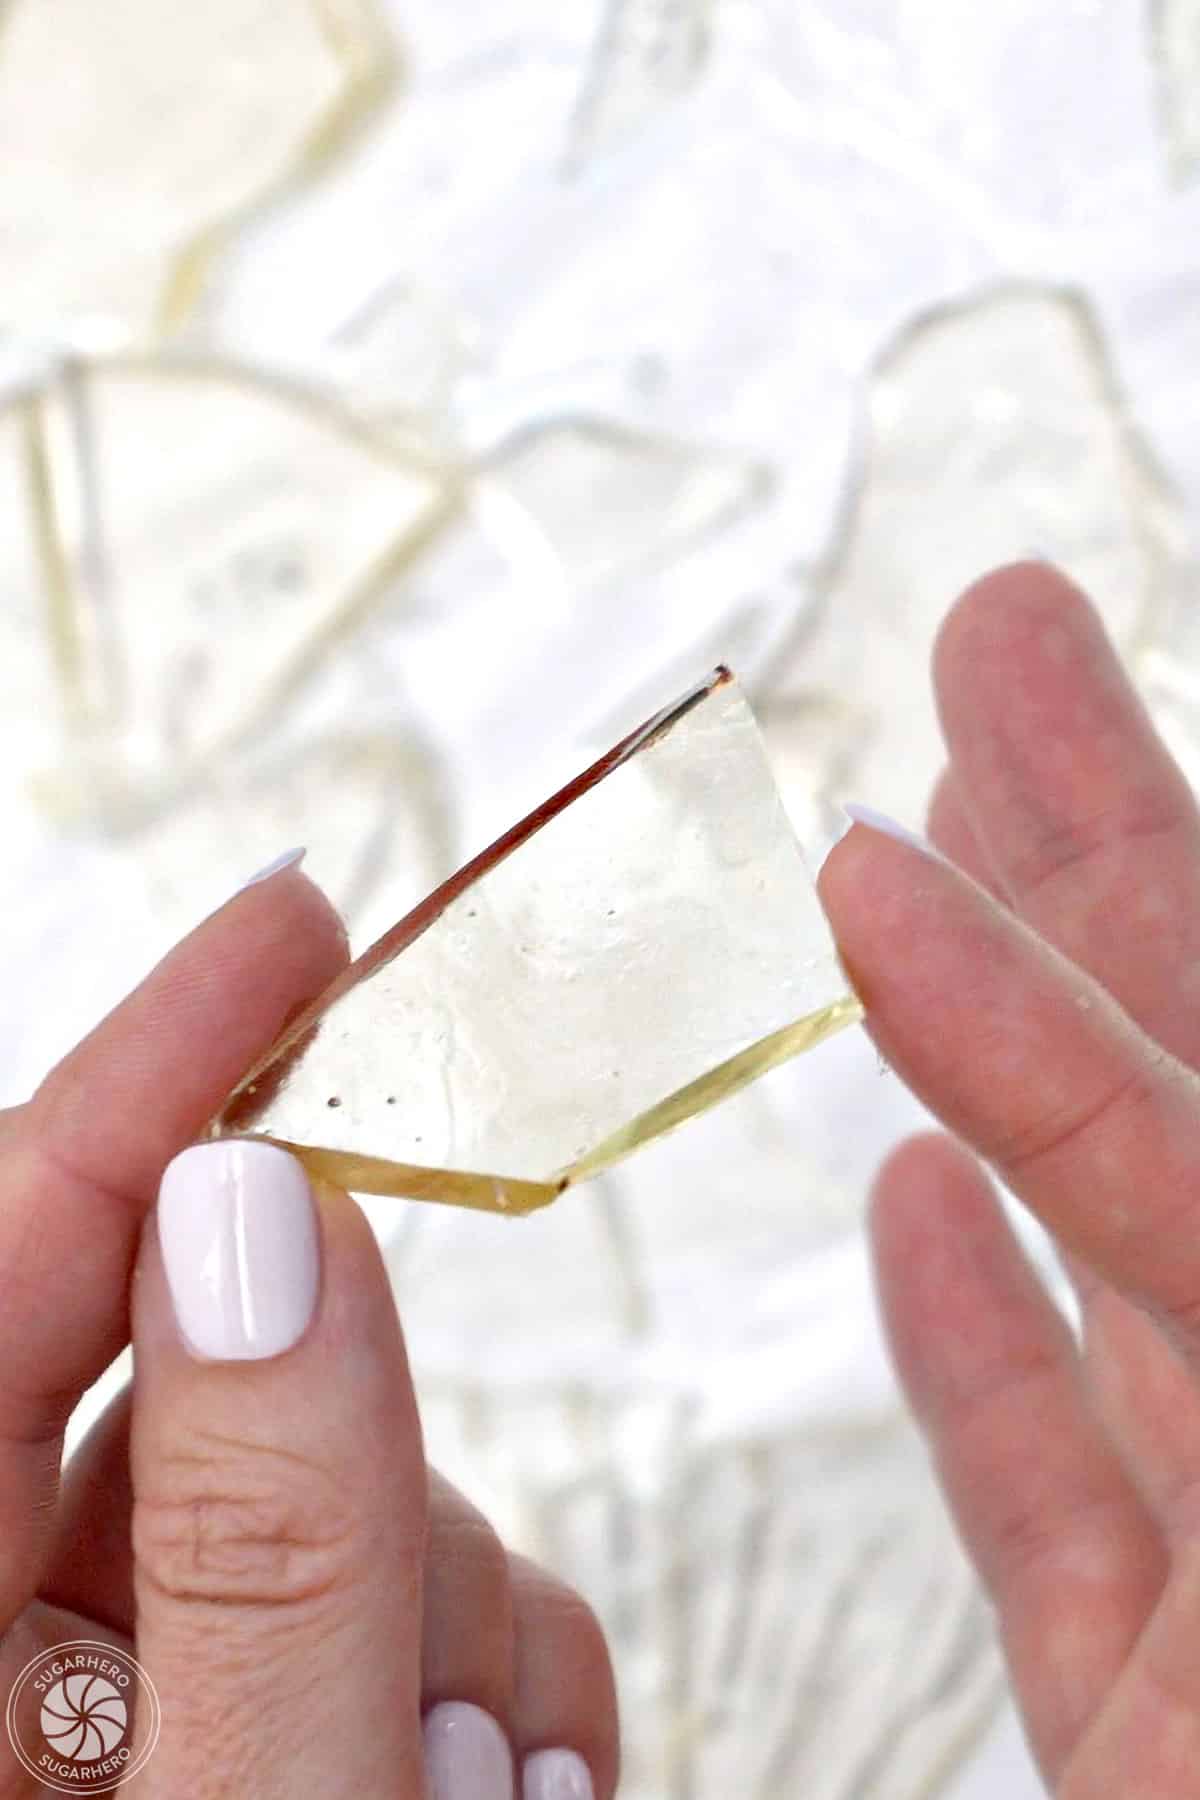
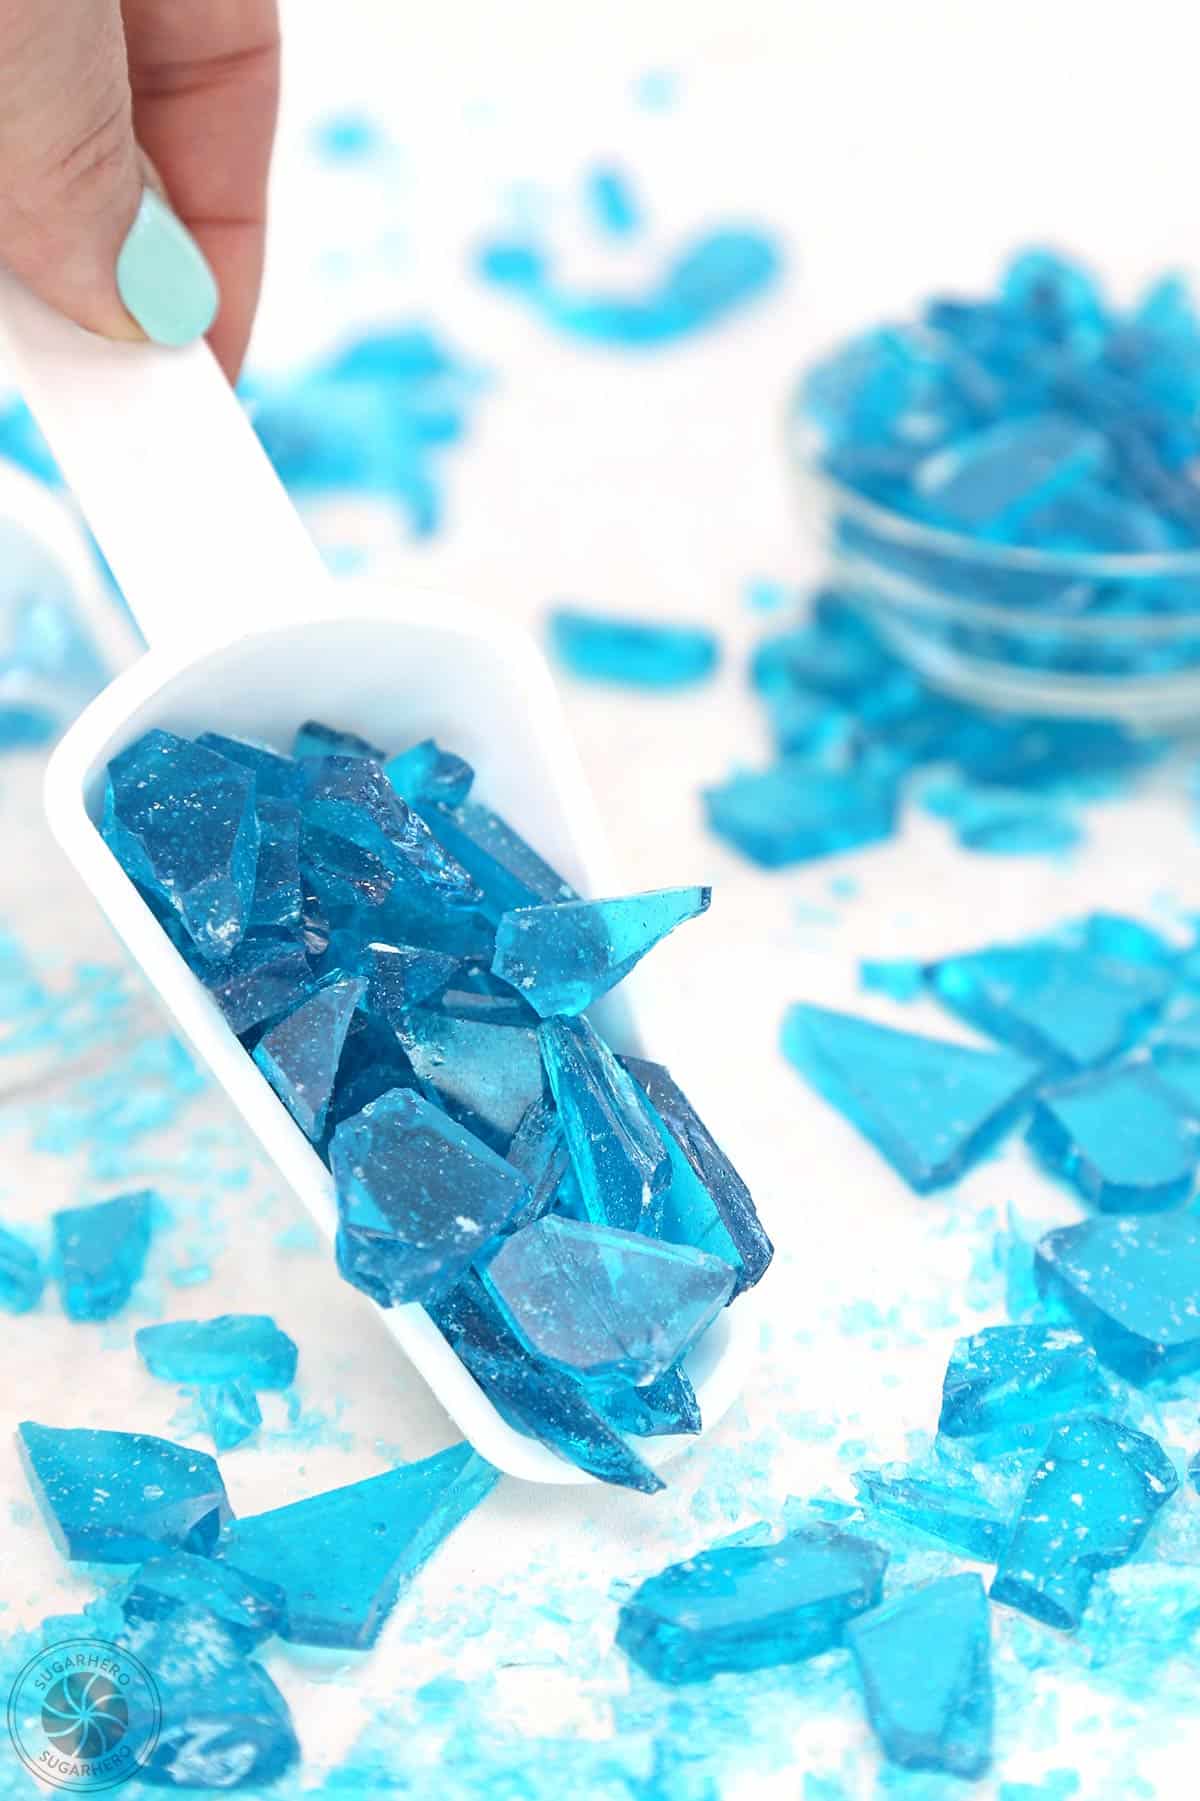
The appeal of edible sugar glass lies in its remarkable versatility and aesthetic impact. It can be employed to construct realistic windows for gingerbread houses, providing a transparent barrier that catches the light. For themed events, particularly around Halloween, shards of broken sugar glass can evoke a sense of drama and intrigue, simulating shattered panes or dangerous fragments. Its crystalline structure also lends itself to creations inspired by popular culture, such as the vibrant blue rock candy reminiscent of the television series "Breaking Bad."
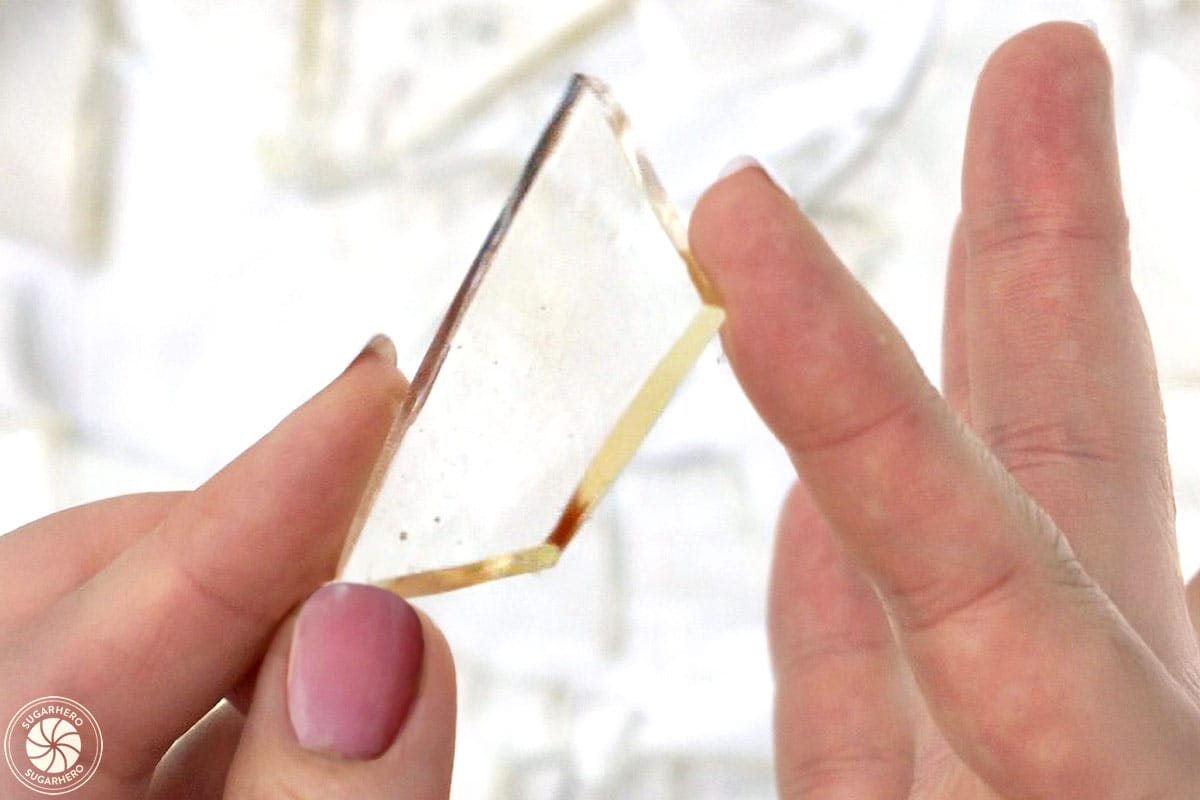
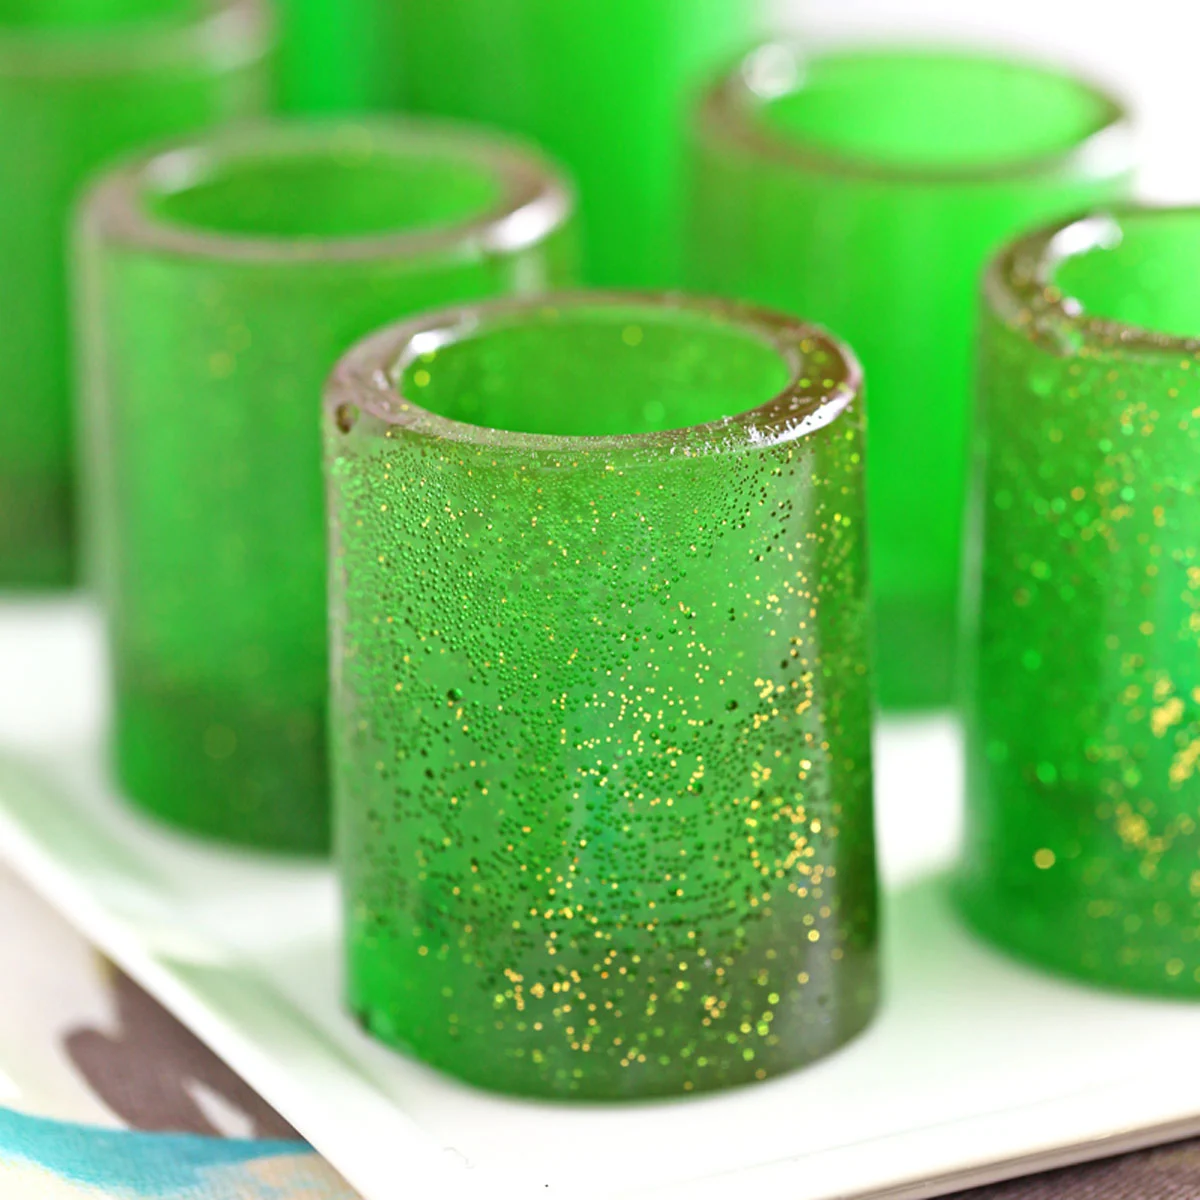
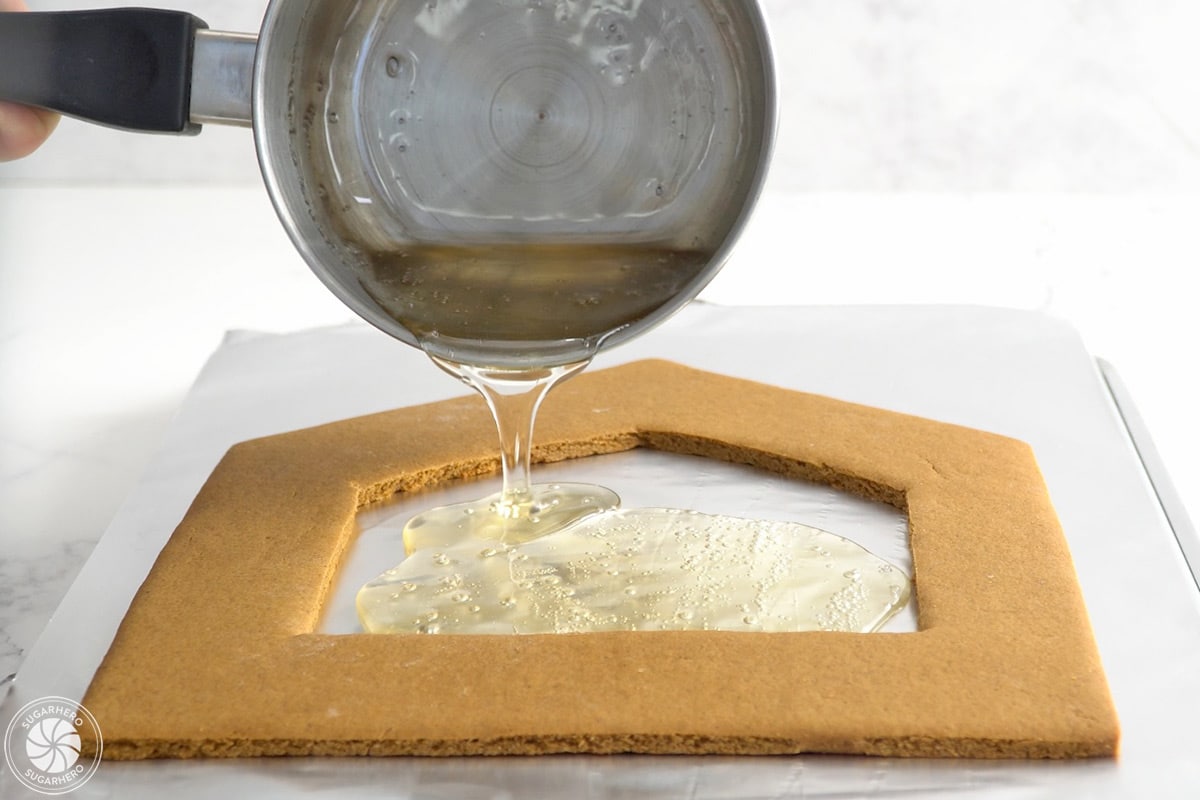
Beyond its visual drama, the true brilliance of edible sugar glass lies in its adaptability. The recipe can be easily customized with a spectrum of food-grade colorings and flavorings, allowing for an endless array of combinations. Whether aiming for the deep jewel tones of stained glass or the subtle pastels of a spring meadow, the possibilities are as boundless as the baker’s imagination. Furthermore, its malleability during the cooling process enables diverse shaping techniques. It can be poured onto a flat surface and fractured into irregular pieces, molded into specific shapes, or carefully poured directly into pre-cut openings in cookies or gingerbread panels to form windows. This inherent adaptability makes it a fundamental tool in the arsenal of any creative dessert artist.
The Science Behind the Sparkle: Crafting Flawless Sugar Glass
Achieving the coveted clear, hard texture of edible sugar glass is surprisingly straightforward with a methodical approach and an understanding of candy-making principles. While often perceived as a complex culinary feat, this recipe is designed to be accessible even to those new to the world of confectionary. Success hinges on precise execution of a few key steps, primarily involving controlled heating and cooling.
The process requires careful attention to ingredient ratios and temperature. Overcooking can lead to crystallization, resulting in an opaque or crumbly texture, while undercooking will yield a sticky, unset product. The use of a candy thermometer is paramount, as it provides the critical temperature readings necessary to guide the sugar syrup to its ideal "hard crack" stage. This stage is characterized by a temperature range typically between 300°F and 310°F (149°C and 154°C). At this temperature, the sugar syrup has evaporated enough water to become a brittle solid upon cooling.
Essential Ingredients for Crystal Clarity
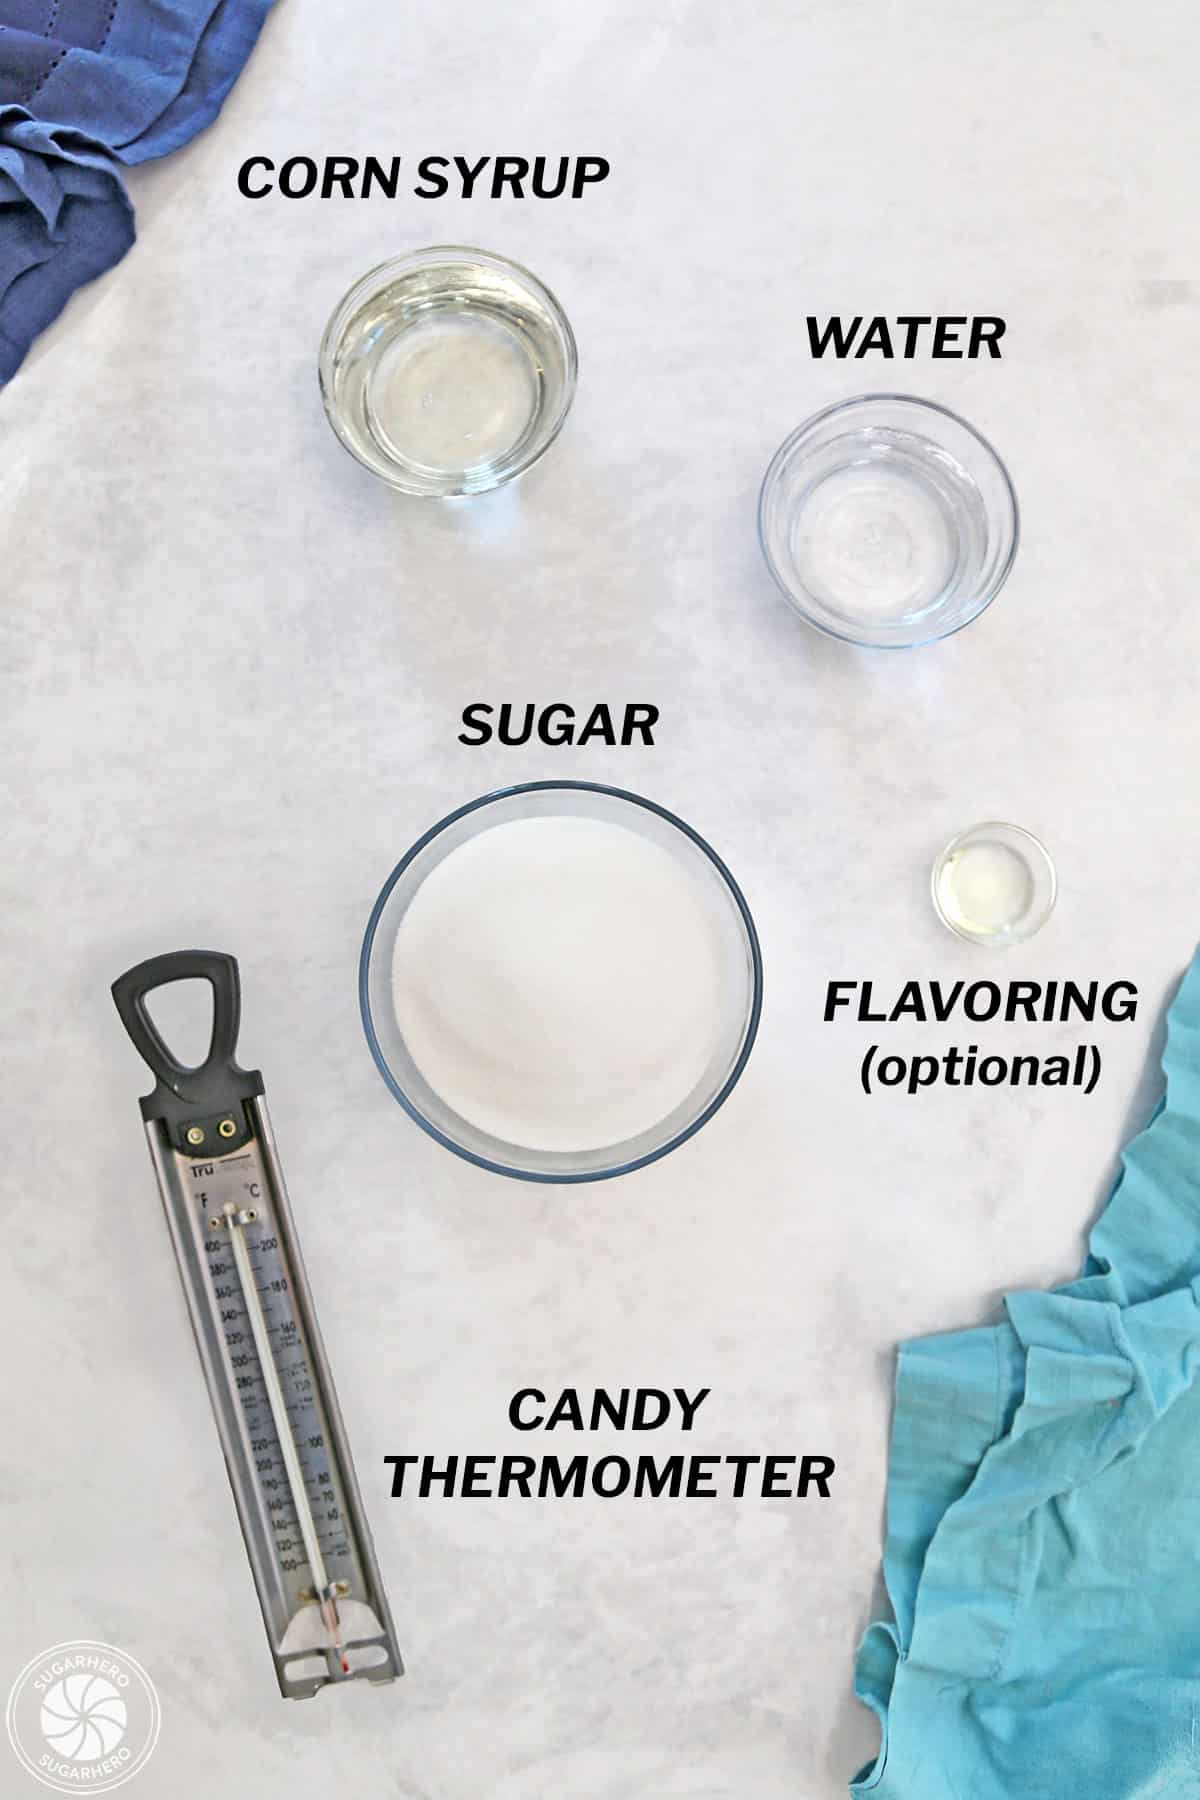
The creation of edible sugar glass relies on a minimal set of fundamental ingredients, each playing a crucial role in achieving the desired texture and appearance.
- Granulated Sugar: The primary component, providing the bulk and structure of the candy. Sourcing a good quality, fine granulated sugar is recommended for smoother dissolution.
- Corn Syrup: This viscous liquid acts as an invert sugar, meaning it prevents the sucrose molecules in the granulated sugar from re-crystallizing into large, visible crystals. This is vital for achieving the clear, glass-like appearance. Light corn syrup is generally preferred for its neutral flavor and color.
- Water: Used to dissolve the sugar and corn syrup, initiating the cooking process.
- Cream of Tartar (Optional but Recommended): A mild acid that further aids in the inversion of sugar, helping to prevent crystallization and contributing to a smoother texture.
- Food Coloring (Optional): Liquid or gel food coloring can be added to impart vibrant hues. Gel colors are often preferred as they are more concentrated and add less liquid to the mixture.
- Flavoring Extracts (Optional): A few drops of flavoring extract, such as vanilla, peppermint, or fruit flavors, can be added to enhance the sensory experience.
Crucial Equipment for Precision
While most of the necessary tools are standard in a well-equipped kitchen, a few specific items are essential for the successful and safe execution of this recipe.
- Heavy-Bottomed Saucepan: A saucepan with a thick, heavy bottom distributes heat evenly, preventing hot spots that can scorch the sugar mixture. A capacity of at least 2-3 quarts is recommended to accommodate the boiling syrup.
- Candy Thermometer: This is arguably the most critical piece of equipment. A reliable candy thermometer, whether digital or analog, is essential for accurately monitoring the syrup’s temperature. It should be calibrated regularly to ensure accuracy.
- Silicone Baking Mat or Parchment Paper: A non-stick silicone baking mat or heavy-duty parchment paper is used to line the baking sheet where the hot sugar will be poured. This prevents sticking and allows for easy removal and breaking of the cooled sugar.
- Heat-Resistant Spatula or Wooden Spoon: Used for initial stirring of the ingredients before the boiling stage. Once the syrup reaches a boil, stirring should be minimized or avoided entirely to prevent crystallization.
- Pastry Brush and Water: A small pastry brush dipped in water is used to wash down the sides of the saucepan during the cooking process. This removes any sugar crystals that may have adhered to the sides, which could initiate crystallization in the main batch.
- Baking Sheet: A sturdy baking sheet to support the silicone mat or parchment paper.
- Heat-Resistant Gloves: Essential for handling hot pans and cooling sugar sheets safely.
Pro Candy Thermometer Tips for Optimal Results
The accuracy of a candy thermometer is non-negotiable when working with sugar at high temperatures. Several factors can influence a thermometer’s reliability:
- Calibration: Before each use, it is advisable to test the accuracy of your candy thermometer. A common method involves placing the thermometer in boiling water (212°F or 100°C at sea level) to ensure it registers the correct temperature. Adjustments can sometimes be made depending on the thermometer type.
- Placement: Ensure the thermometer bulb is fully submerged in the sugar syrup without touching the bottom of the pan, which can provide an inaccurate reading.
- Reading the Temperature: Observe the temperature closely as it rises. Different thermometers may have slightly different reaction times. Avoid relying on the thermometer’s mark for the "hard crack" stage; instead, aim for the precise temperature reading.
- Altitude Adjustments: For those residing at higher altitudes, the boiling point of water is lower. This will affect the final temperature required for hard crack candy. Recipes may need to be adjusted accordingly, or the target temperature lowered.
The Art of the Pour: Step-by-Step Sugar Glass Creation
The process of making edible sugar glass is a meticulous yet rewarding endeavor. Following these steps ensures a beautiful, clear, and brittle confection.
- Preparation is Key: Begin by preparing your workspace. Line a baking sheet with a silicone baking mat or parchment paper. Ensure all your ingredients are measured precisely. If using color or flavor, have them ready to add at the appropriate stage.
- Combine Ingredients: In a heavy-bottomed saucepan, combine the granulated sugar, corn syrup, water, and cream of tartar (if using). Stir these ingredients together over medium heat until the sugar is completely dissolved. It is crucial to ensure all sugar granules are suspended in the liquid before proceeding.
- Boil and Monitor: Once the sugar is dissolved, attach the candy thermometer to the side of the pan, ensuring the bulb is submerged in the syrup but not touching the bottom. Increase the heat to medium-high and bring the mixture to a boil.
- The Critical Stage – Hard Crack: Allow the syrup to boil undisturbed. Resist the urge to stir, as this can introduce sugar crystals and lead to crystallization. As the temperature rises, periodically use a wet pastry brush to wash down any sugar crystals that form on the sides of the saucepan. Continue boiling until the thermometer registers between 300°F and 310°F (149°C and 154°C), the hard crack stage.
- Introduce Color and Flavor (Optional): Once the target temperature is reached, immediately remove the saucepan from the heat. If adding food coloring or flavoring, carefully stir them in now. Work quickly, as the syrup will begin to cool and thicken.
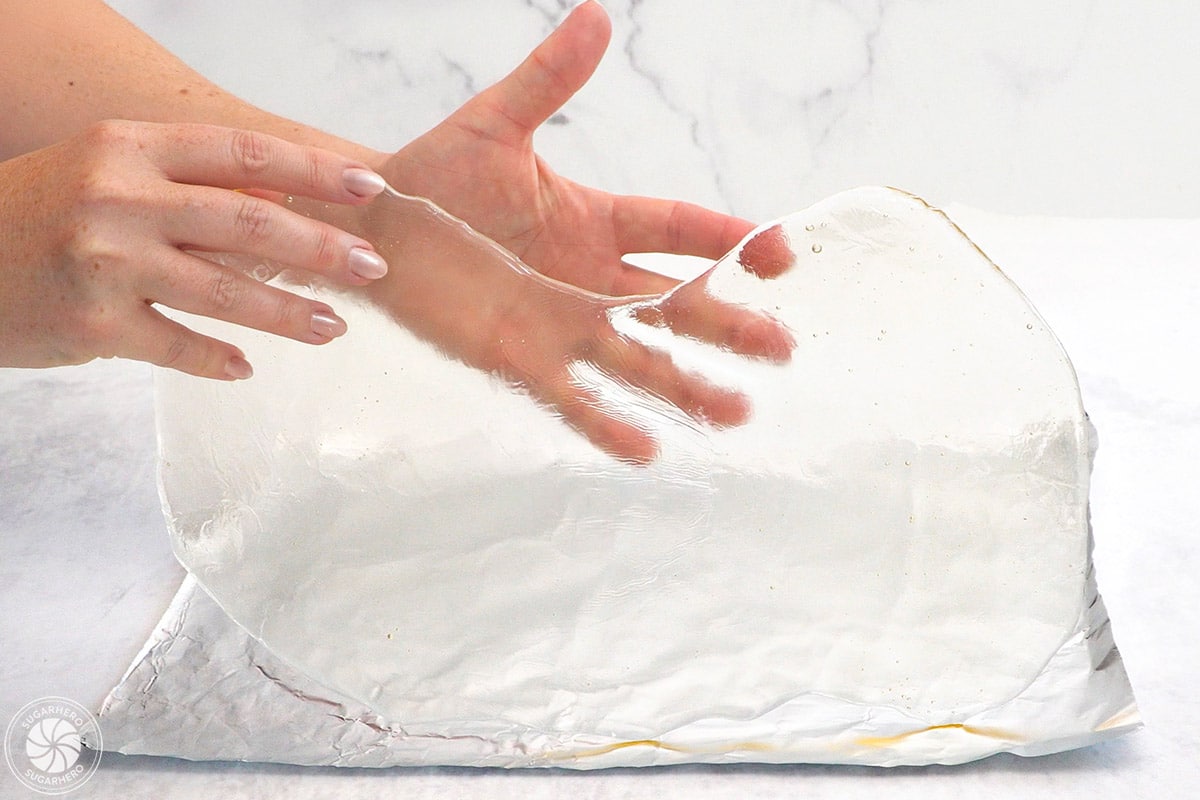
- The Pour: Carefully and slowly pour the hot sugar syrup onto the prepared silicone mat or parchment paper. Spread it as thinly and evenly as possible using a heat-resistant spatula. For creating window panes, pour the syrup into pre-made frames or directly into the cutouts of baked cookies.
- Cooling and Hardening: Allow the sugar glass to cool completely at room temperature, undisturbed. This process can take anywhere from 30 minutes to a couple of hours, depending on the thickness of the pour and ambient temperature. Do not attempt to move or break the sugar until it is completely hard and cool to the touch.
- Breaking and Shaping: Once fully cooled and hardened, the sugar glass can be carefully broken into desired shapes. Gently tap larger sheets with the back of a heavy spoon or a small mallet. For more controlled breaks, use a sharp knife or scoring tool. Wear gloves to protect your hands from sharp edges.
Troubleshooting Common Challenges: FAQs for Sugar Glass Success
Candy making, while rewarding, can present unique challenges. Addressing common issues proactively can significantly improve your chances of success.
Why is my candy sticky?
Stickiness in hardened sugar glass is almost always attributable to humidity. Sugar is hygroscopic, meaning it readily absorbs moisture from the air. High humidity levels can cause the candy to become tacky and eventually dissolve. It is advisable to make sugar glass on dry days. If you live in a humid climate, consider using silica gel packets within your airtight storage containers to absorb excess moisture. Properly stored, sugar glass can remain intact for up to seven days, but this duration is significantly reduced in humid conditions.
Why is my candy not hardening?
If your sugar glass remains soft or does not set properly, it indicates that it has not been cooked to the correct temperature. Ensure your candy thermometer is accurate and that you have reached the hard crack stage (300-310°F or 149-154°C). Re-testing and calibrating your thermometer is crucial if you suspect an inaccuracy. Double-checking your ingredient measurements is also important, as incorrect ratios can affect the final consistency.
Why is my glass candy opaque or crumbly?
An opaque or crumbly texture signifies crystallization. This occurs when sugar crystals form prematurely during the cooking process. The primary culprits include:
- Stirring the syrup after it begins to boil: Once boiling, avoid stirring.
- Failure to wash down the sides of the pan: Sugar crystals on the pan’s interior can initiate crystallization.
- Accidental introduction of stray sugar crystals: Even a tiny crystal on a spatula or thermometer can trigger the process.
The corn syrup in the recipe is designed to inhibit crystallization. Substituting other ingredients for corn syrup may increase the likelihood of this issue. While crystallized sugar glass is still edible, its appearance and texture will differ from the desired translucent, brittle quality.
Storage Information:
Edible sugar glass should be stored at room temperature in a completely airtight container. This is crucial for preventing moisture absorption. Avoid refrigeration or freezing, as the condensation that forms can quickly make the candy sticky and unusable. In very humid environments, incorporating silica gel packets into the storage container can help maintain dryness and extend the candy’s shelf life. Properly stored, it can last for up to a week, but this is contingent on ambient humidity levels.
Conclusion
The creation of edible sugar glass is a testament to the transformative power of simple ingredients guided by precise technique. Its ability to mimic real glass, coupled with its inherent versatility in color and flavor, makes it an invaluable asset for enhancing the visual appeal of any dessert. By understanding the science behind sugar crystallization and employing careful measurement and temperature control, bakers can confidently produce this stunning decorative element, elevating their culinary creations from the ordinary to the truly spectacular. Whether crafting whimsical gingerbread houses or dramatic, show-stopping desserts, edible sugar glass offers a pathway to unparalleled artistry.